In this guide, we will walk you through the settings available in the Sublium plugin for customizing labels and buttons on your product and related pages.
The settings are organized into several sections, each designed to enhance the user experience and ensure a seamless checkout process.
The page settings are divided into the following sections:
- Product Page
- WooCommerce Cart Page
- Sliding Cart
- Checkout Page
Each of these sections allows you to customize labels that appear across various pages in your store.
Product Page
Sublium lets you modify the labels for subscription-related options on the product page. You can adjust these labels to suit your store’s branding and customer needs.
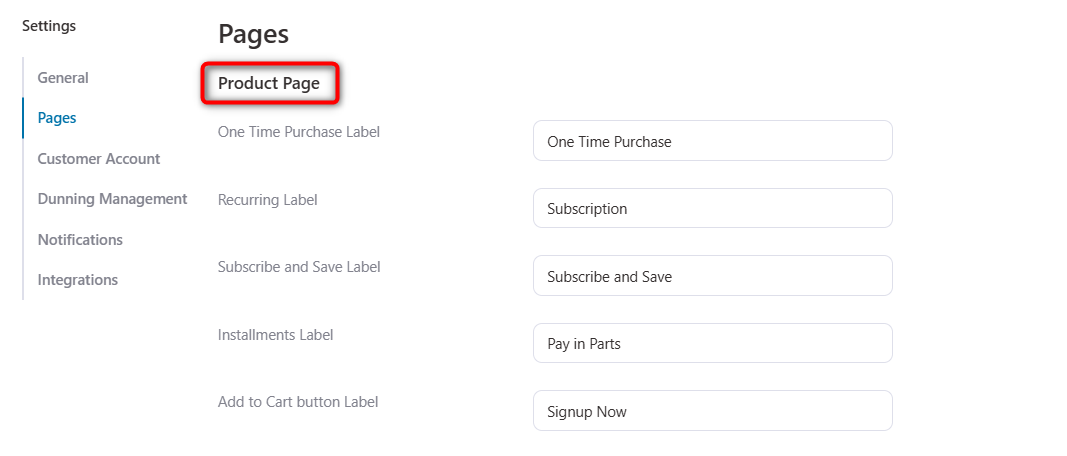
- One-Time Purchase Label: For single-purchase products (e.g., Buy Now or One-Time Payment).
- Recurring Label: For auto-renewing subscription products (e.g., Recurring Plan).
- Subscribe and Save Label: For discounted subscription options (e.g., Subscribe & Save or Save with Subscription).
- Installments Label: For installment-based products (e.g., Pay in Parts).
- Add to Cart button Label: Customize the button text (e.g., Add to Cart or Subscribe Now).
After editing, click Save and refresh the product page to see your updates.
WooCommerce Cart Page
You can enable and customize the Upgrade to Subscription option directly from the cart.

Enable Upgrade to Subscription.
Change the label text (e.g., “Switch to Subscription” or “Upgrade for Savings”).
Sliding Cart
If you’re using FunnelKit Sliding Cart, you can also show an Upgrade to Subscription option here.

Checkout Page
On the checkout page, you can enable and customize the subscription upgrade label.
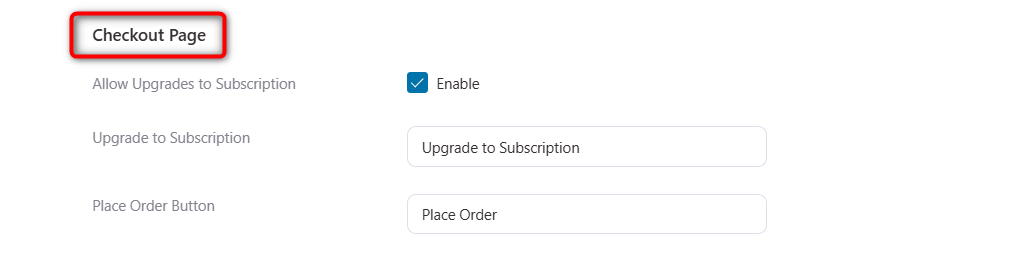
Edit the Place Order Button (e.g., Complete Purchase or Place Subscription Order).
Save your settings and refresh the checkout page to apply the changes.
With Sublium, you can easily tailor labels and buttons across product, cart, and checkout pages, creating a more engaging and branded customer journey.