

Do you offer Apple Pay at your WooCommerce store?
Are you tired of losing potential customers at checkout?
According to the Baymard Institute, 28% of shoppers abandon their carts because the checkout process is lengthy and complex.
Imagine a shopper ready to buy but leaving because entering payment details felt tedious. That’s lost revenue and missed opportunities to grow your business.
Fortunately, integrating Apple Pay with WooCommerce can solve this issue.
Apple Pay offers a secure, one-tap payment solution that simplifies checkout and boosts conversions.
With over 507 million Apple Pay users worldwide, this payment option is popular for its security and convenience. Businesses like Meesho Mall have reported up to a 2.5x faster checkout speed and a 5% increase in sales after enabling Apple Pay.
This blog’ll provide a step-by-step guide for adding Apple Pay to your WooCommerce store.
What is WooCommerce Apple Pay?
WooCommerce Apple Pay is a digital wallet by Apple that allows users to make payments in WooCommerce stores with just a single click.
It offers customers a faster, more secure, and highly convenient checkout experience with Apple devices such as iPhones, iPads, and Macs.
With Apple Pay, shoppers can skip manually entering payment or shipping details since these are already saved in their Apple Pay account.
This feature works with Apple Pay-supported devices and browsers like Safari on macOS or iOS.
Apple Pay simplifies checkout, reduces cart abandonment, and provides secure transactions using device-specific numbers and biometrics like Face ID or Touch ID. It also supports both online and mobile payments.
Adding Apple Pay to your WooCommerce store offers customers a seamless, modern payment option they’ll love.
Ready to learn more? Move to the next section to explore the benefits of Apple Pay.
What are The Benefits of Apple Pay for the WooCommerce Store?
Apple Pay provides your users a seamless shopping experience by ensuring a faster checkout and thus boosting sales.
Here’s a closer look at the benefits of integrating Apple Pay into your WooCommerce store.
- Faster checkout process
Apple Pay’s one-click payment option significantly speeds up checkout. Unlike other methods requiring manual entry of payment information, Apple Pay lets users log in to their Apple account and complete purchases quickly.
- Reduced cart abandonment rate
As mentioned earlier, 28% of U.S. online shoppers abandon their carts due to a long or complicated checkout.
Apple Pay reduces this friction, helping WooCommerce stores lower cart abandonment rates.
- Increased conversions
According to research, by 2027, global consumers will spend $6,007 billion per year using mobile payments like Apple and Google Pay.
So, by enabling Apple Pay, WooCommerce stores can make it easier for mobile shoppers to complete their purchases, boosting conversion rates.
- Enhanced security
With Apple Pay, the security features of your device’s hardware and software work together to secure WooCommerce transactions.
So, when customers pay with Apple Pay, you won’t have to worry about security.
- Improved customer trust
You will likely gain customer trust when you offer a secure payment option like Apple Pay.
This will make your customers more inclined to rely on your brand for their desired products.
- Compatibility with Apple devices
Counterpoint Research shows Apple devices account for 45% of the U.S. smartphone market share.
By enabling Apple Pay, WooCommerce stores can cater to a significant portion of this consumer base.
- Mobile-friendly payment method
In 2024, there will likely be over 187 million active mobile shoppers in the US alone.
Apple Pay optimizes the mobile shopping experience, helping WooCommerce stores tap into this growing market.
- Supports global customers
Apple’s official website states that Apple Pay is available in over 70 countries and supports 40+ currencies.
This global reach allows WooCommerce stores to offer a secure and convenient payment option for international customers.
Does WooCommerce Support Apple Pay?
Yes. WooCommerce supports Apple Pay. However, it is not available by default on your WooCommerce store.
You must integrate a compatible payment gateway, such as Stripe, Square, etc., to enable Apple Pay in your WooCommerce Stores.
Move to the next section to find out different payment gateways you can use to offer Stripe in WooCommerce.
Top Payment Gateways Supporting Apple Pay
Apple Pay is a fast and secure payment method that offers customers a seamless checkout experience.
You must integrate a supported payment gateway to accept Apple Pay on your WooCommerce store.
Below are the top payment gateways that support Apple Pay, along with key details, including supported countries, currencies, and transaction fees.
1. Stripe
Stripe is a global payment processor that offers seamless integration for Apple Pay, allowing businesses to accept payments in multiple currencies across numerous countries.
Along with Apple Pay, it also integrates with Google Pay, all kinds of debit and credit cards, local payments, and BNPL payment methods.

- Supported Countries: 45+ countries, including the U.S., Canada, UK, Australia, Germany, France, Japan, and more.
- Supported Currencies: 135+ currencies, including USD, EUR, GBP, CAD, AUD, etc.
- Transaction Fees: 2.9% + 30¢ per successful transaction (domestic). An additional 1% fee applies to international transactions.
2. Square
Square is an easy-to-use payment platform that enables businesses to accept Apple Pay payments online and in person.
It is available in several countries but offers competitive transaction fees, making it ideal for small and medium-sized businesses.

- Supported Countries: 5 countries: The U.S., Canada, Japan, Australia, and the UK.
- Supported Currencies: 5 currencies: USD, CAD, GBP, JPY, AUD.
- Transaction Fees: 2.6% + 10¢ per transaction for card-present payments; 2.9% + 30¢ for online transactions.
3. PayPal
You can also add Apple Pay to your WooCommerce store using the PayPal payment platform.
Paypal is both a payment gateway and payment method. Along with Apple Pay, you can accept credit cards, debit cards, and other digital wallets.

- Supported Countries: 40+ countries, including the U.S., Canada, UK, Australia, and several European countries.
- Supported Currencies: 130+ currencies, including USD, GBP, EUR, CAD, AUD, JPY, and others.
- Transaction Fees: 2.9% + 30¢ per transaction for U.S. businesses. International transactions incur an additional 1% fee.
4. Authorize.Net
Authorize.Net is a reliable payment gateway that supports Apple Pay for businesses looking for secure and easy transaction processing.
It also offers credit cards, Debit cards, Digital wallets, etc.

- Supported Countries: 24 countries, including the U.S., Canada, the UK, Europe, and others.
- Supported Currencies: 25+ currencies, including USD, GBP, EUR, CAD, AUD, and more.
- Transaction Fees: 2.9% + 30¢ per transaction. Additional fees apply for international payments.
5. WooPayments
WooPayments, a native payment gateway developed by WooCommerce, allows businesses to accept Apple Pay directly through their WooCommerce stores.
It simplifies the payment process and integrates seamlessly with other payment methods.
- Supported Countries: Available in the U.S., Canada, the UK, and several European countries. Expanding to other regions gradually.
- Supported Currencies: USD, EUR, GBP, and several other currencies depending on the country.
- Transaction Fees: 2.9% + 30¢ per transaction for U.S. businesses; international fees may apply depending on the country and currency.
These payment gateways make it easy for WooCommerce store owners to offer Apple Pay as a payment method. Each has unique benefits and pricing structures, so select the one that best fits your business needs.
✅ Expert recommendations:
Experts highly recommend using Stripe to offer Apple Pay, which provides exceptional security and supports various payment options.
With Stripe, you can offer mobile wallets like Apple Pay and Google Pay and accept payments via debit and credit cards.
On top of this, you can also offer local payment options like iDEAL, SEPA, P24, Bancontact, etc.
Stripe offers that if you want to attract new customers with a BNPL payment option like Klarna, Affirm, etc..
Stripe is the top choice for integrating Apple Pay with WooCommerce for the best combination of security and versatility.
Next, move to the next section to find out what you must prepare before integrating Apple with WooCommerce.
What Are The Prerequisites for Apple Pay Integration with WooCommerce?
1. Stripe Account
You will need a Stripe account to process payments through Apple Pay on your WooCommerce store.
Stripe handles all the payment processing and supports Apple Pay integration, making it a crucial part of the setup.
You can create a Stripe account at Stripe.com.
2. SSL Certificate
Apple Pay mandates the use of SSL certificates for secure transactions. SSL encrypts the data exchanged between your site and customers, ensuring that sensitive payment information is kept safe.
You can purchase an SSL certificate from your hosting provider, and many hosting providers also offer them for free.
3. FunnelKit Pay – WooCommerce Plugin for Apple Pay Integration
To integrate Apple Pay with WooCommerce, you’ll need a plugin that connects Stripe with your WooCommerce Store.
Our experts recommend FunnelKit Pay. Over 17000 store owners have already used this plugin to integrate Stripe with WooCommerce.
FunnelKit pay makes integrating Stripe with WooCommerce a breeze because it automatically fetches the live and test keys, so no manual work is needed.
Plus, when it comes to webhooks, it stays one step ahead by instantly syncing webhooks from your Stripe account without requiring manual copy-paste.
Moreover, this WooCommerce Apple Pay plugin ensures a secure two-way authentication with Strong Customer Authentication (SCA). It automatically detects and prevents spam transactions for both web and mobile orders.
Move to the next section to learn how to offer Apple Pay in WooCommerce.
How to Set up WooCommerce Apple Pay in Your Store?
Follow this step-by-step guide to set up Apple Pay in your WooCommerce store.
Step 1: Install and activate FunnelKit Pay
The first step is to install and activate FunnelKit Pay. To do this, navigate to Plugins ⇒ Add a new plugin and search for ‘FunnelKit Pay’.
Install and activate the plugin as shown in the screenshot below:
#image
Step 2: Connect the Stripe account to your WooCommerce store
After installing FunnelKit Pay, click the ‘Start Onboarding Wizard’ button.
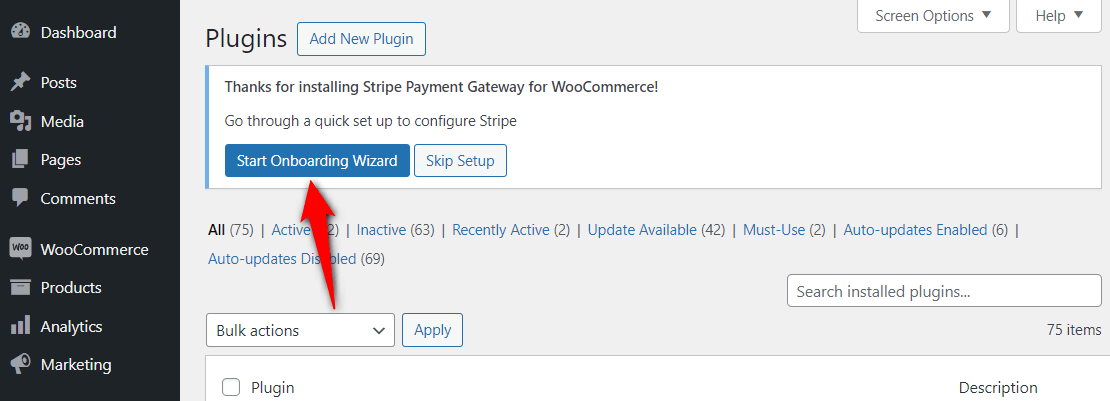
It’ll direct you to the WooCommerce – Stripe connection process.
Here, hit the ‘Connect with Stripe’ button.

Sign in to your Stripe account with your login credentials, email address and password.
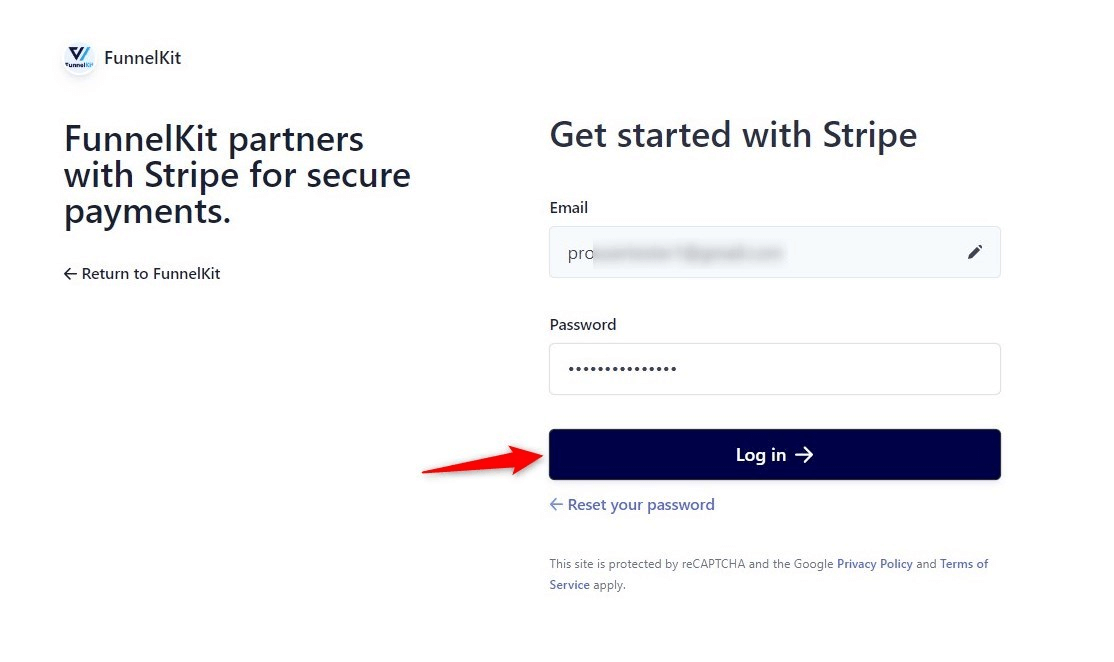
Verify your authorization by entering the 6-digit verification code sent to your registered phone number.
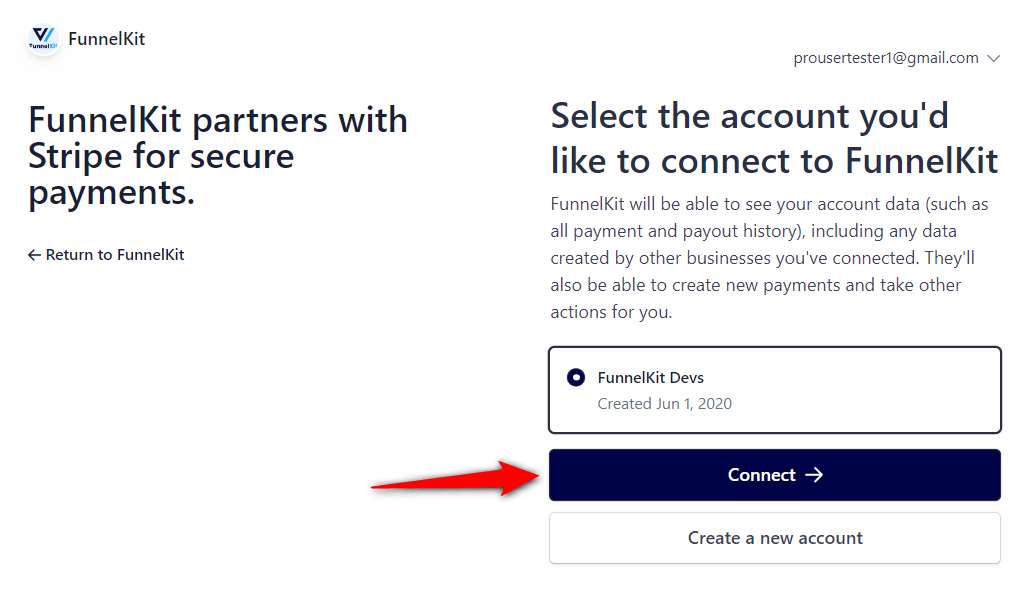
Next, confirm your Stripe account by selecting it and clicking on ‘Connect’.
Now, enable Apple Pay. You can also enable Google Pay, the Credit Card (Stripe), and any of your preferred Buy Now Pay Later payment gateways – Affirm, Klarna, or Afterpay.
Click on the ‘Save and Continue’ button.

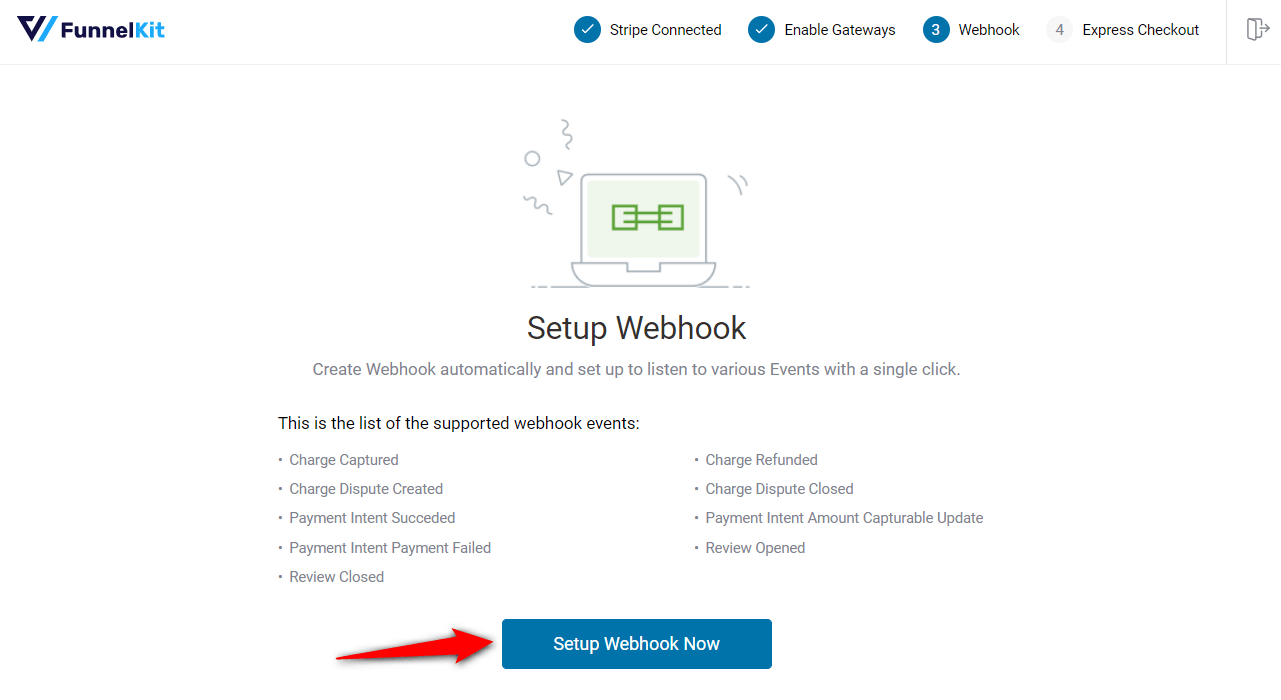
After activating, FunnelKit Pay automatically activates your webhooks to capture various events.
To do so, hit ‘Setup Webhook Now’.
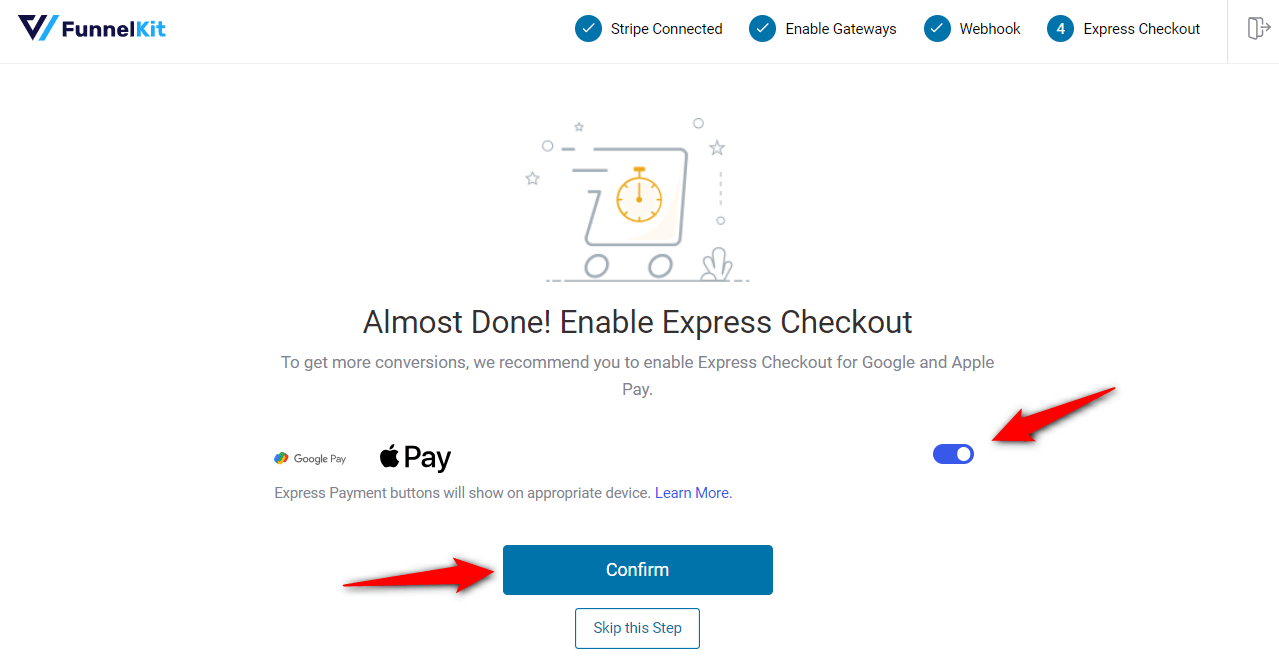
Next, turn the toggle to enable express checkout payments in your WooCommerce store.
Confirm the live or test mode you want to run on your WooCommerce store.
For now, we recommend turning on the ‘Test’ mode and clicking on ‘Save and Review Settings’.
This will successfully connect your Stripe account with your WooCommerce store.
Step 3: Configure the WooCommerce Apple Pay
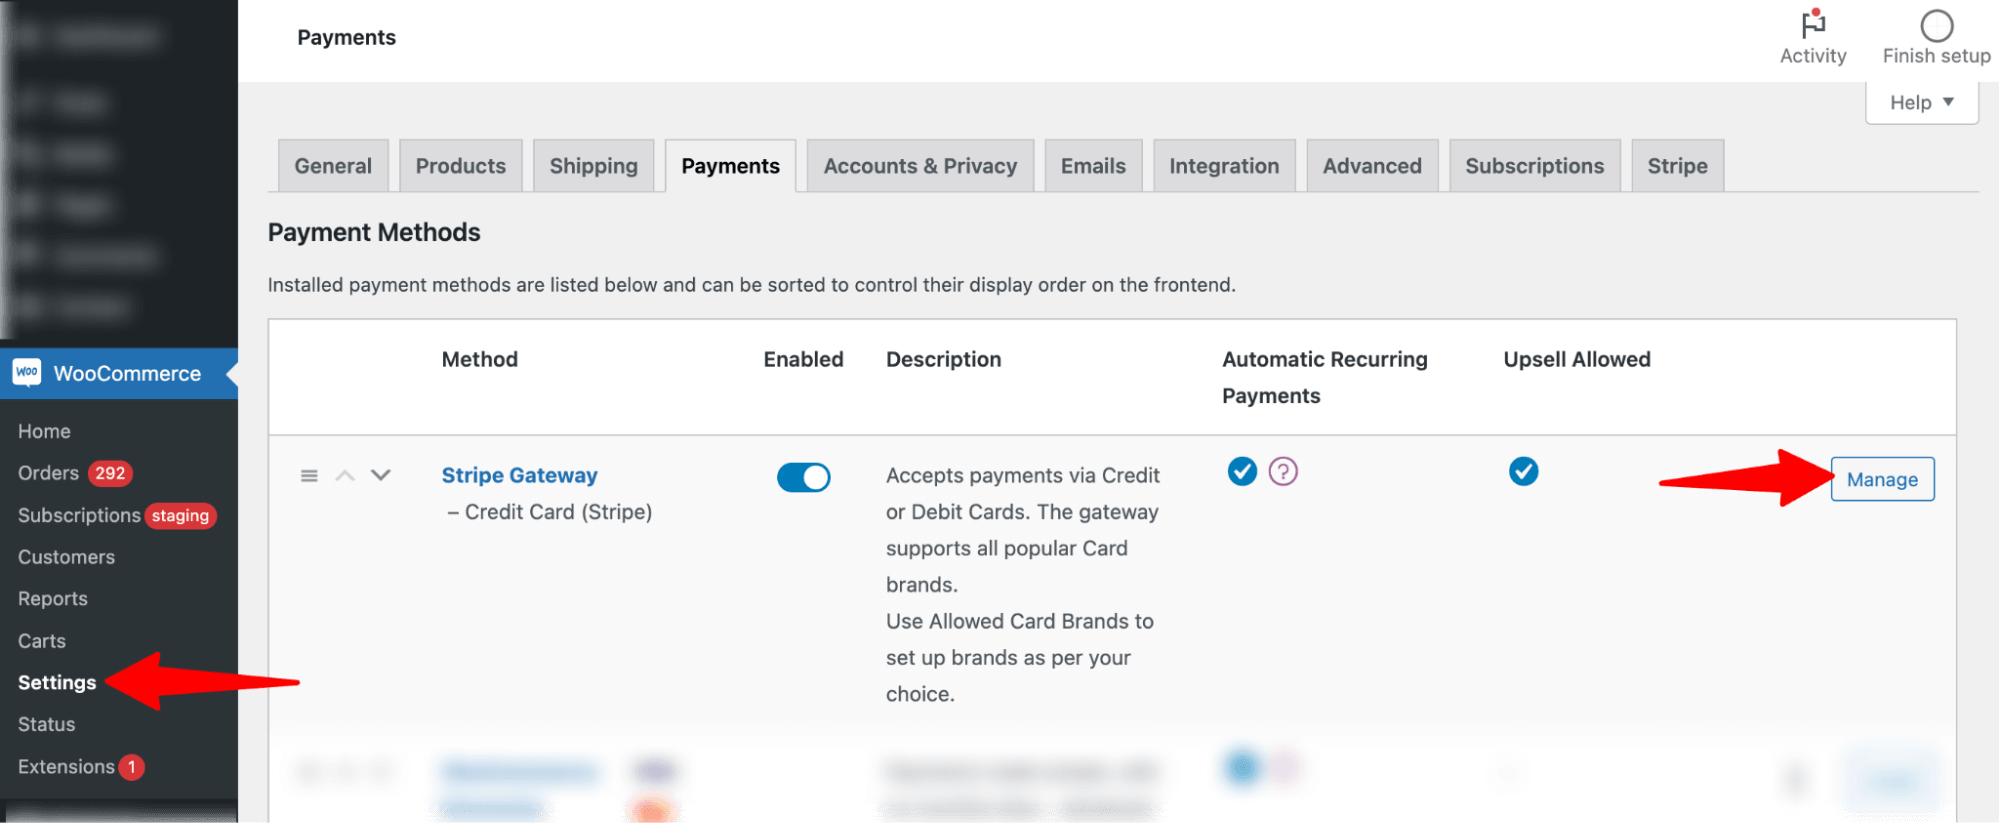
To configure Apple Pay as an express checkout, go to WooCommerce ⇒ Settings ⇒ Payments and hit Manage next to Stripe Gateway.
Next, ensure you are on the Express Checkout tab and the option “Enable Express Checkout” is checked.
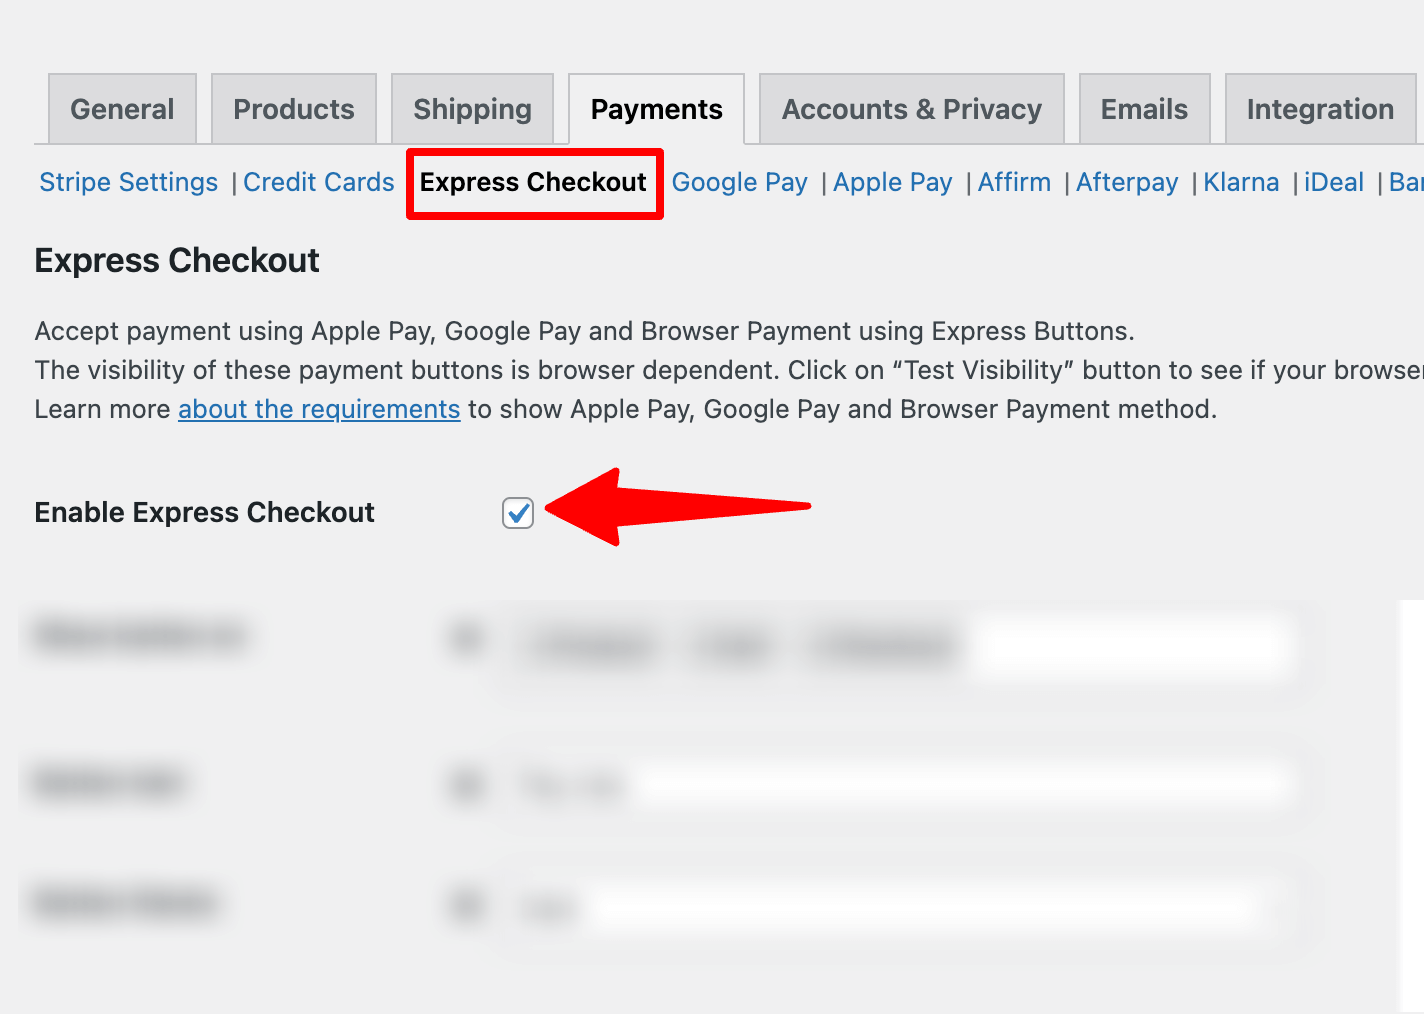
This will make sure Apple Pay express checkout is enabled on your store.
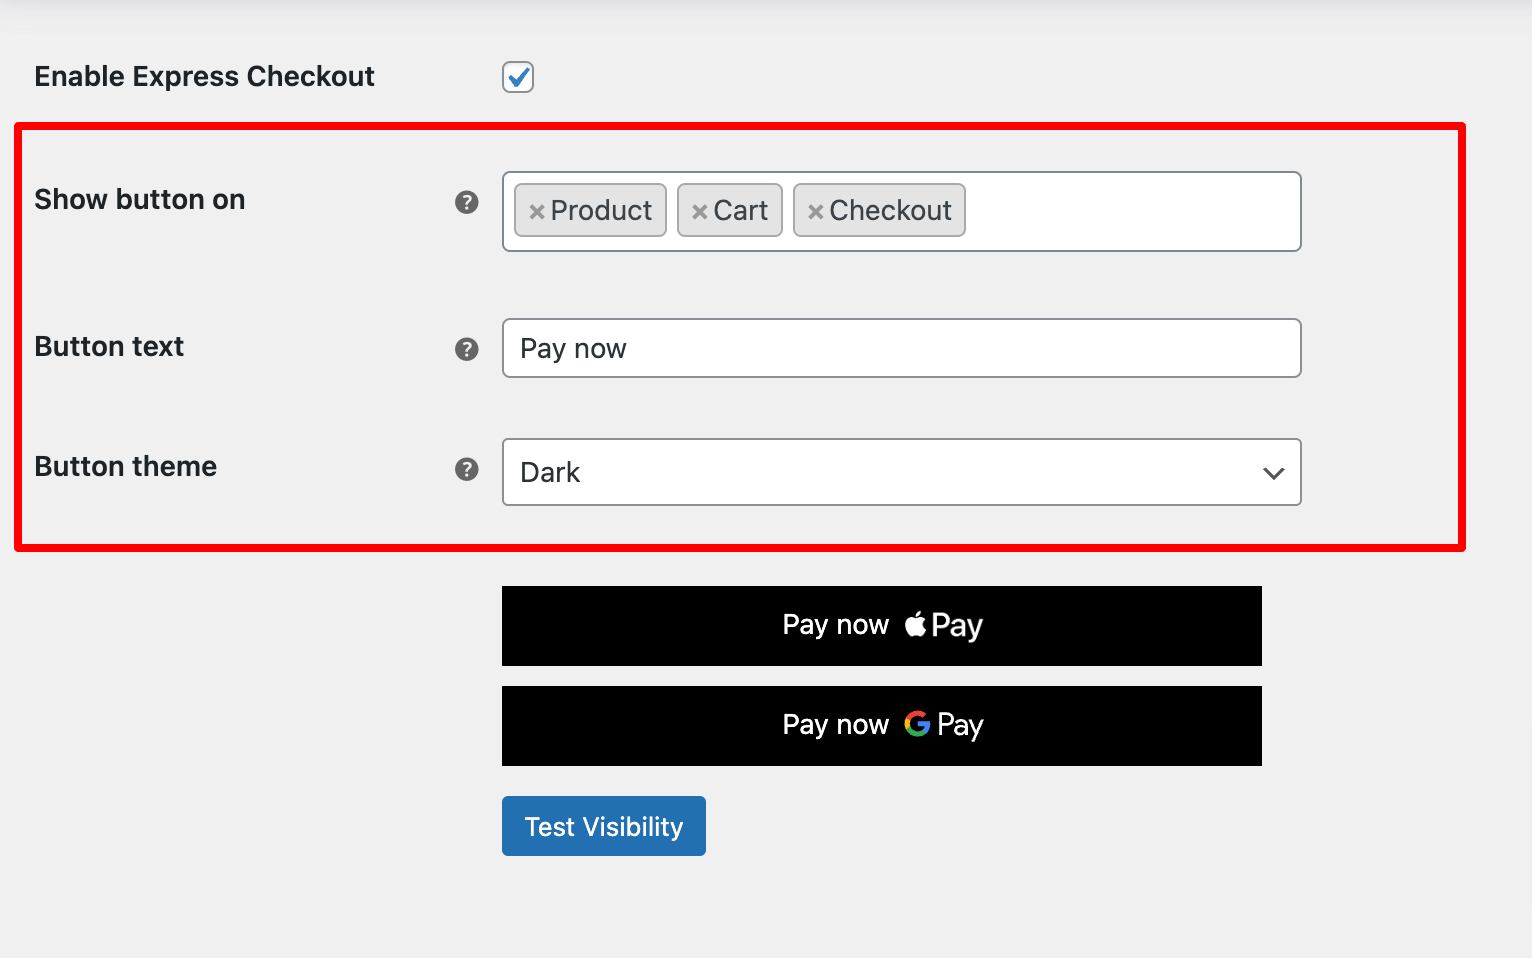
Next, it’s time for configuration. For this set, the following options:
- Show button: You can show the button on the product, cart, and checkout page.
- Button text: Set what the Apple Pay button will say.
- Button theme: Choose a button theme. Options are Dark, light, and light outline.
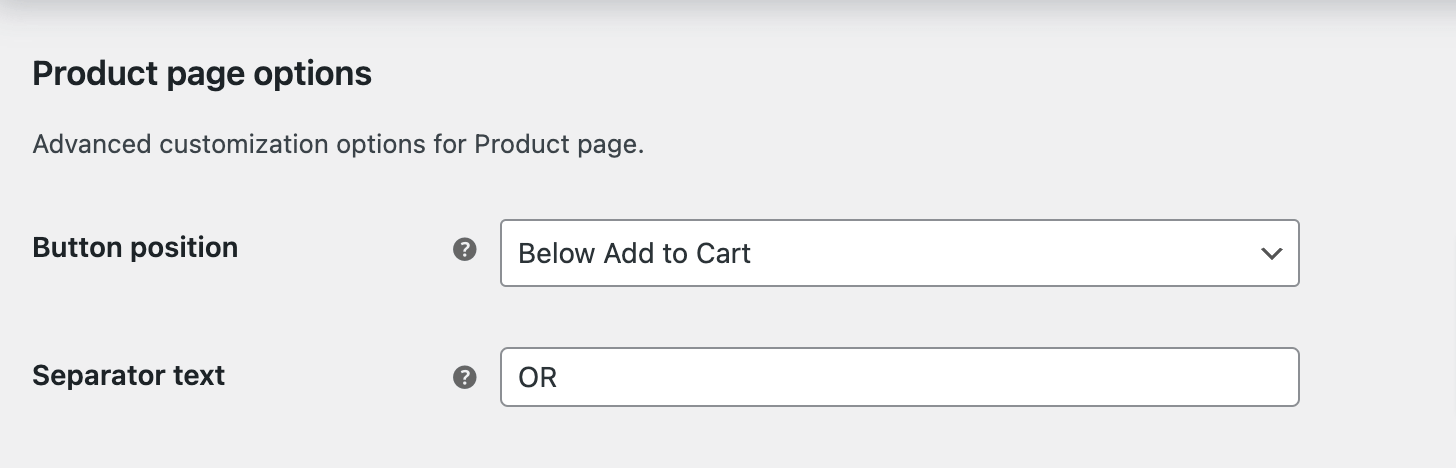
Then, scroll down to customize the settings of each page.
- Product page options
Here, you can set the button position and separator text.
- Cart page options
Here, you can set the Separator text for the cart page.

- Checkout page options
Set the button position, title, width, alignment, and separator text.

Make sure to save the changes.
Step 4: Enable inline Apple Pay (Optional)
Inline Apple Pay is a special feature of FunnelKit Pay. It’s highly useful for WooCommerce store owners who want to provide customers the option to pay with Apple Pay but need them to fill out some important form fields.
With inline Apple Pay, the payment method and other options are presented in the payment gateway section. This ensures that users fill out all the required fields before payment.
Without this feature, if your checkout includes mandatory fields and customers select Apple Pay on top, they may encounter errors that can ruin the shopping experience and, in the worst case, lead to cart abandonment.
To enable inline Apple Pay, move to the Apple Pay tab and check the option “Enable Apple Pay.”

This will enable inline Apple Pay.
You can also set the title and description. Make sure to save the changes.

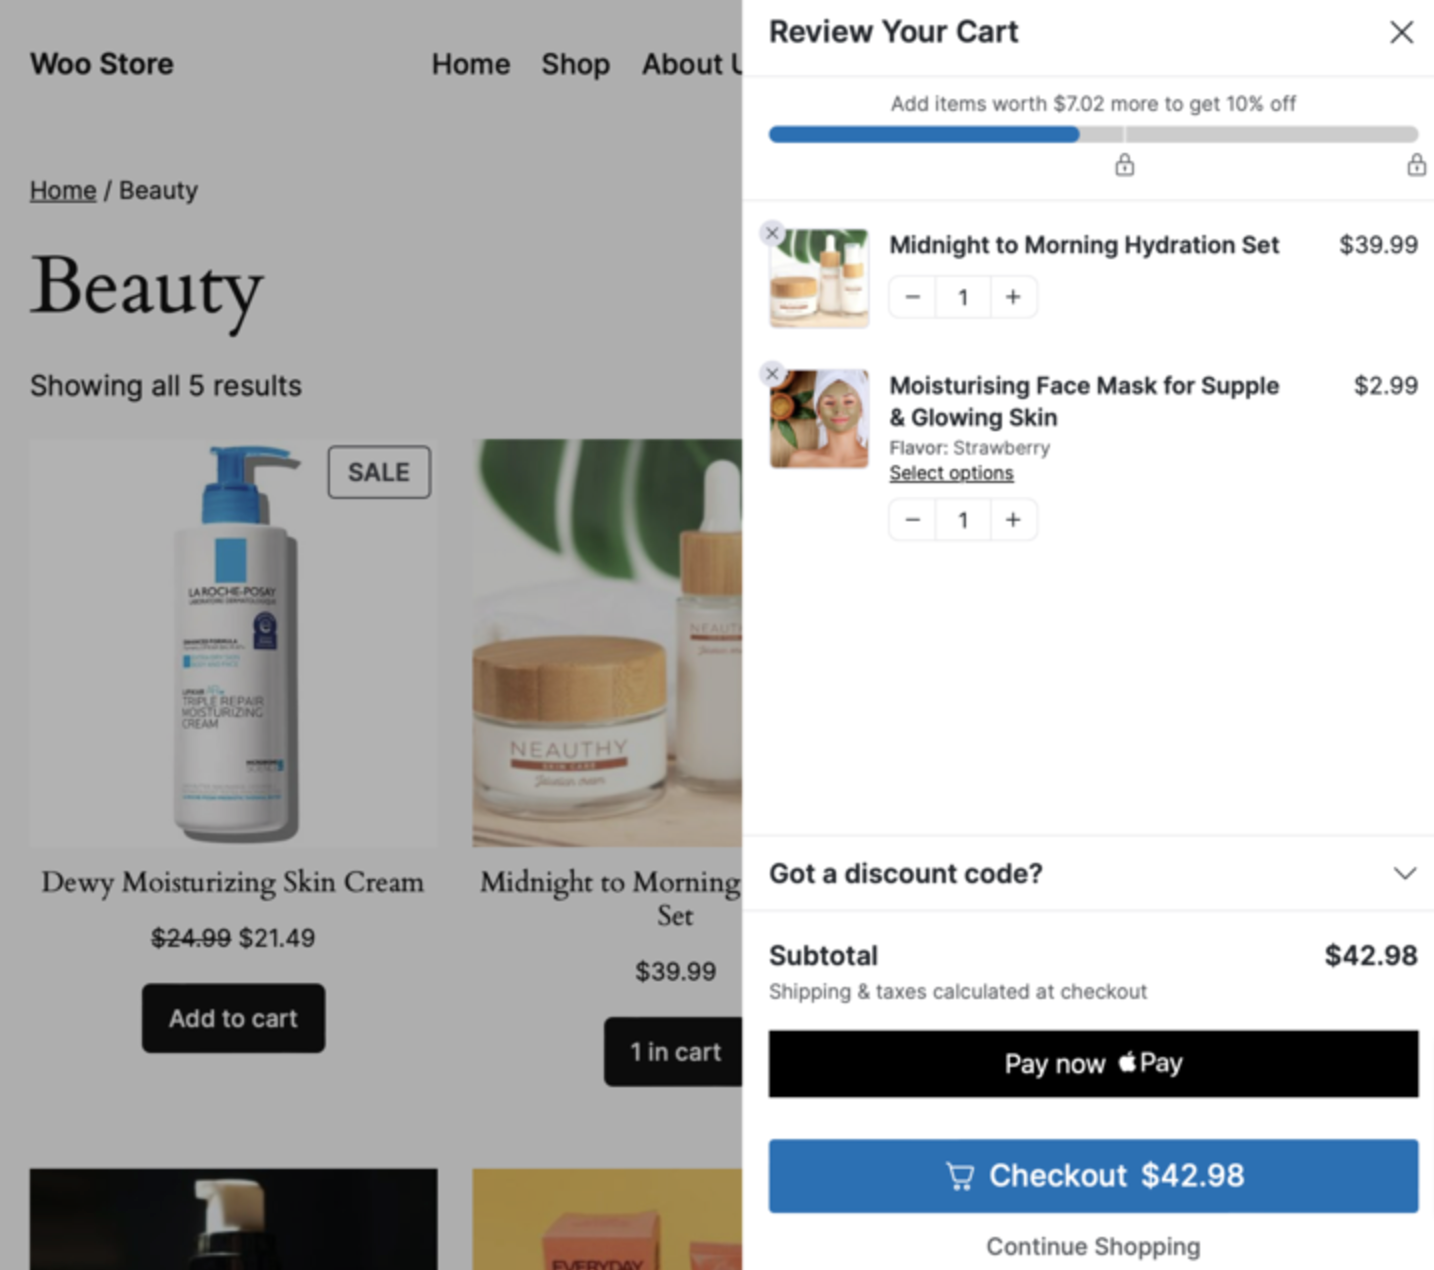
Now that Apple Pay express checkout, both one-click and inline options are set, and it’s time to test.
Witness the FunnelKit Cart’s sliding shopping cart; not only can you allow users to skip the cart page, but you can also boost AOV by offering in-cart product recommendations and milestone-based rewards.
Testing WooCommerce Apple Pay
Before testing the WooCommerce Apple payment option, ensure your Stripe Mode is set to “Test Mode (For Administrators).”
This model is important because it allows you to test the payment method, worrying that real customers can place orders using test data.

Once you have turned on the test mode for admins, you are ready to test Apple Pay.
Add some products to your cart to test the process and proceed to the checkout page. Select Apple Pay as your payment method.
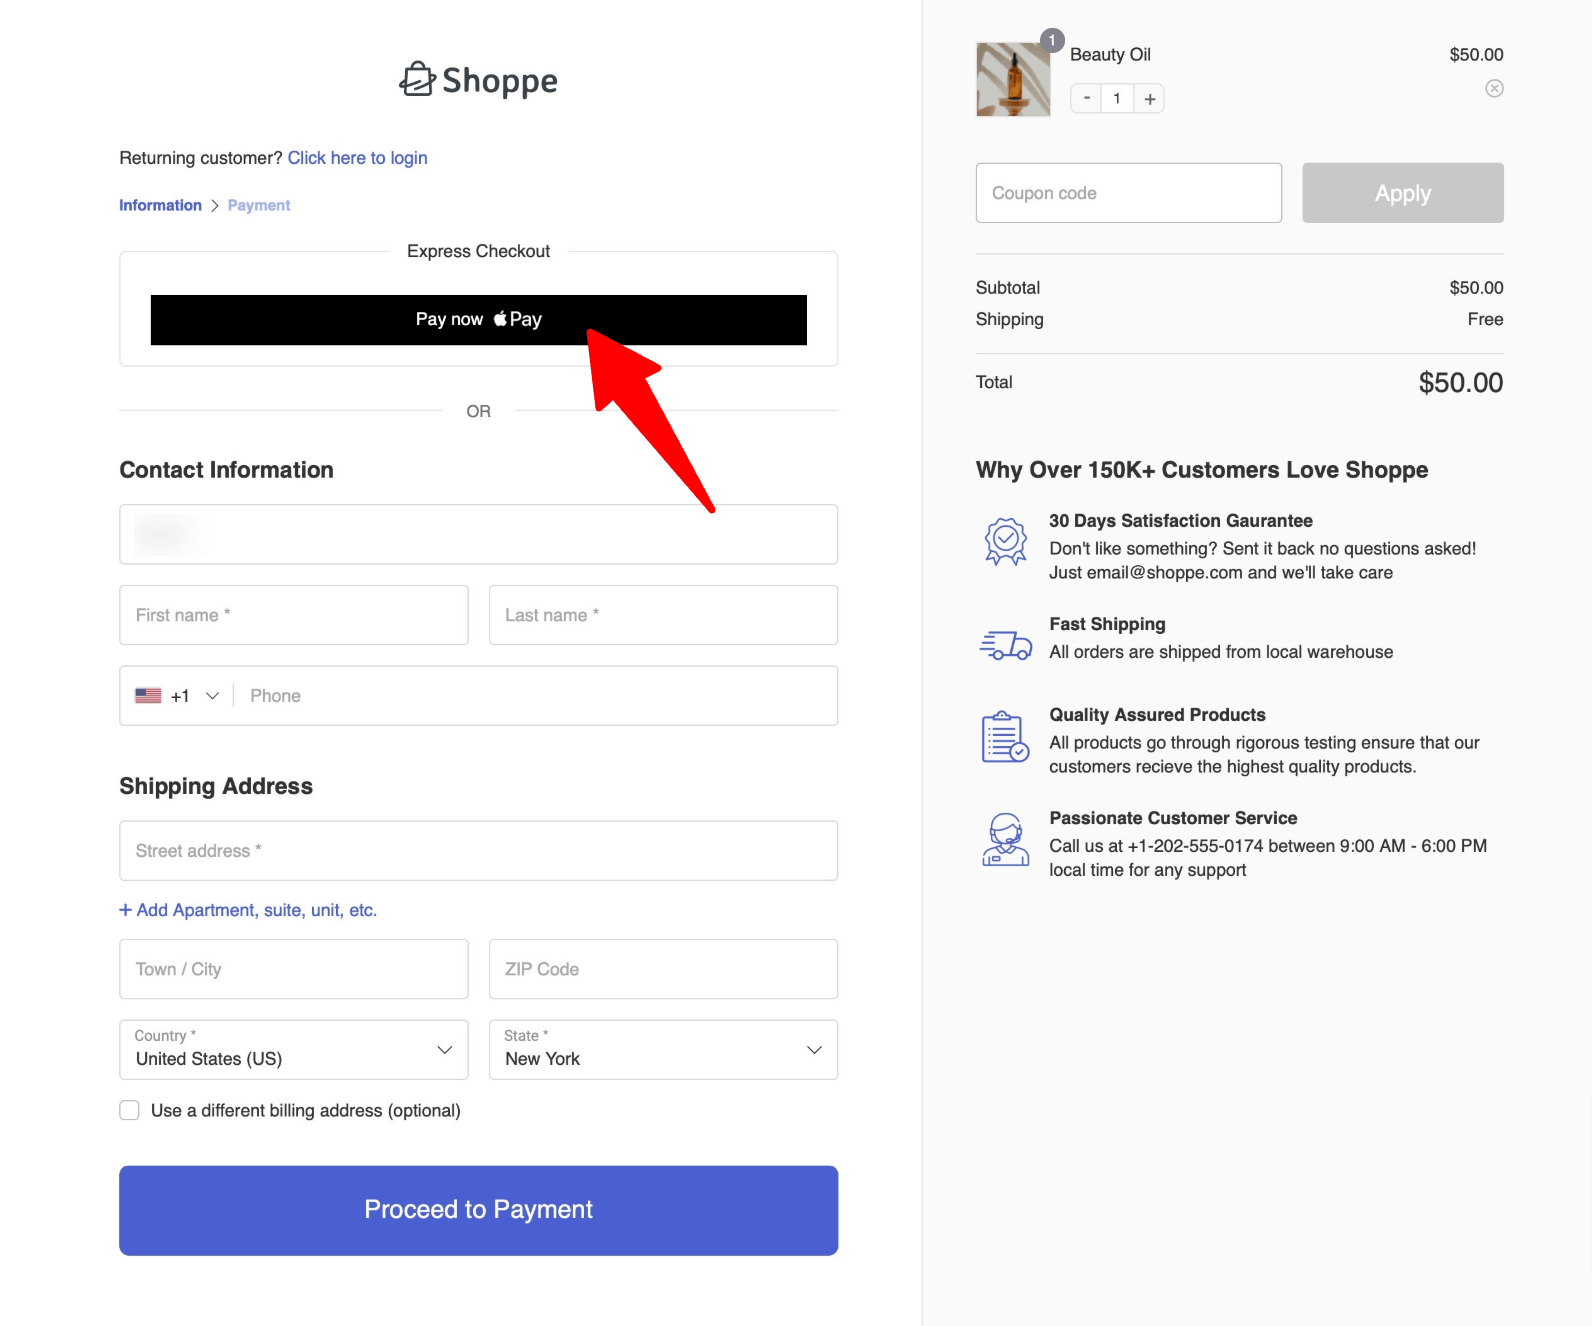
With Apple Pay, customers can complete the payment with a simple touch or face recognition, leveraging the convenience of biometric authentication.
This streamlined process ensures a fast and secure transaction without manually entering card details.
Troubleshooting Common Apple Pay Issues in WooCommerce
Here are some of the common issues you may face with troubleshooting tips:
1. Apple Pay Not Showing at Checkout
If Apple Pay isn’t showing up during checkout, try these steps:
- Enable Apple Pay in your WooCommerce settings.
- Use a compatible device: Apple Pay works with Safari on iPhone, iPad, or Mac.
- Make sure your site is secure with HTTPS.
- Ensure your payment gateway plugin is up-to-date.
2. Compatibility Problems with Themes or Plugins
If your theme or plugins are causing issues:
- Switch to a default theme (like Storefront) to check if the theme is the problem.
- Disable plugins one by one to see if there’s a conflict.
- Contact a developer if you need help fixing theme or plugin issues.
3. Debugging payment errors
To fix payment errors:
- Check payment logs for error details.
- Update your Apple Pay certificates if needed.
- Review your payment gateway settings for any issues.
FAQs About WooCommerce Apple Pay Integration
1. Do all WooCommerce stores support Apple Pay?
No, not all WooCommerce stores support Apple Pay. To use Apple Pay, your store must integrate the appropriate payment gateway (e.g., Stripe) and be set up with SSL for secure transactions.
Your store’s location and device compatibility also affect whether Apple Pay is available. Use FunnelKit Pay to integrate Stripe with WooCommerce and easily offer Apple Pay.
2. How secure is Apple Pay?
Apple Pay is highly secure. It uses tokenization to protect your payment details and Face ID or Touch ID for authentication.
Each transaction requires unique, encrypted information, making it safer than traditional credit card payments.
3. Are there additional costs for using Apple Pay?
There are generally no additional costs for using Apple Pay in WooCommerce itself. However, payment gateway providers like Stripe may charge transaction fees. Strupe changes 2.9% + 30¢ per successful transaction (domestic). International transactions are subject to an additional 1% fee.
Ready to Offer WooCommerce Apple Pay in Your Store?
Offering Apple Pay in your WooCommerce store presents a valuable opportunity to enhance your sales and attract a wider audience.
As Apple Pay grows in popularity, especially among Apple device users, not offering this payment method means missing out on a chance to boost your revenue.
By integrating Apple Pay, you provide your customers with a seamless, secure, and convenient payment option, improving their shopping experience and increasing the likelihood of repeat purchases.
If you’re not offering Apple Pay yet, now’s the time to tap into this growing market and increase your sales!
With FunnelKit Pay, you can seamlessly offer Apple Pay in your WooCommerce store. You can also offer Apple Pay in-line and the Apple Pay express checkout option.
Get FunnelKit Pay today and start offering WooCommerce Apple Pay on your store.