If you’re running Sublium on your website, we highly recommend setting up a proper CRON system to ensure smooth and reliable operation. WP-Cron handles many essential scheduled tasks, and configuring it correctly helps your website run faster and more consistently.
What is CRON and Why Is It Important?
CRON is a scheduling system that automatically runs tasks at specific intervals. In simple terms, it acts like a clock that triggers tasks at set times.
WordPress includes its own simulated CRON system (WP-Cron), but it only runs when someone visits your site. This means:
- Low-traffic sites may miss scheduled tasks
- Heavy caching can block cron execution
- Time-sensitive tasks may be delayed
That’s why setting up a real cron job at the hosting level or using a third-party service is strongly recommended.
Tasks That Depend on WP-Cron
- Subscription renewals
- Dunning retries
- Sending timely emails (payment recovery, renewal notifications, card expiry)
- Exporting data
- Updating subscription analytics daily
How to Disable wp-cron
WordPress uses wp-cron to run scheduled tasks like publishing posts, sending emails, or checking for updates.
However, wp-cron only runs when someone visits your site. This can cause delays on low-traffic sites or performance issues on high-traffic ones. Disabling wp-cron allows you to replace it with a real server-level cron job that runs more reliably.
To disable WP-Cron, edit your wp-config.php file. Add the following line just before the “That’s all, stop editing!” message:
define('DISABLE_WP_CRON', true);Once disabled, you can set up a proper cron job through your hosting control panel or a third-party cron service for more accurate scheduling.
Method 1: Setting Up a Proper Cron Job on Your WordPress Host (Recommended)
The setup process varies by hosting provider. The easiest way is via cPanel, which many shared hosts (including Bluehost) provide.
Here we are showing how to set up a Cron Job in Hostinger.
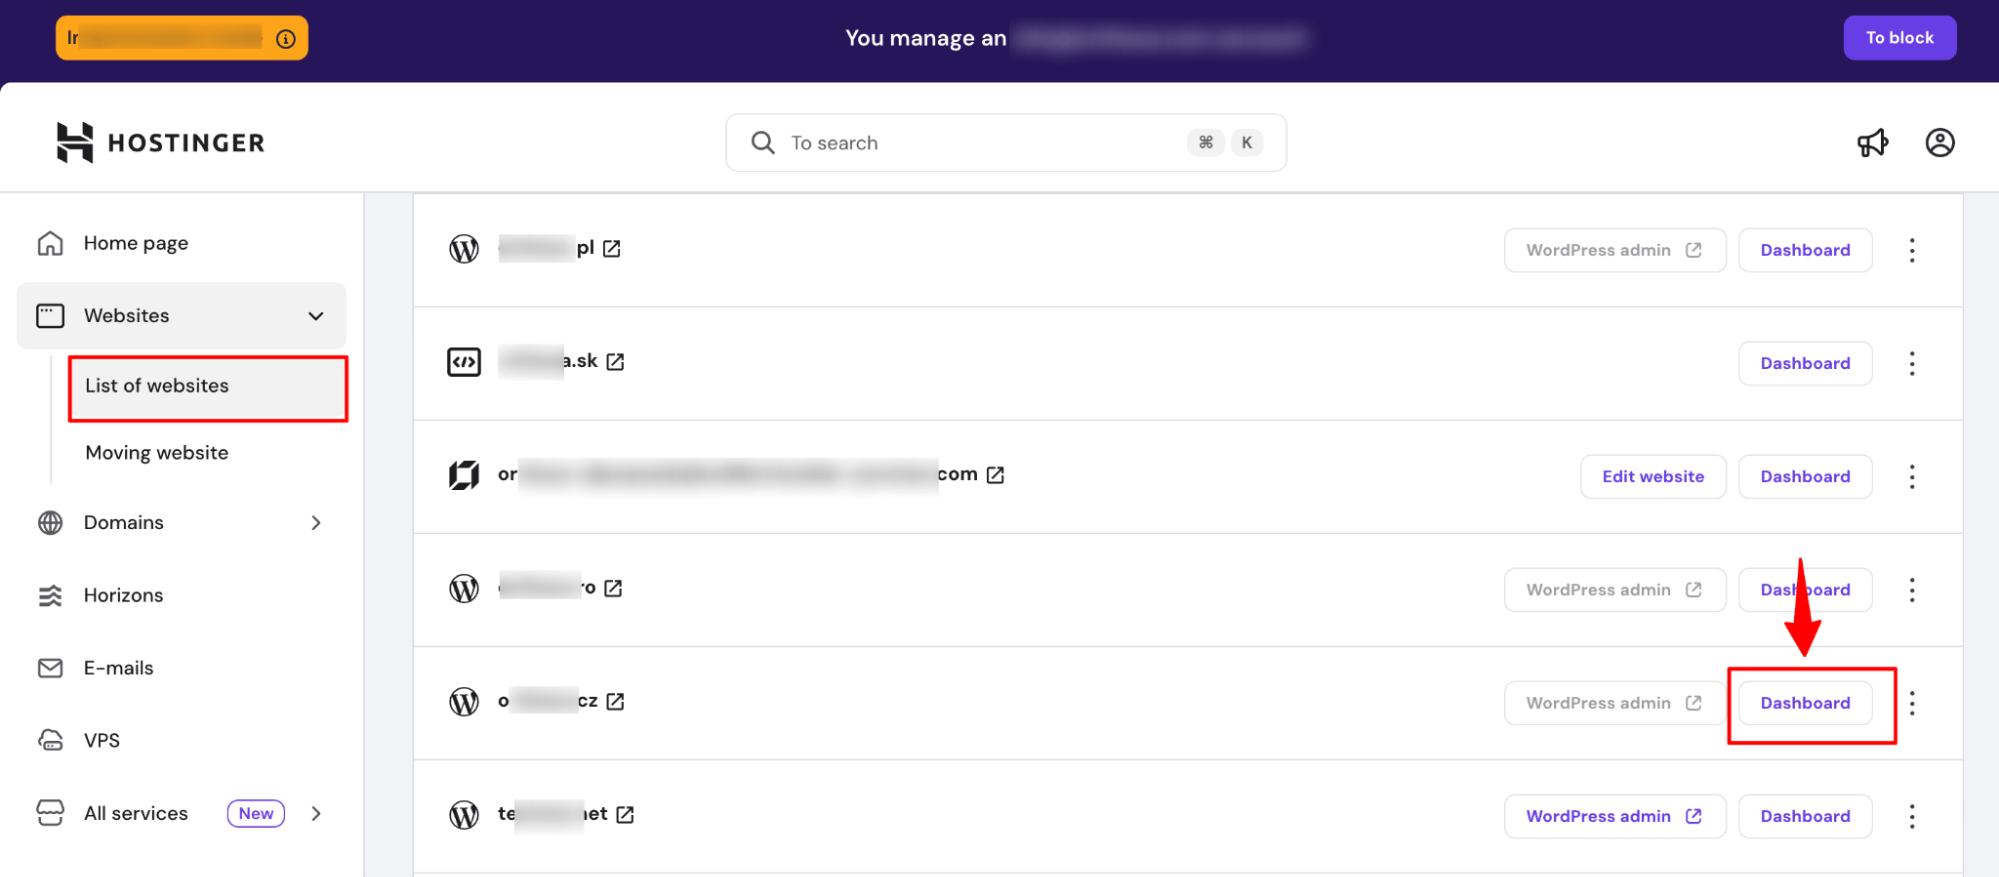
Step 1: Access cPanel Cron Jobs
Log in to Hostinger, then from the Home page, navigate to websites and hit Dashboard on the site for which you want to run a cron job.
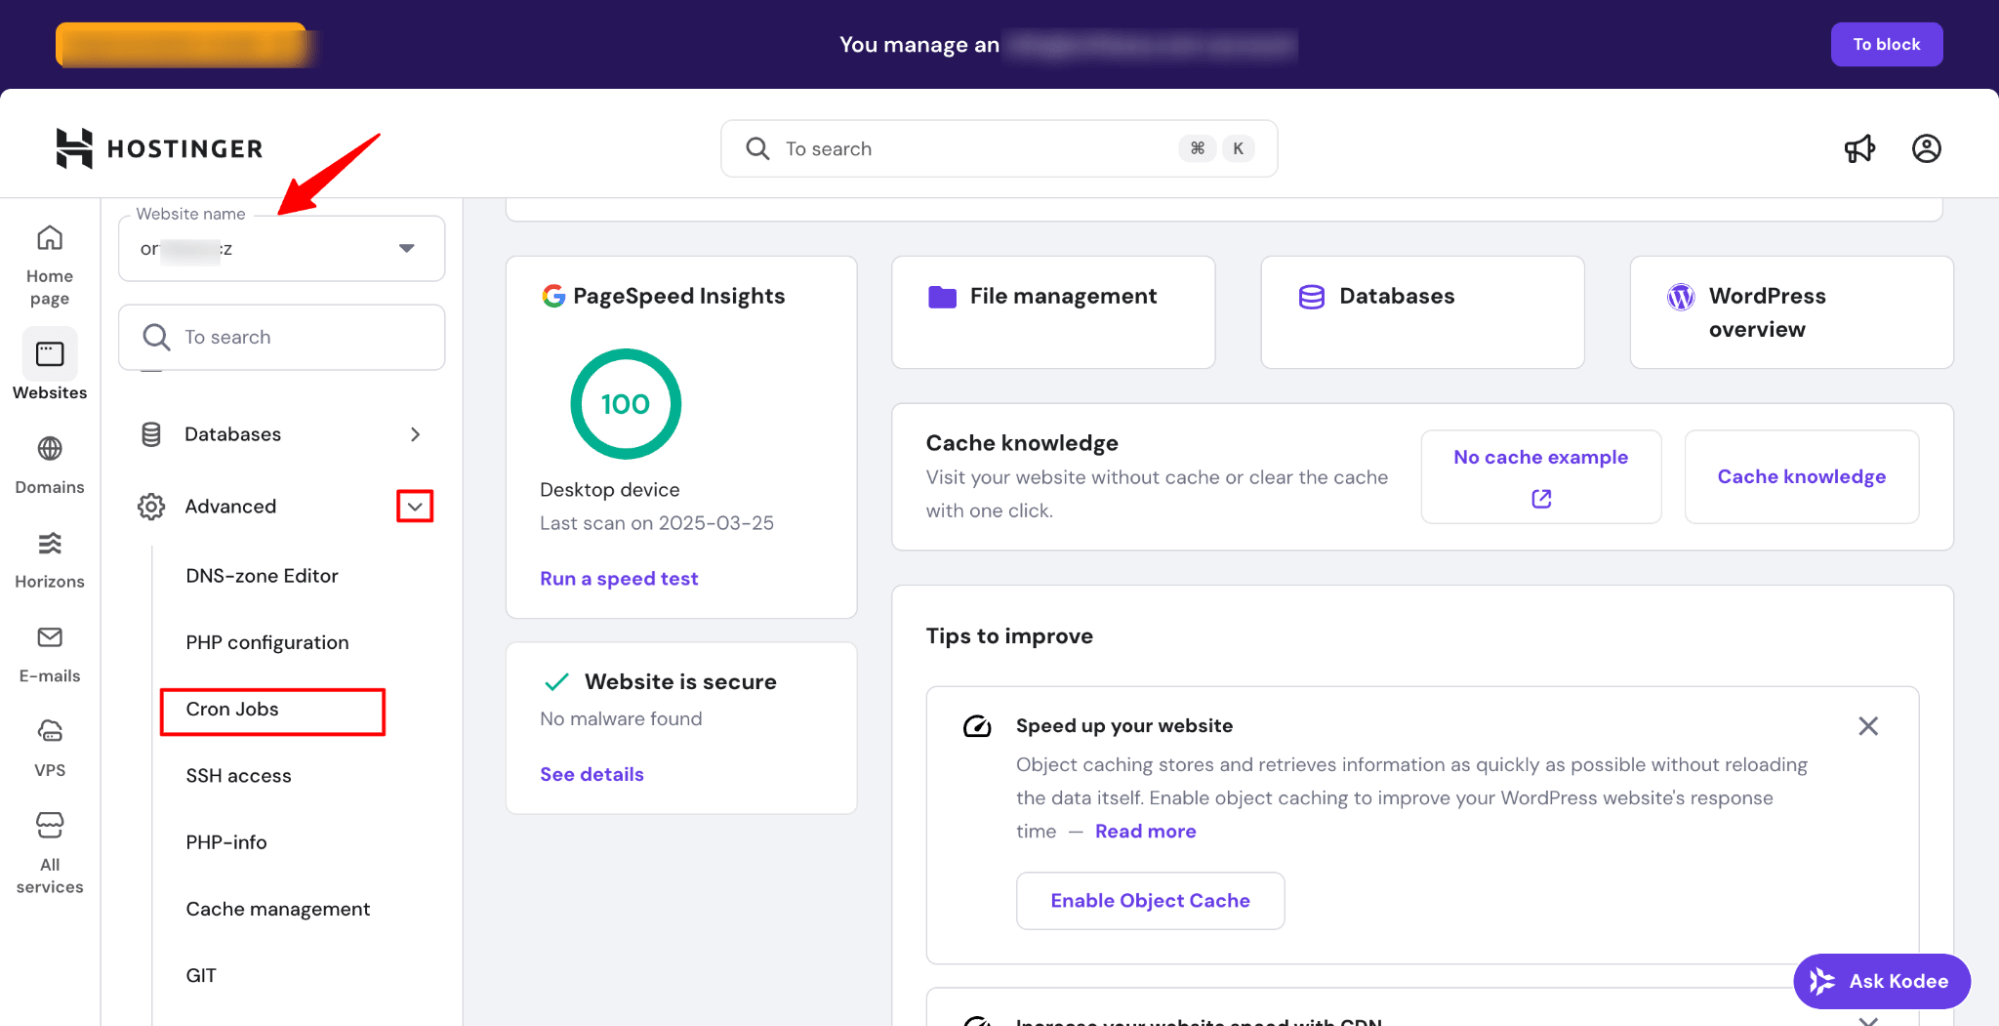
Step 2: Add a New Cron Job
Next, scroll down to the Advanced option, expand it, and choose Cron Jobs.
Choose the PHP option, enter your cron file path (e.g., public_html/cron.php).
To run a PHP cron job every 15 minutes in Hostinger:
- Minute: Every 15 minutes (*/15)
- Hour / O’clock: Every hour (*)
- Day / Day: Every day (*)
- Month / Month: Every month (*)
- Weekday / Weekday: Every weekday (*)
Finally, click Save to activate the cron job.
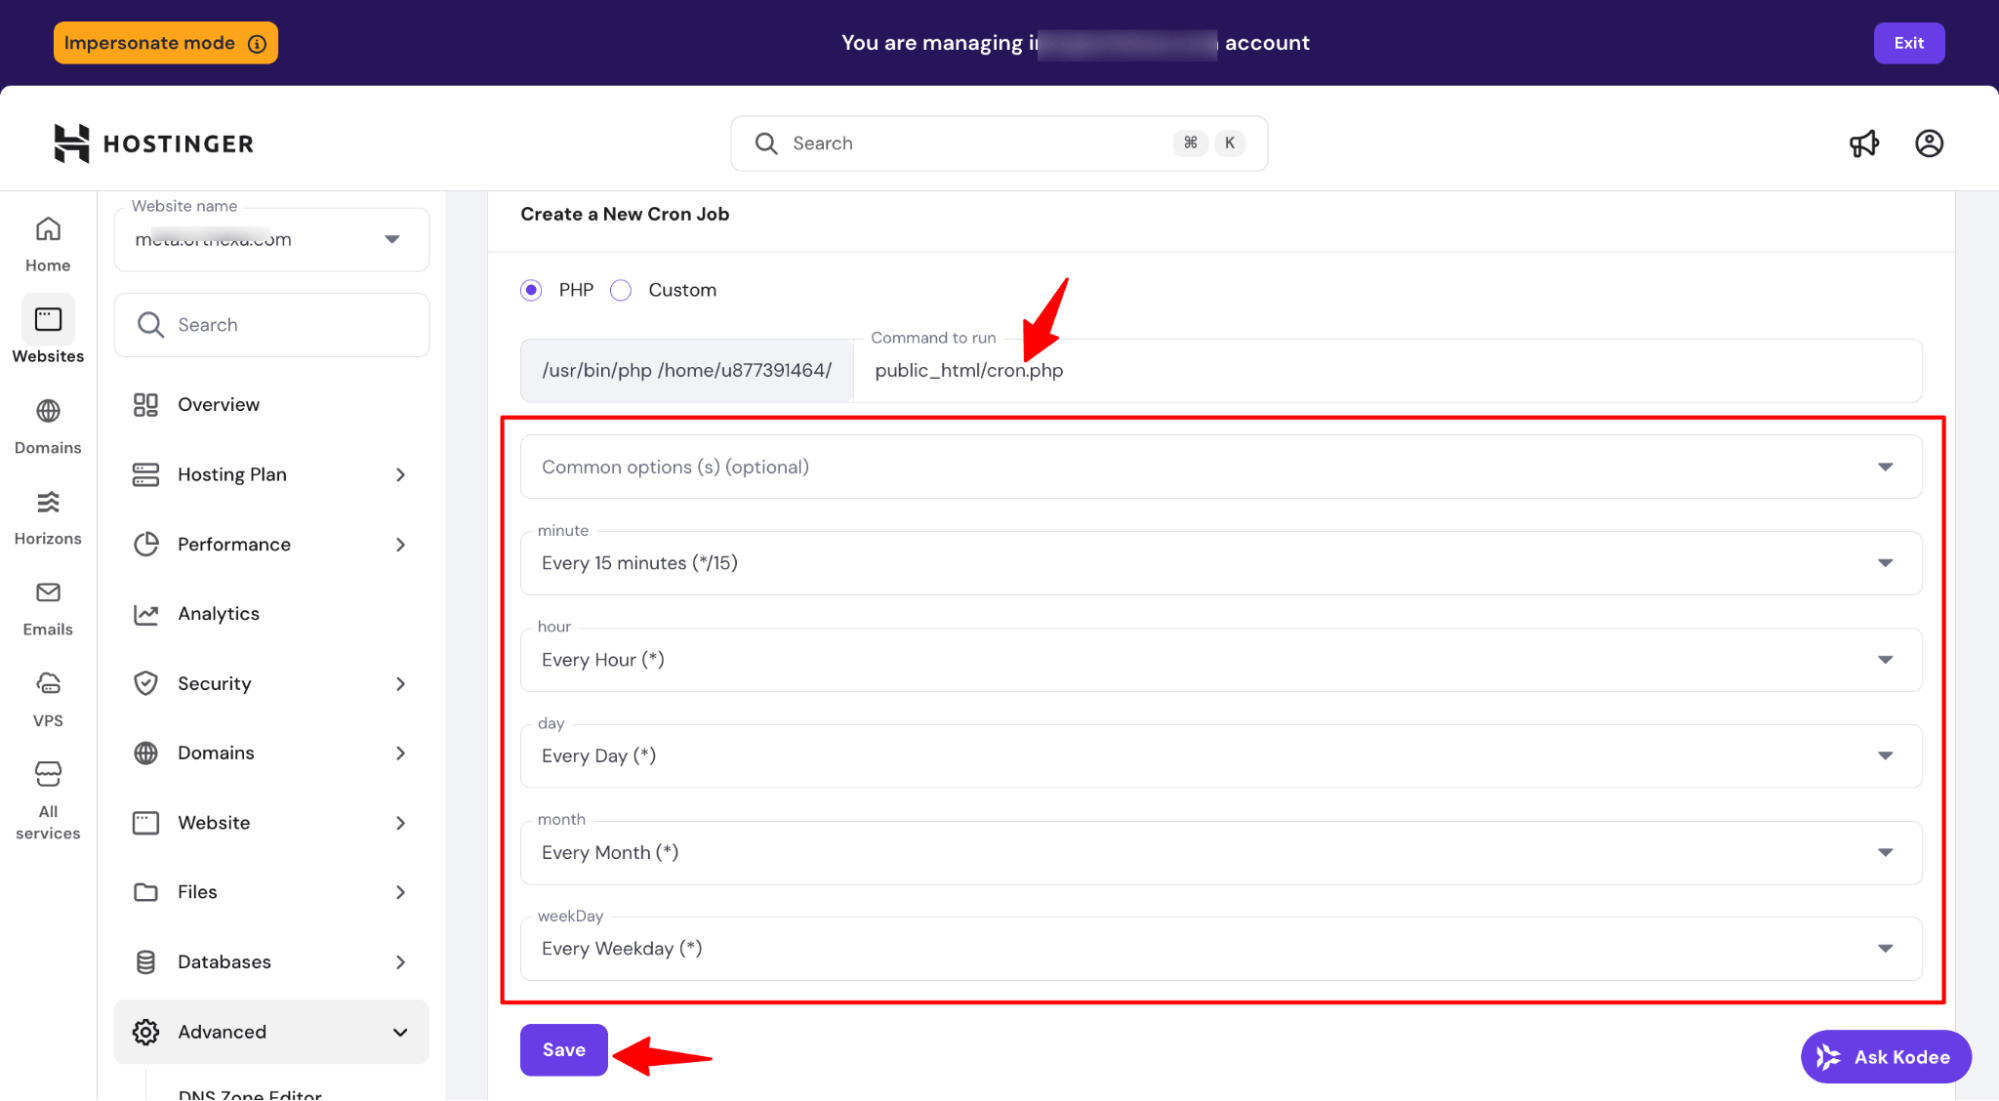
Once saved, your PHP script will run automatically every 15 minutes, ensuring scheduled tasks execute reliably without manual intervention.
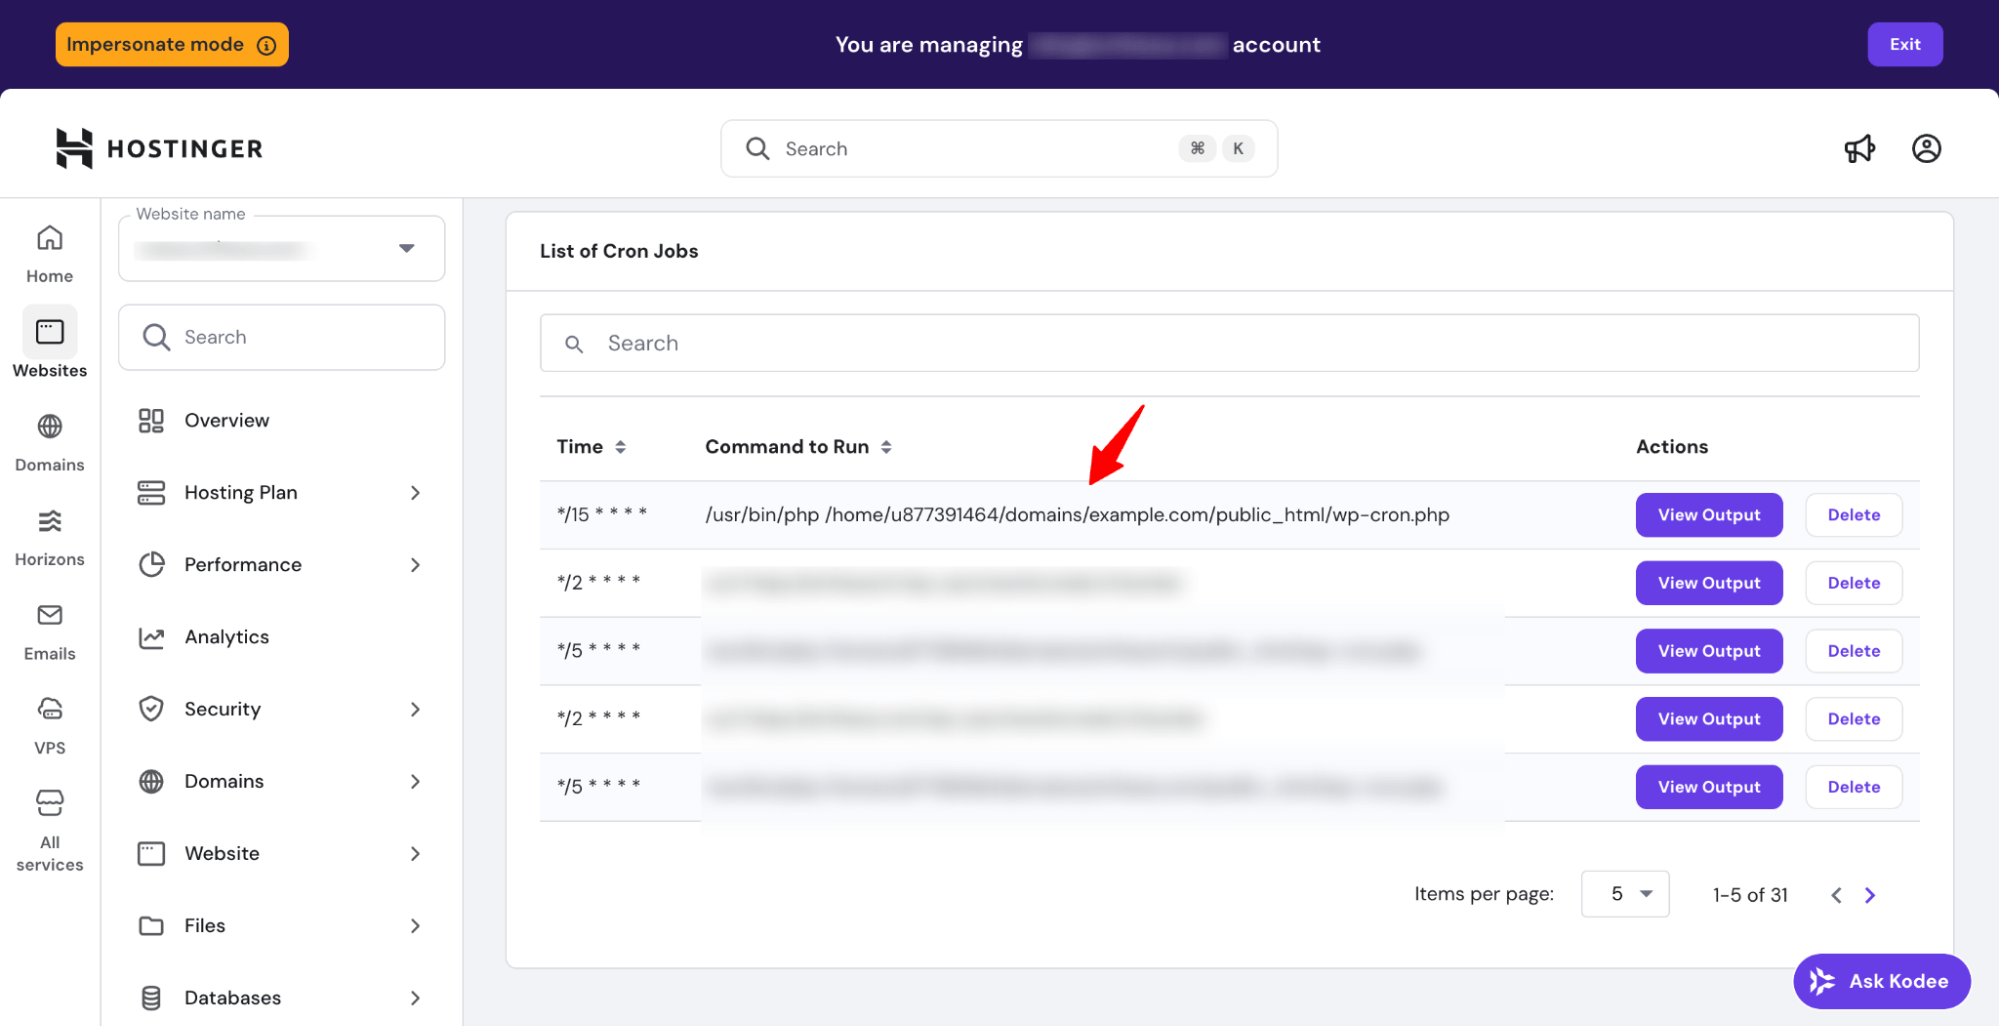
You will find the command on the Cron job list.
Method 2: Setting Up a Cron Job Using a Third-Party Service
If your host:
- Doesn’t offer cron jobs
- Doesn’t use cPanel
- Restricts WP-Cron
- Is difficult to configure
…you can use an external cron provider.
Popular Third-Party Cron Providers:
- EasyCron – free plan (requires monthly renewal)
- Cron-job.org – completely free
- Cronitor – free for one cron job
- FastCron – Reliable cron jobs service
For this example, we’ll use EasyCron.
Here are the steps you need to follow:
Step 1: Create a Cron Job in EasyCron
Sign up at EasyCron.com. Then, click + Cron Job on the left.
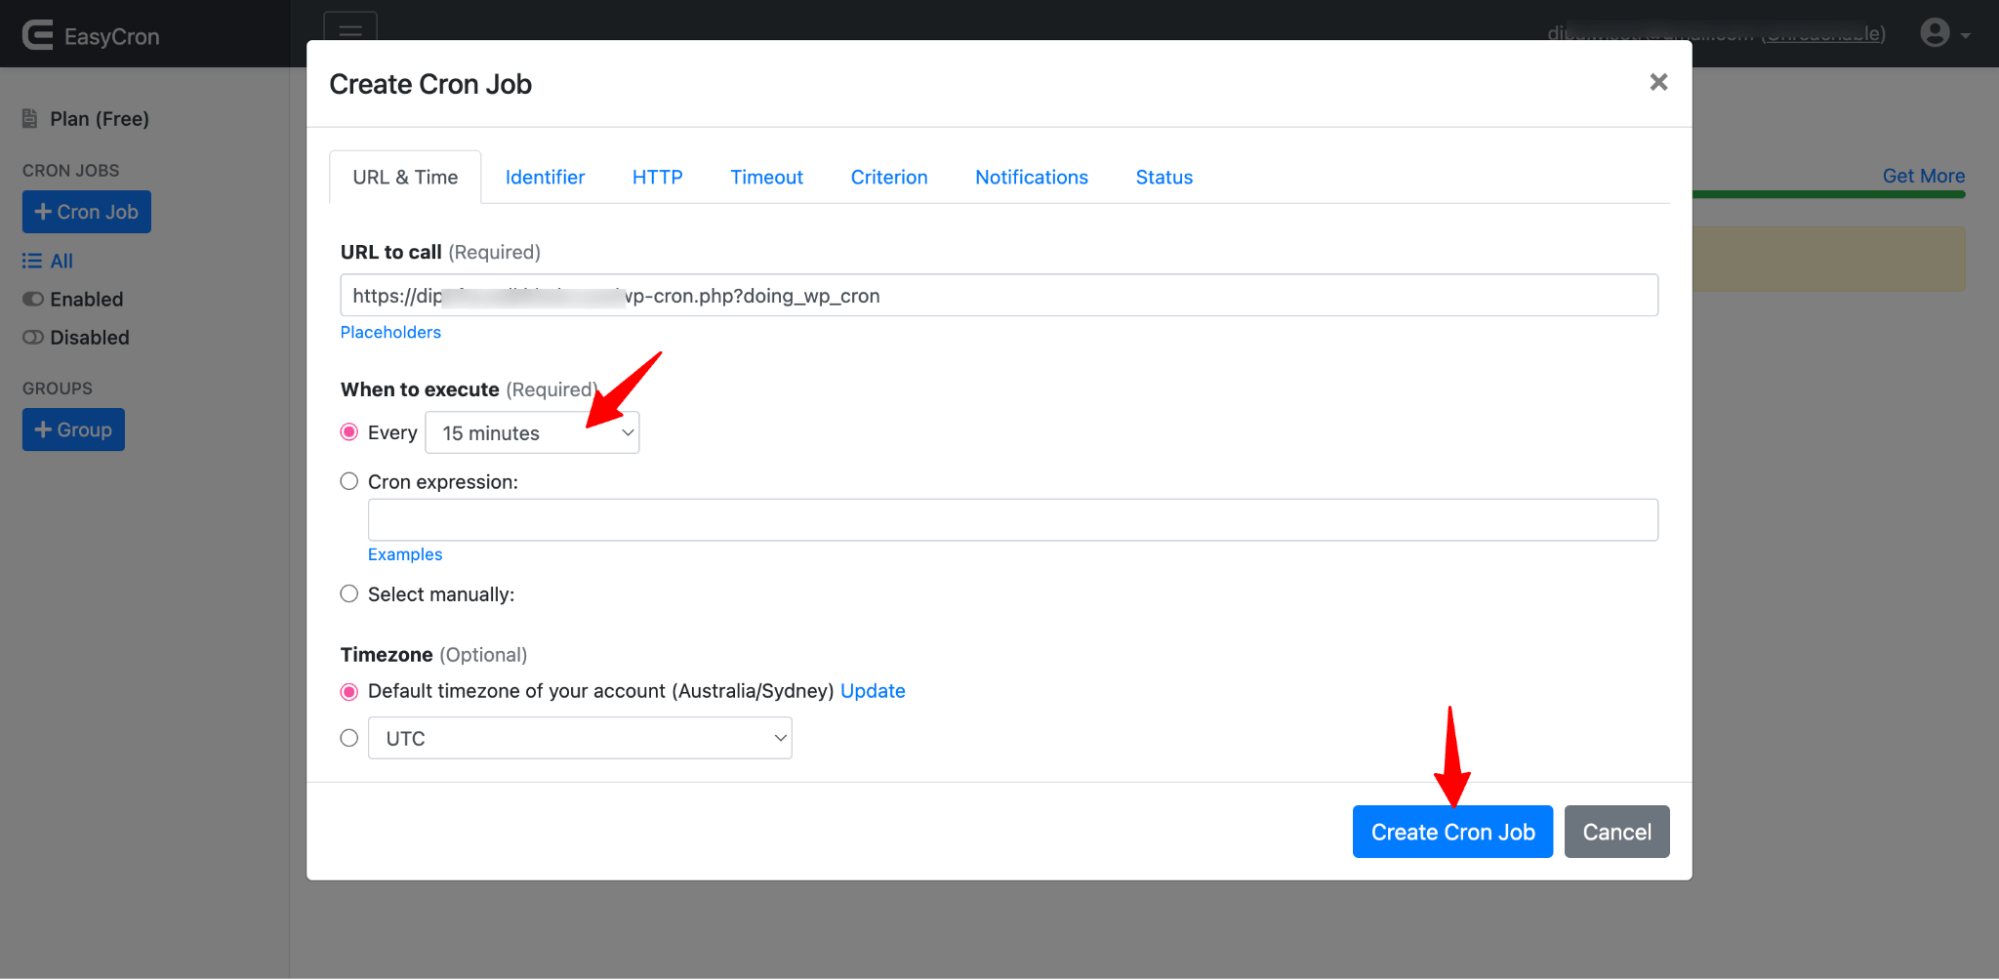
This opens the Create Cron Job screen.
Step 2: Add the WP-Cron URL
In the URL to call field, enter:
https://example.com/wp-cron.php?doing_wp_cronReplace example.com with your website domain.
Step 3: Set the Schedule
Under When to execute, choose Every 15 minutes.
Click Create Cron Job to save.
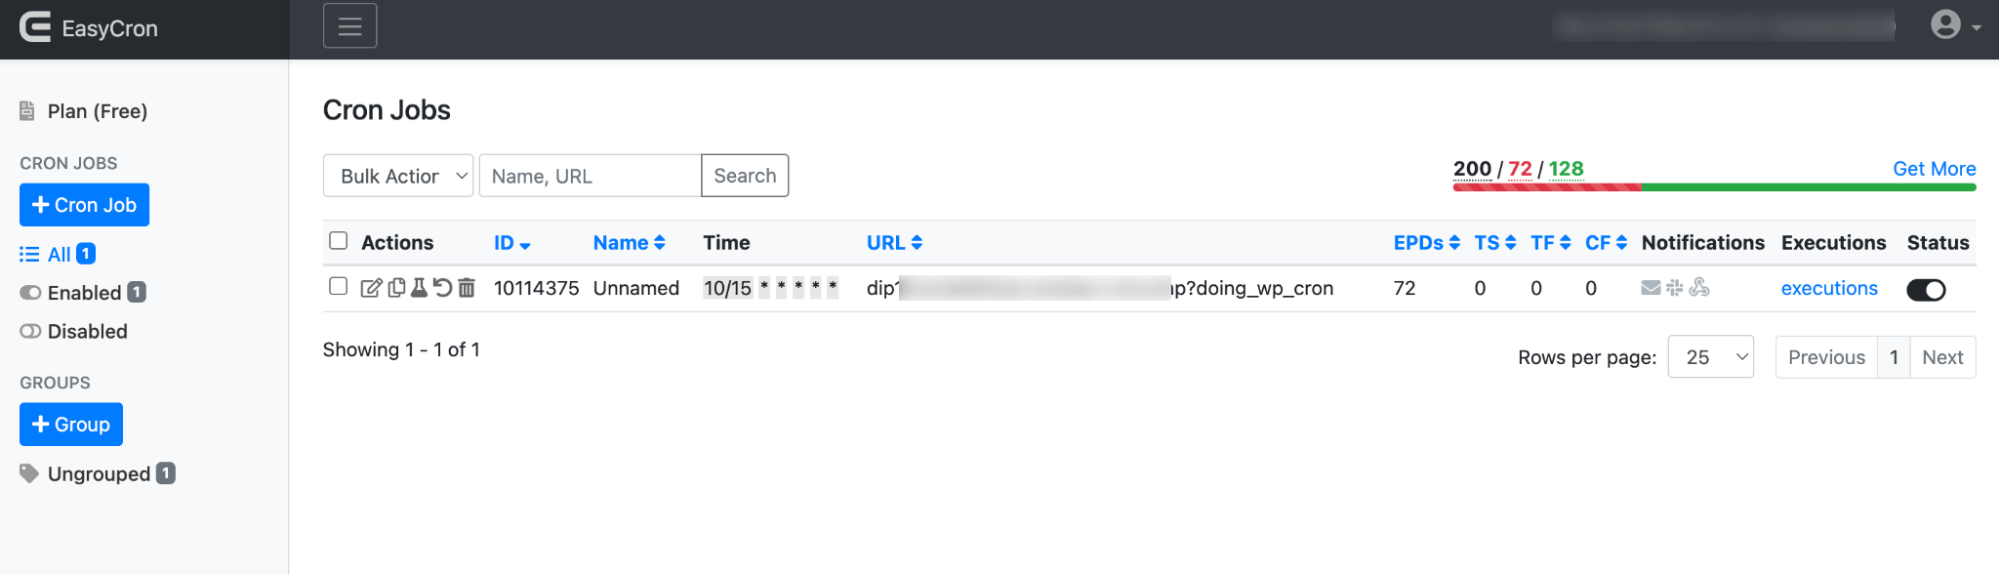
Your new cron job will now appear in the job list and will run automatically every 15 minutes.

That’s it. This is how you can set up a cron job in WordPress.