This guide will show you how to customize email notifications in Sublium Subscriptions.
Sublium offers two types of visual builders: Rich Text and a drag-and-drop Visual Builder.
We will cover both methods for customizing your emails.
Follow the steps below to fully customize your email notifications and deliver a polished communication experience for both customers and admins.
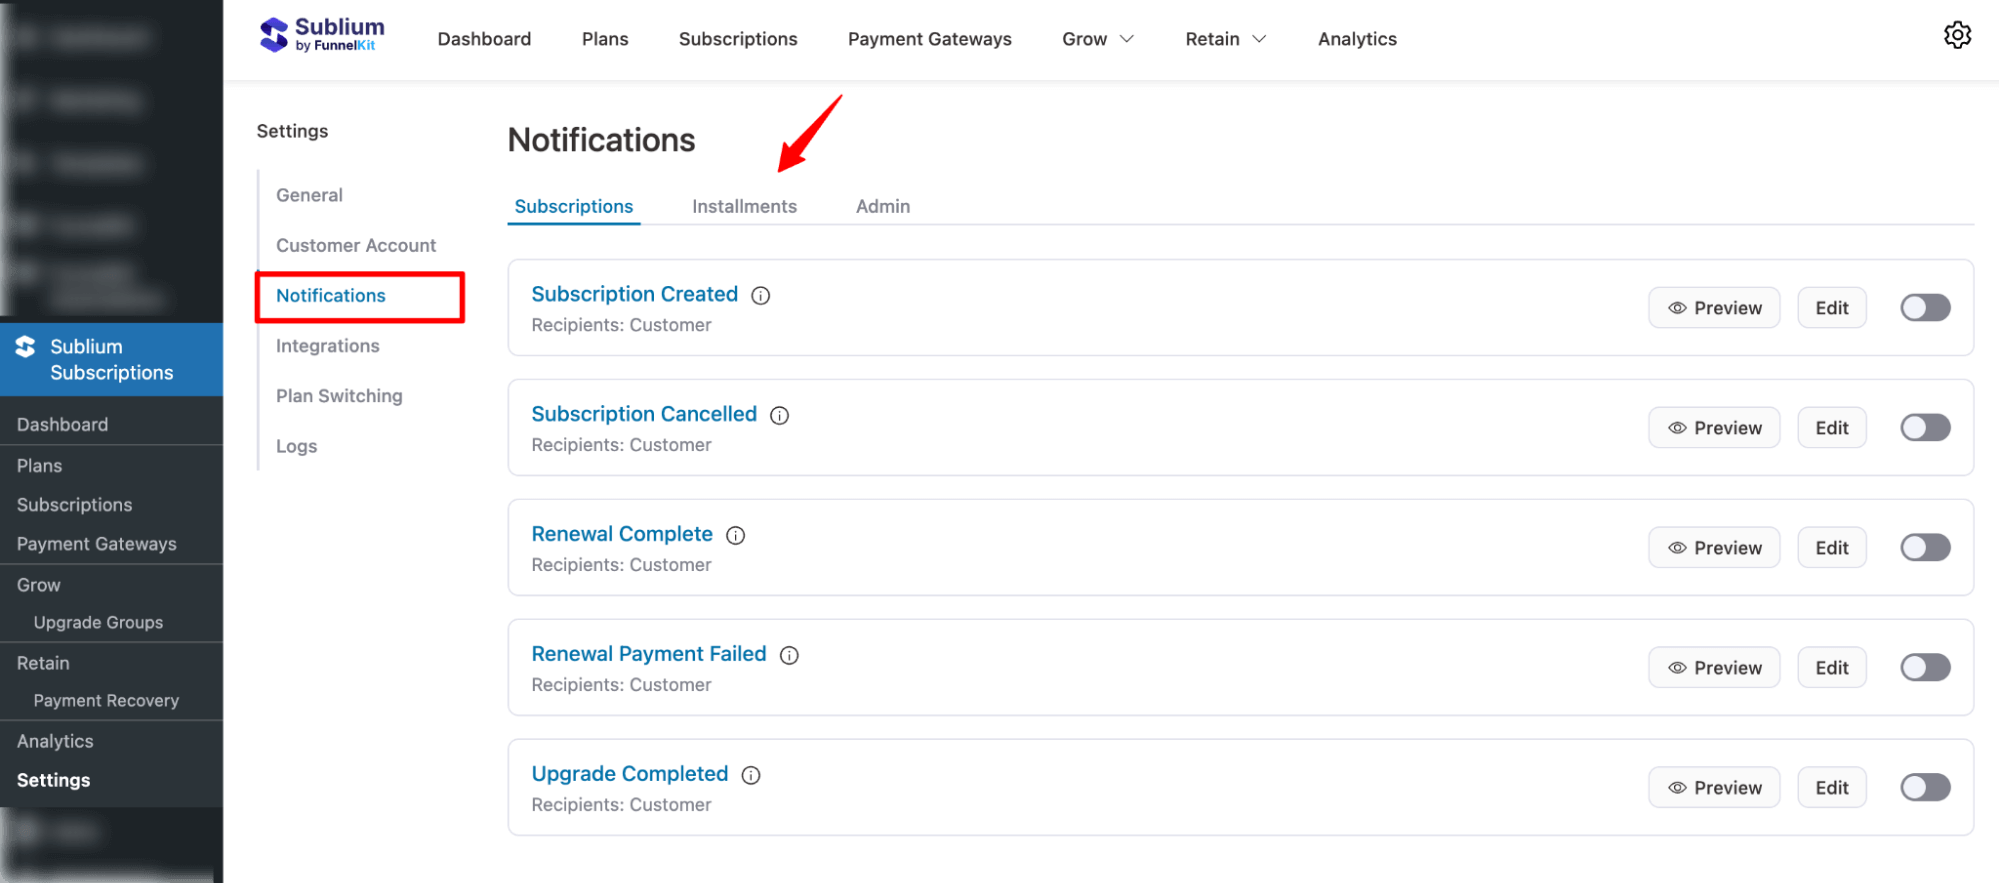
Access Notifications
Navigate to the Sublium Subscriptions ⇒ Settings ⇒ Notifications. Here, you will find 3 tabs for different notifications.
- Subscriptions notifications
- Installments notification
- Admin notifications
Customize Email Notifications In Sublium Subscription
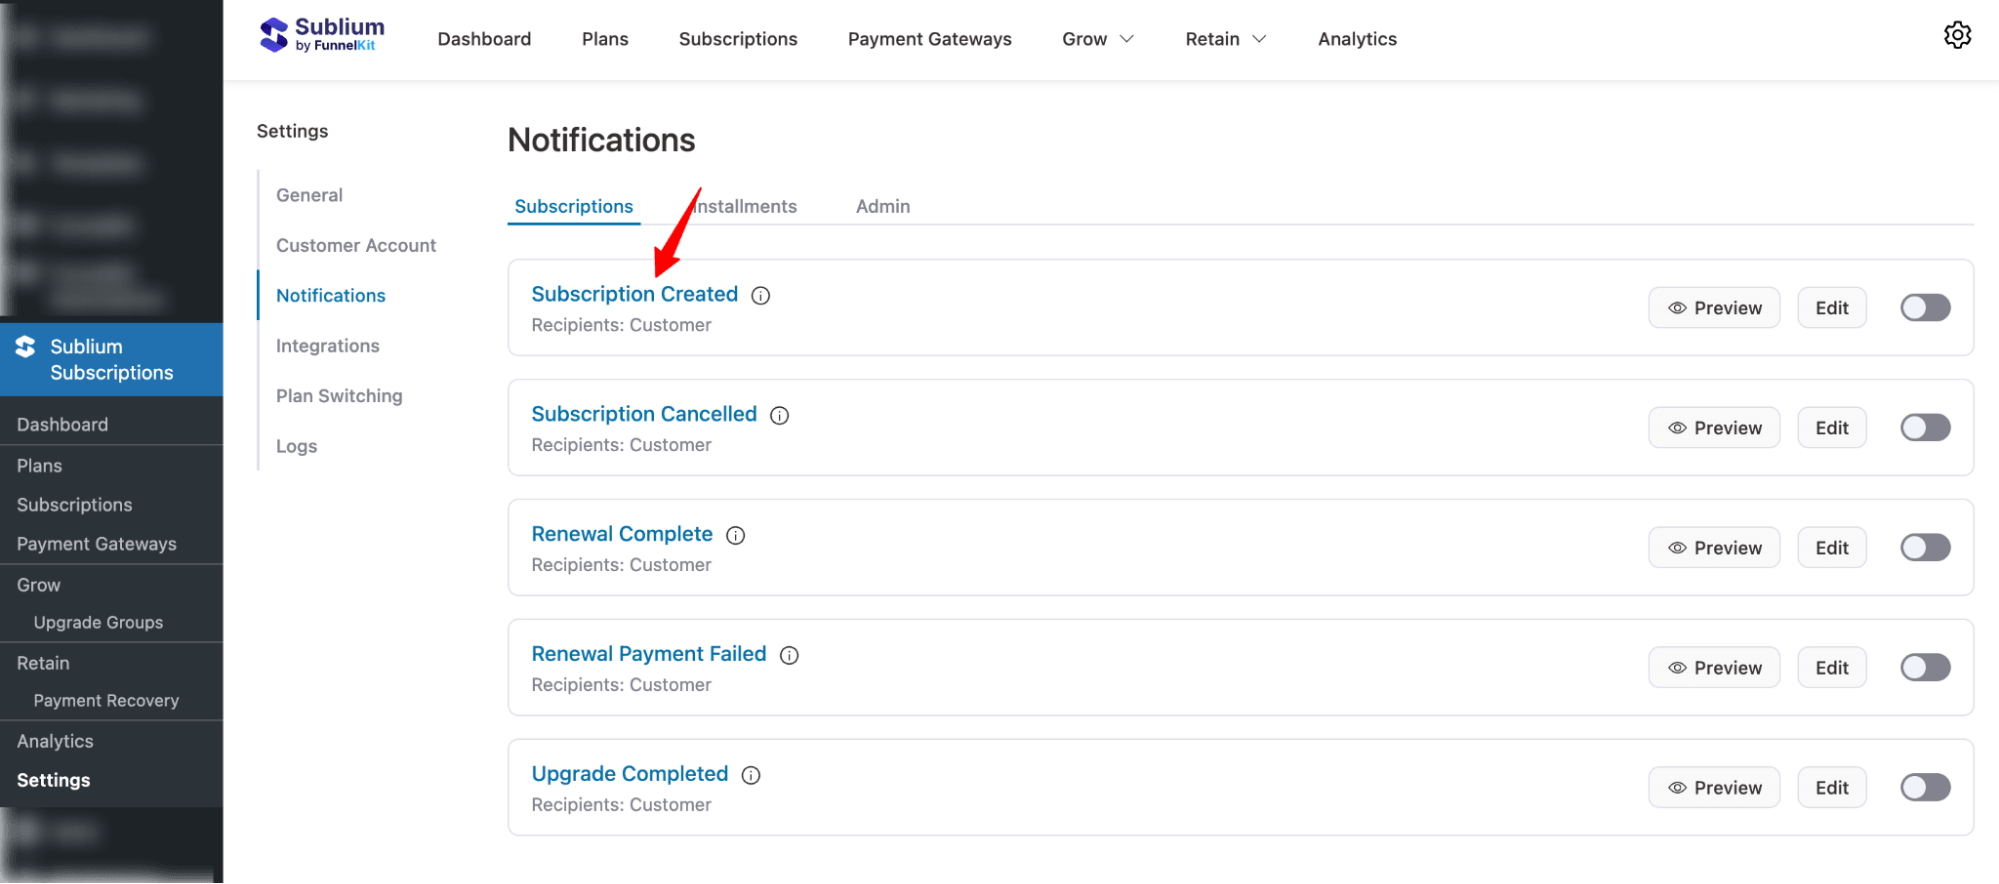
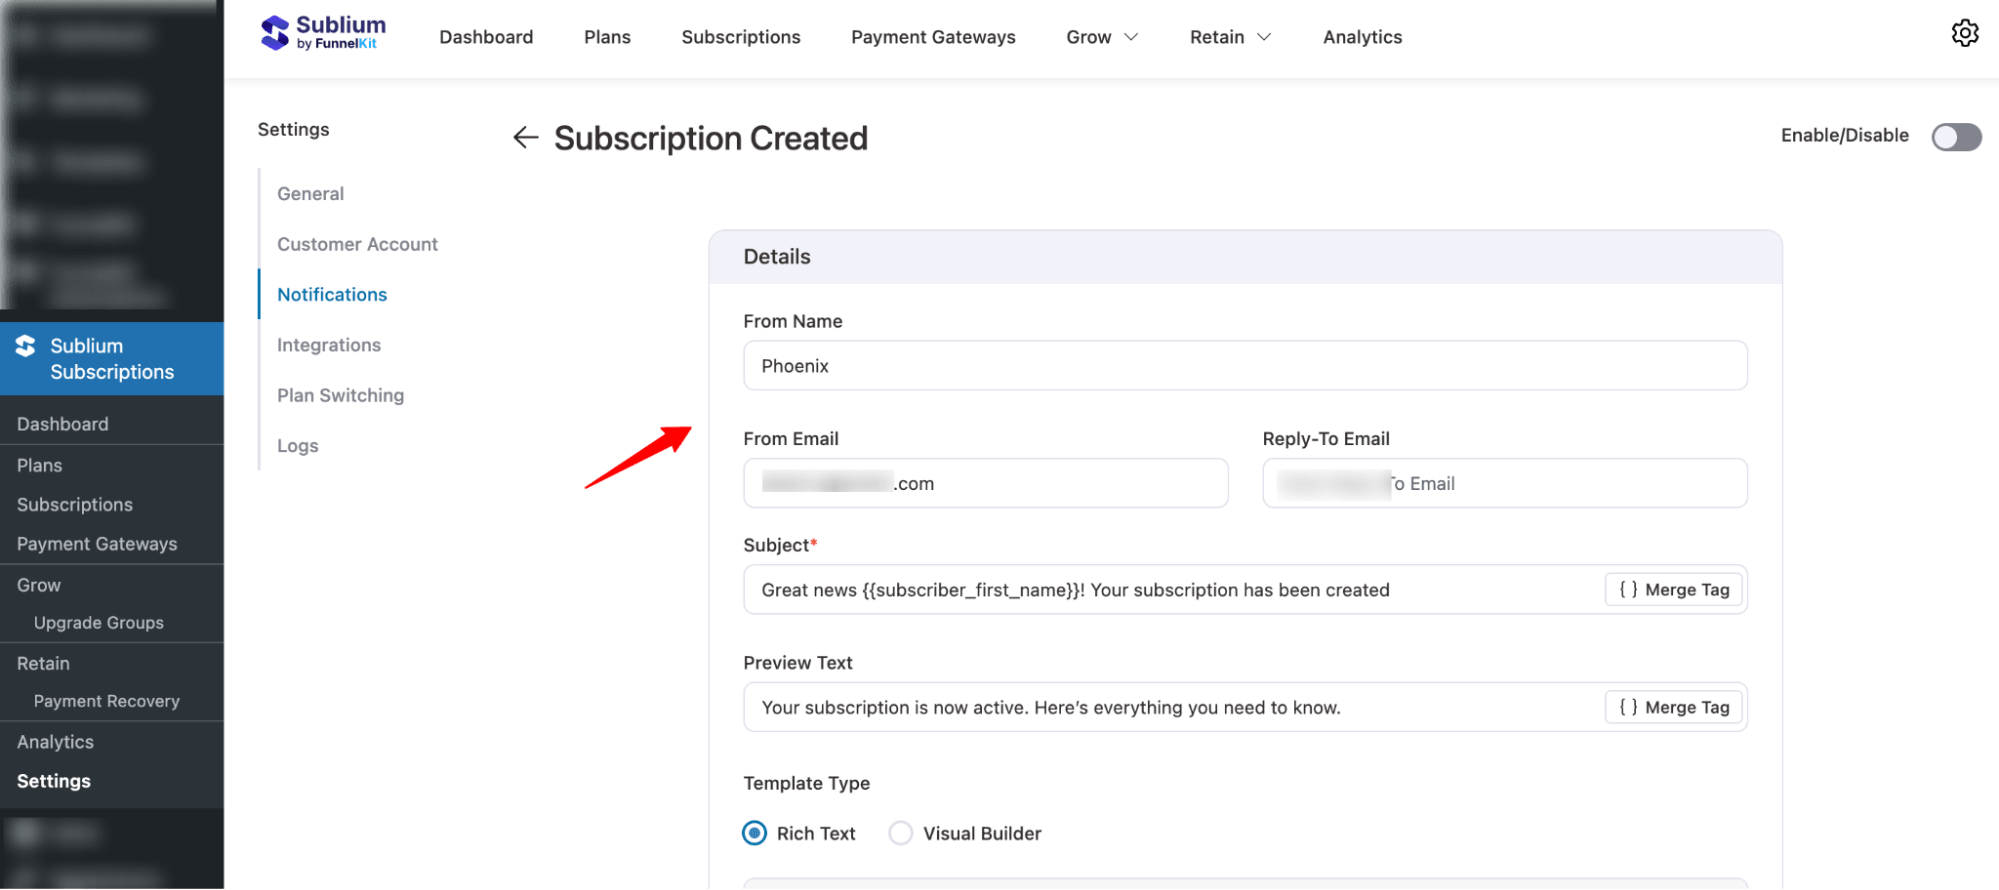
Step 1: Click on the email notification to set up its details
Select the email notification you want to customize by clicking on its name. This will open the settings and allow you to begin editing.
Configure the following fields:
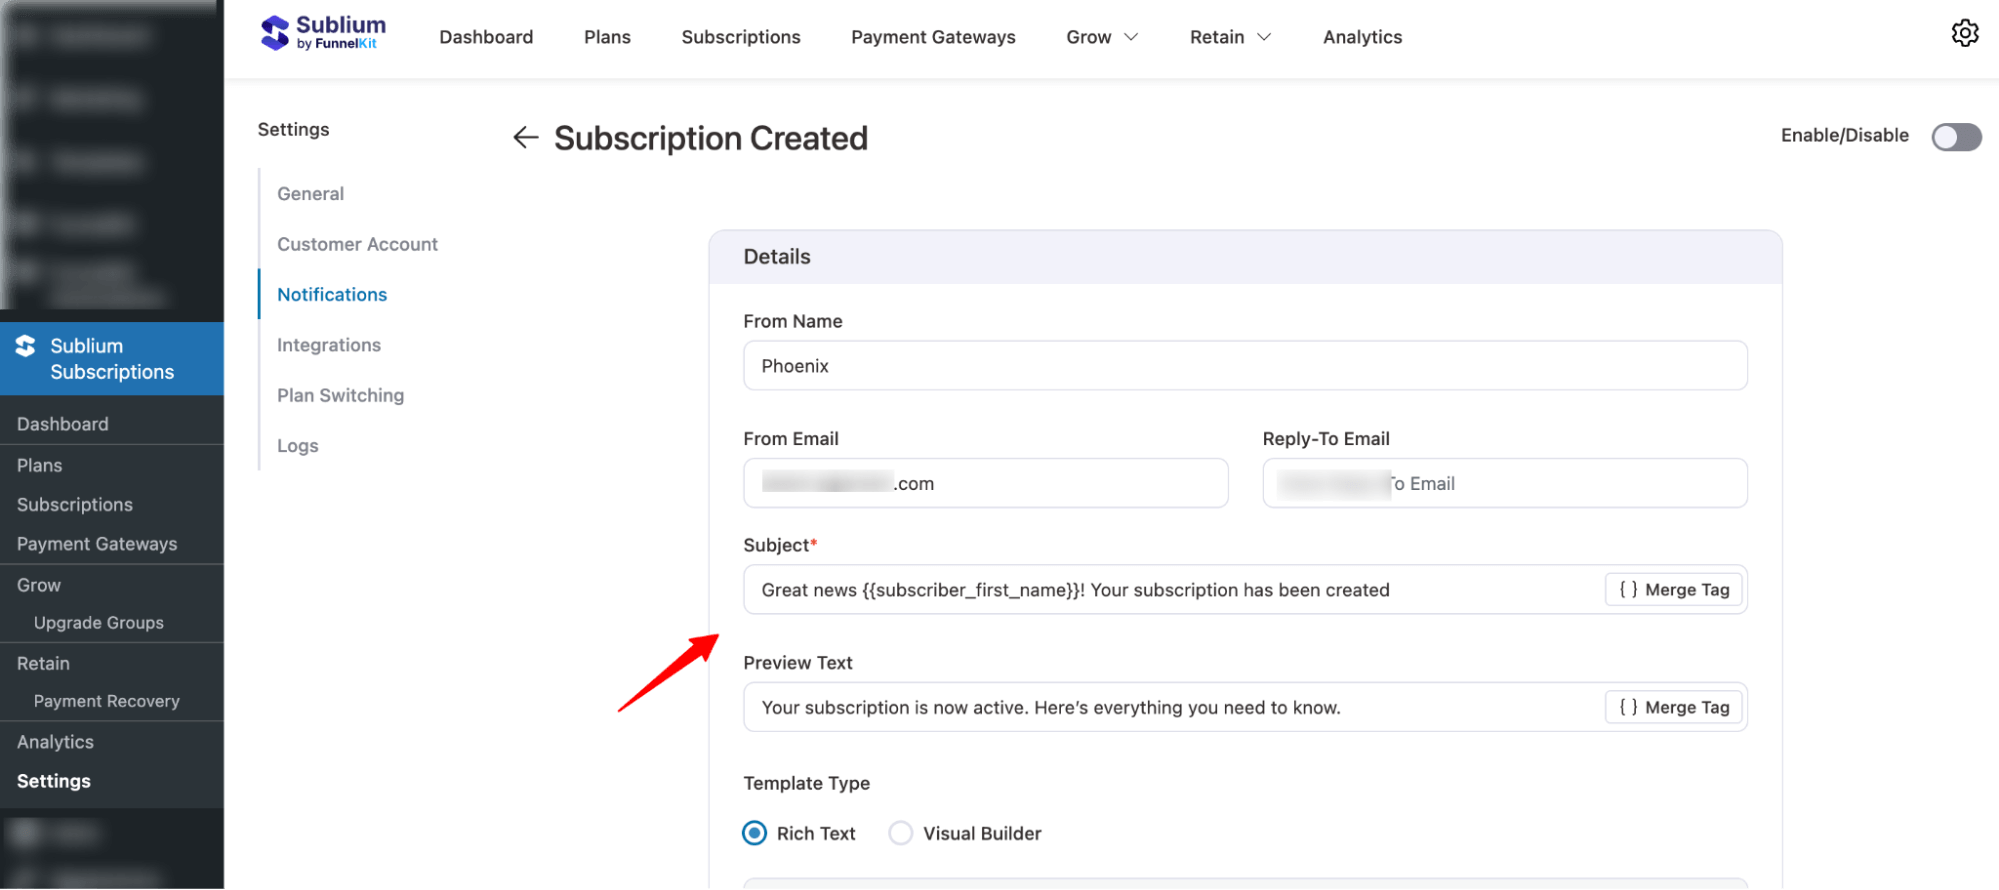
- From Name: Name that appears as the sender.
- From Email: The email address the message is sent from.
- Reply-To Email: The address where recipients can respond.
Step 2: Set personalized subject line and preview text
Next, it’s time to set the subject line and preview text.
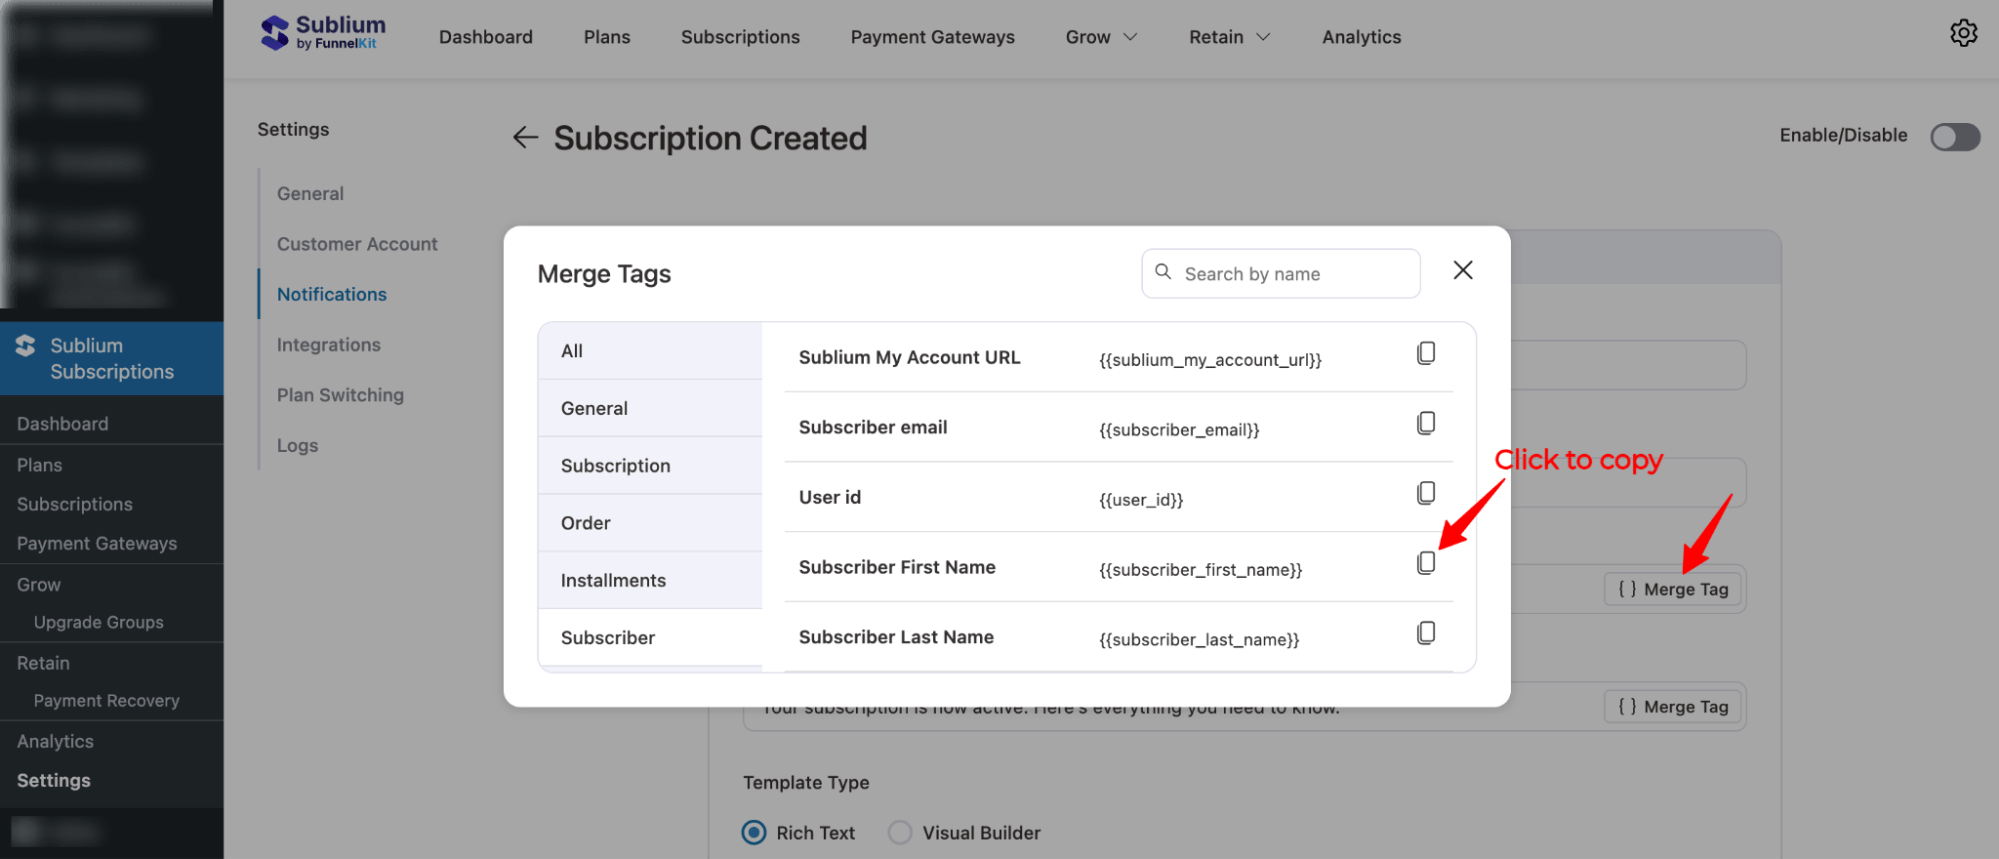
To personalize the email and subject line, you can use a Merge tag to add dynamic information.
To add any merge tag, hit the “{ } Merge Tag” button, then search for the merge tag you like, copy it, and then paste it to add it to your subject line and preview text.
For this notification, configure these two options:
- Subject: Set the subject line of the email.
- Preview Text: Set the text displayed in the inbox before opening the email.
Step 3: Choose email template type
Sublium offers two template types for email customization:
- Rich Text: Basic text editing with limited customization options
- Visual Builder (Recommended): Allows for advanced customization with drag-and-drop content block features. Provides full control over the design and layout of your subscription emails
Choose the one you prefer to start customizing the email body content.
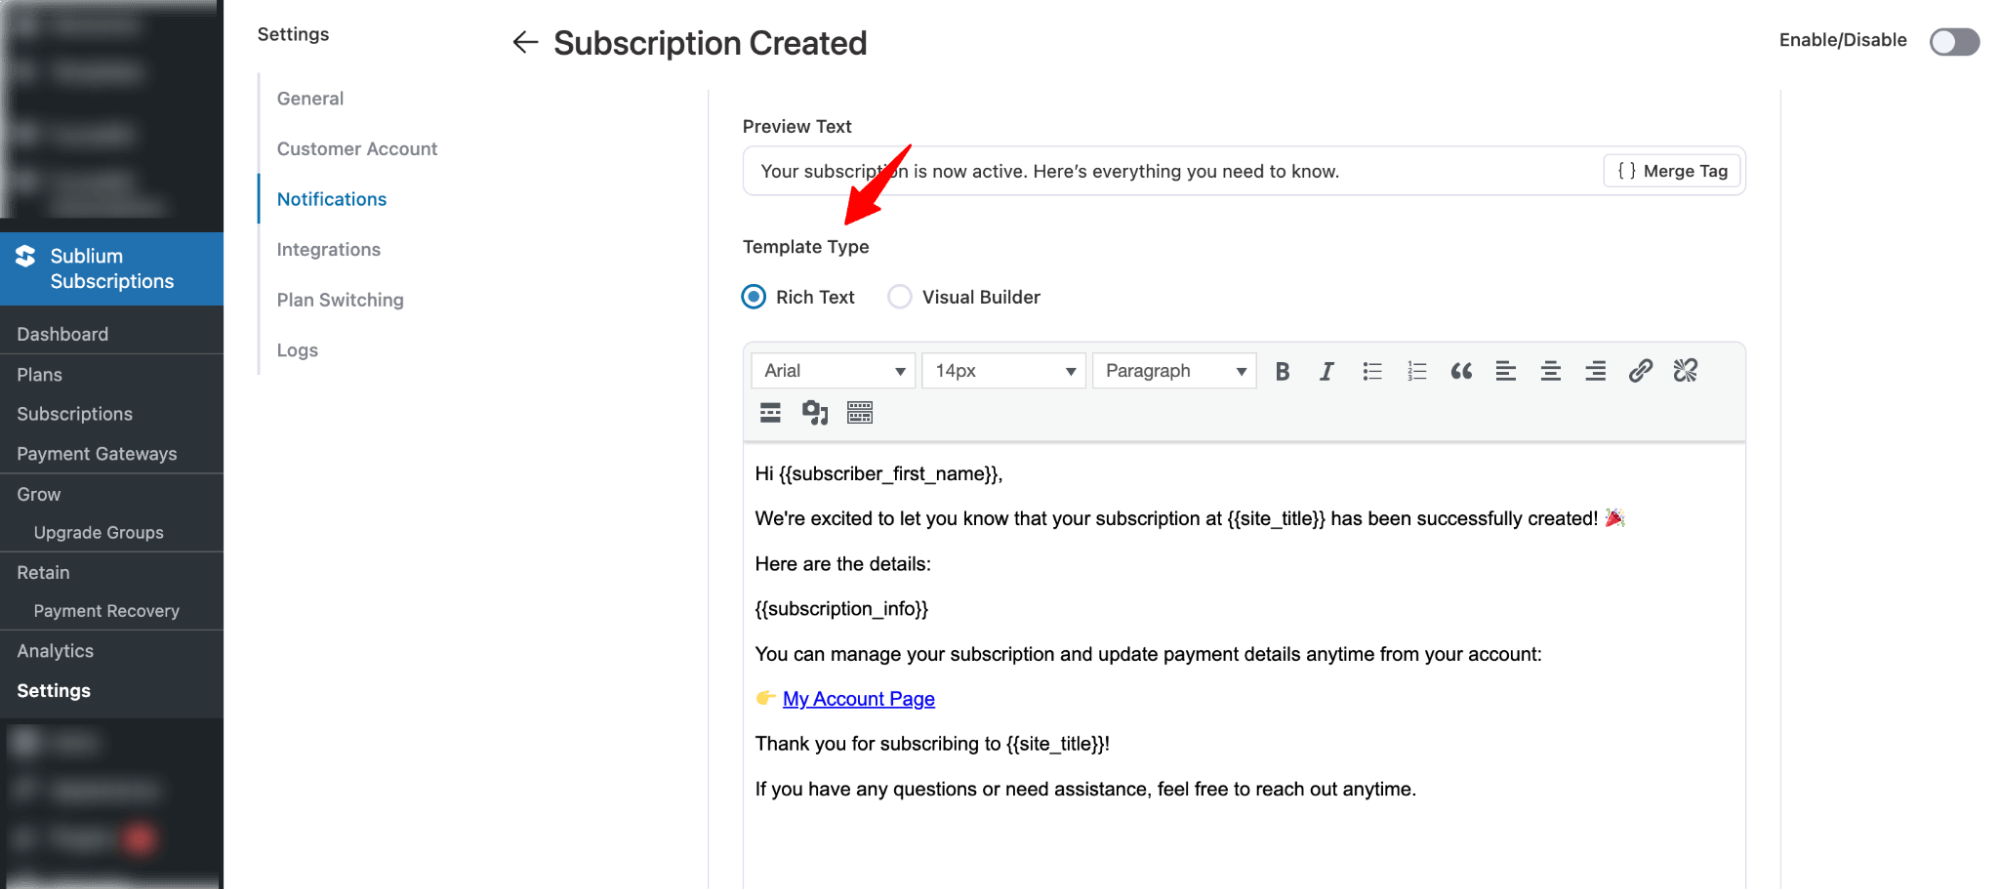
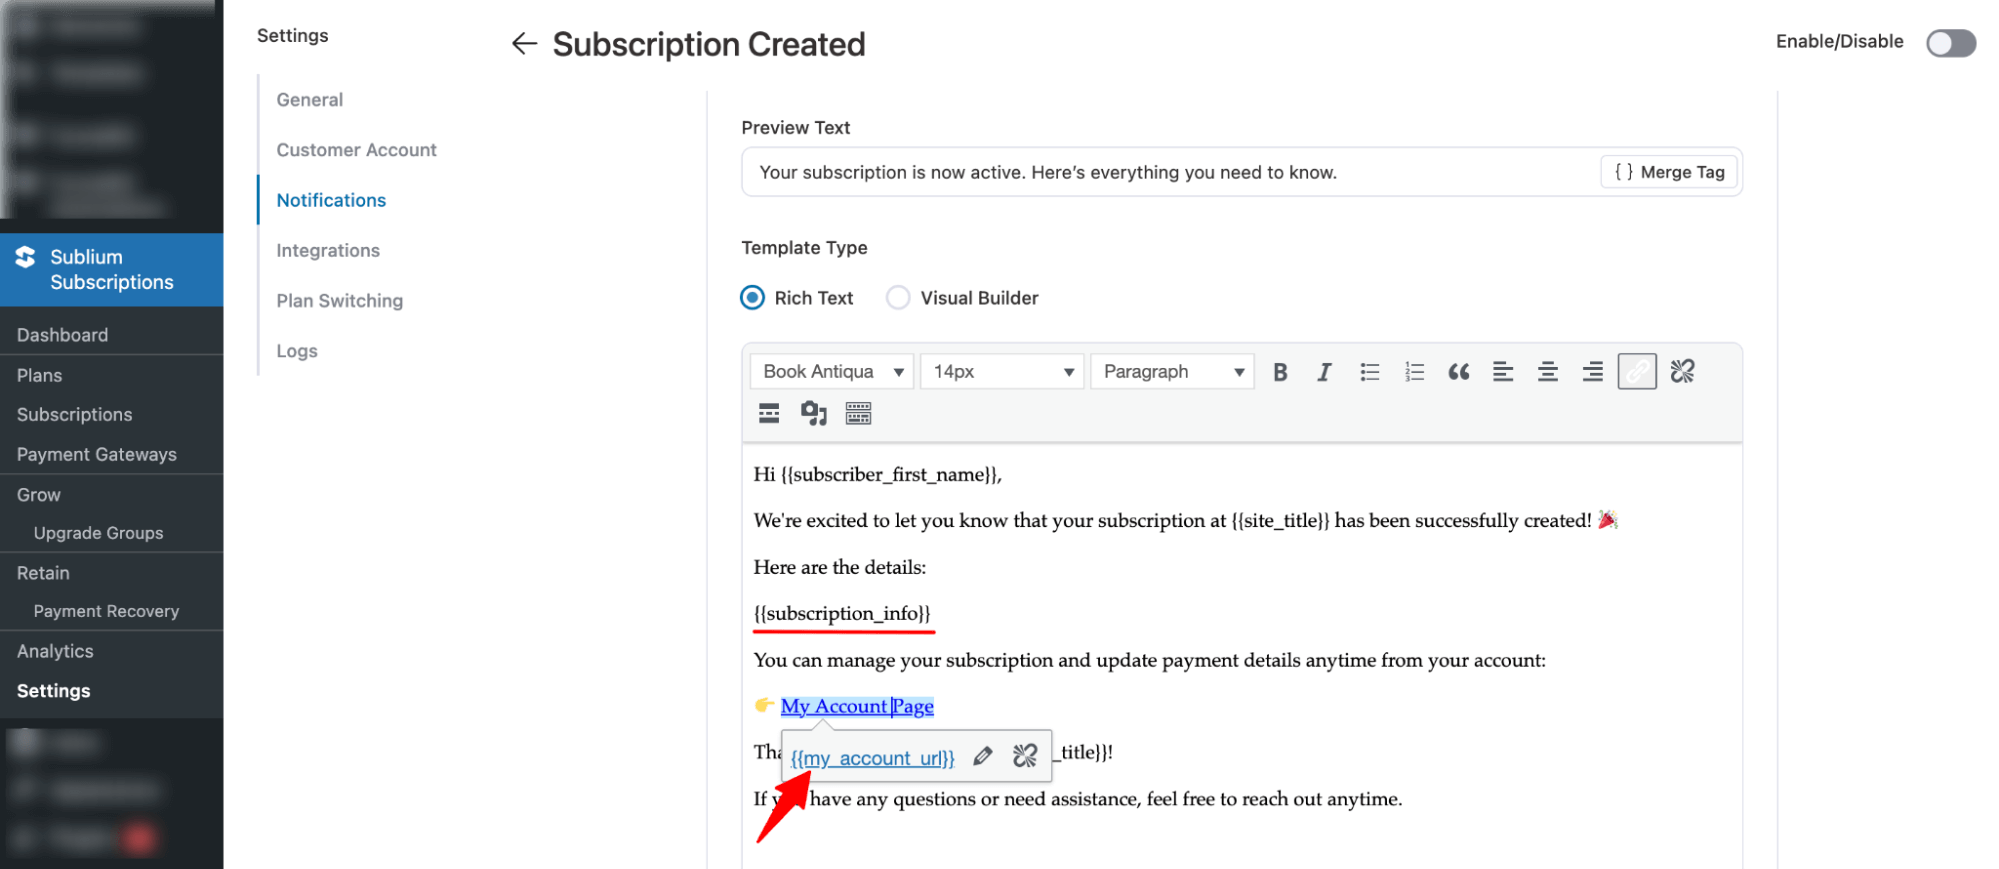
Step 4: Customize email with Rich Text (method 1)
You get a prebuilt text-based template with Rich text template type.
Choose Rich Text and start editing.
Here are the customization options you get
- Font selection – Choose different fonts (e.g., Book Antiqua).
- Font size adjustment – Change text size (e.g., 14px).
- Text style/format – Apply paragraph styles, headings, etc.
- Bold text – Make text bold.
- Italic text – Make text italic.
- Numbered list – Create ordered/numbered lists.
- Bullet list – Create unordered/bulleted lists.
- Blockquote – Format text as a blockquote.
- Text alignment – Align text left, center, right, or justify.
- Insert/edit link – Add hyperlinks to text.
- Clear formatting – Remove existing formatting from text.
- Insert image – Add images to the content.
- Insert media/audio – Add audio or media files.
- Insert table/keyboard input – Add tables or specialized content like keyboard input.
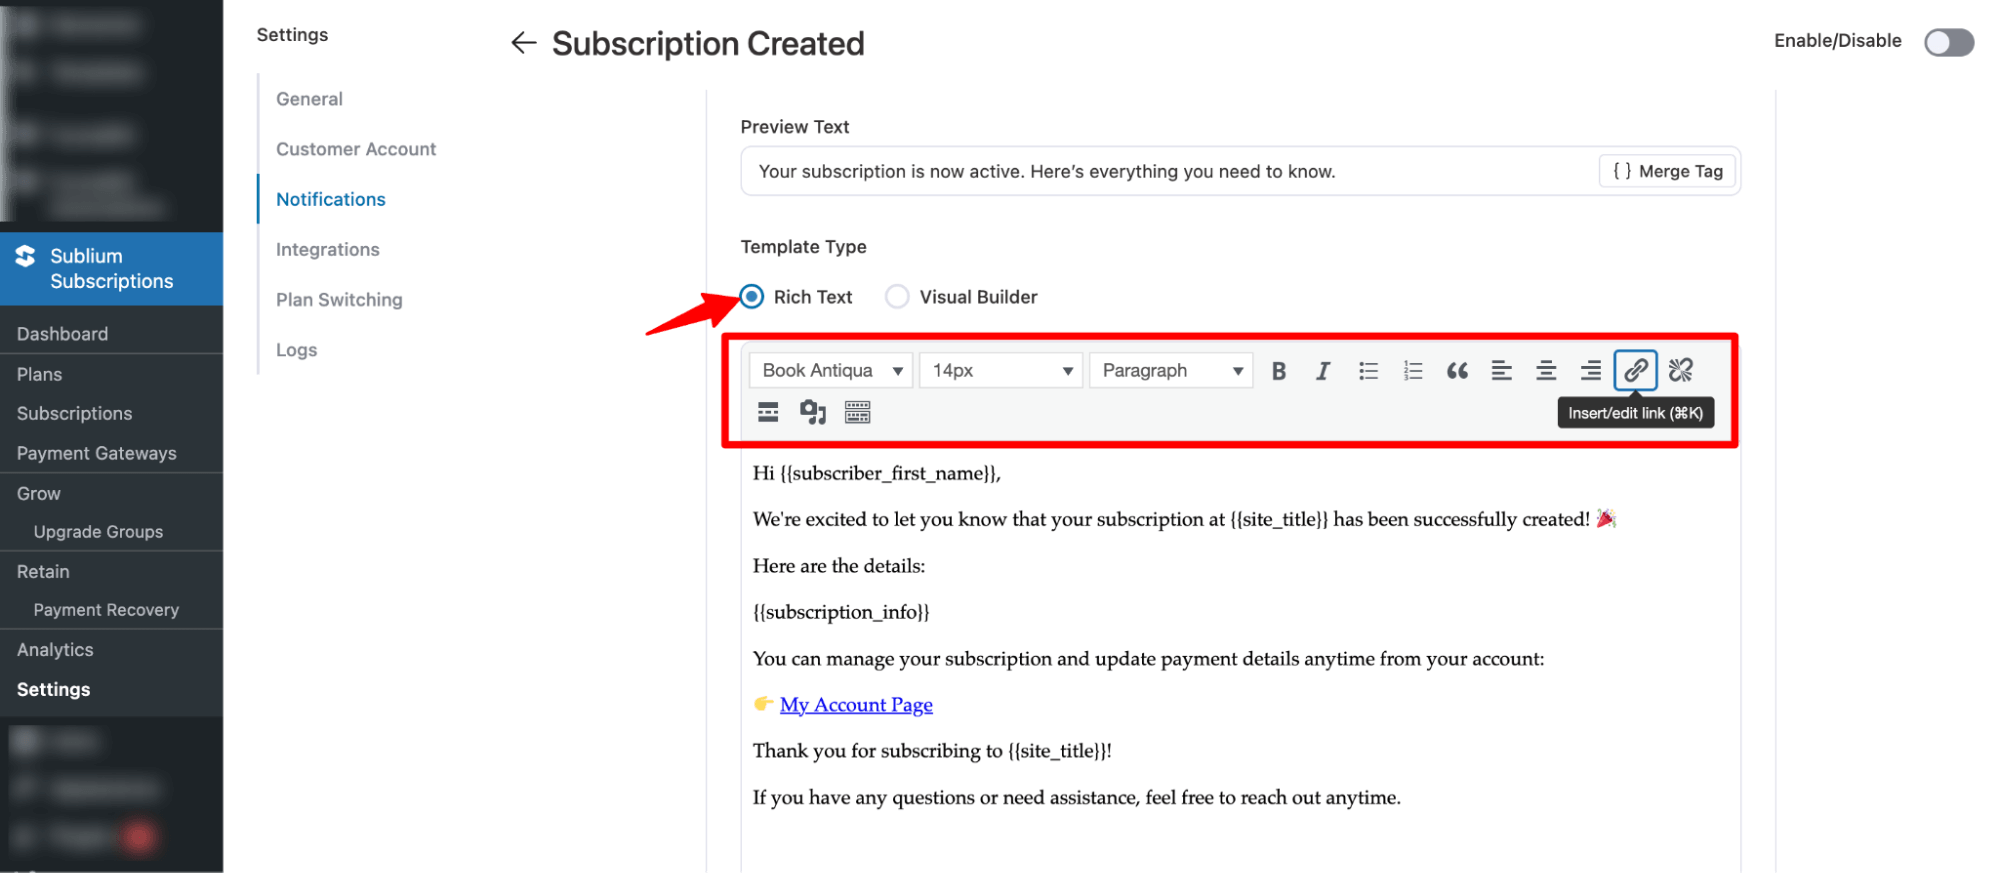
Again, like the Subject line and Preview text, here you can use merge tags to personalize the message. Plus, to direct users to different dynamic links, like the My Account page, you can add merge tags in the links.
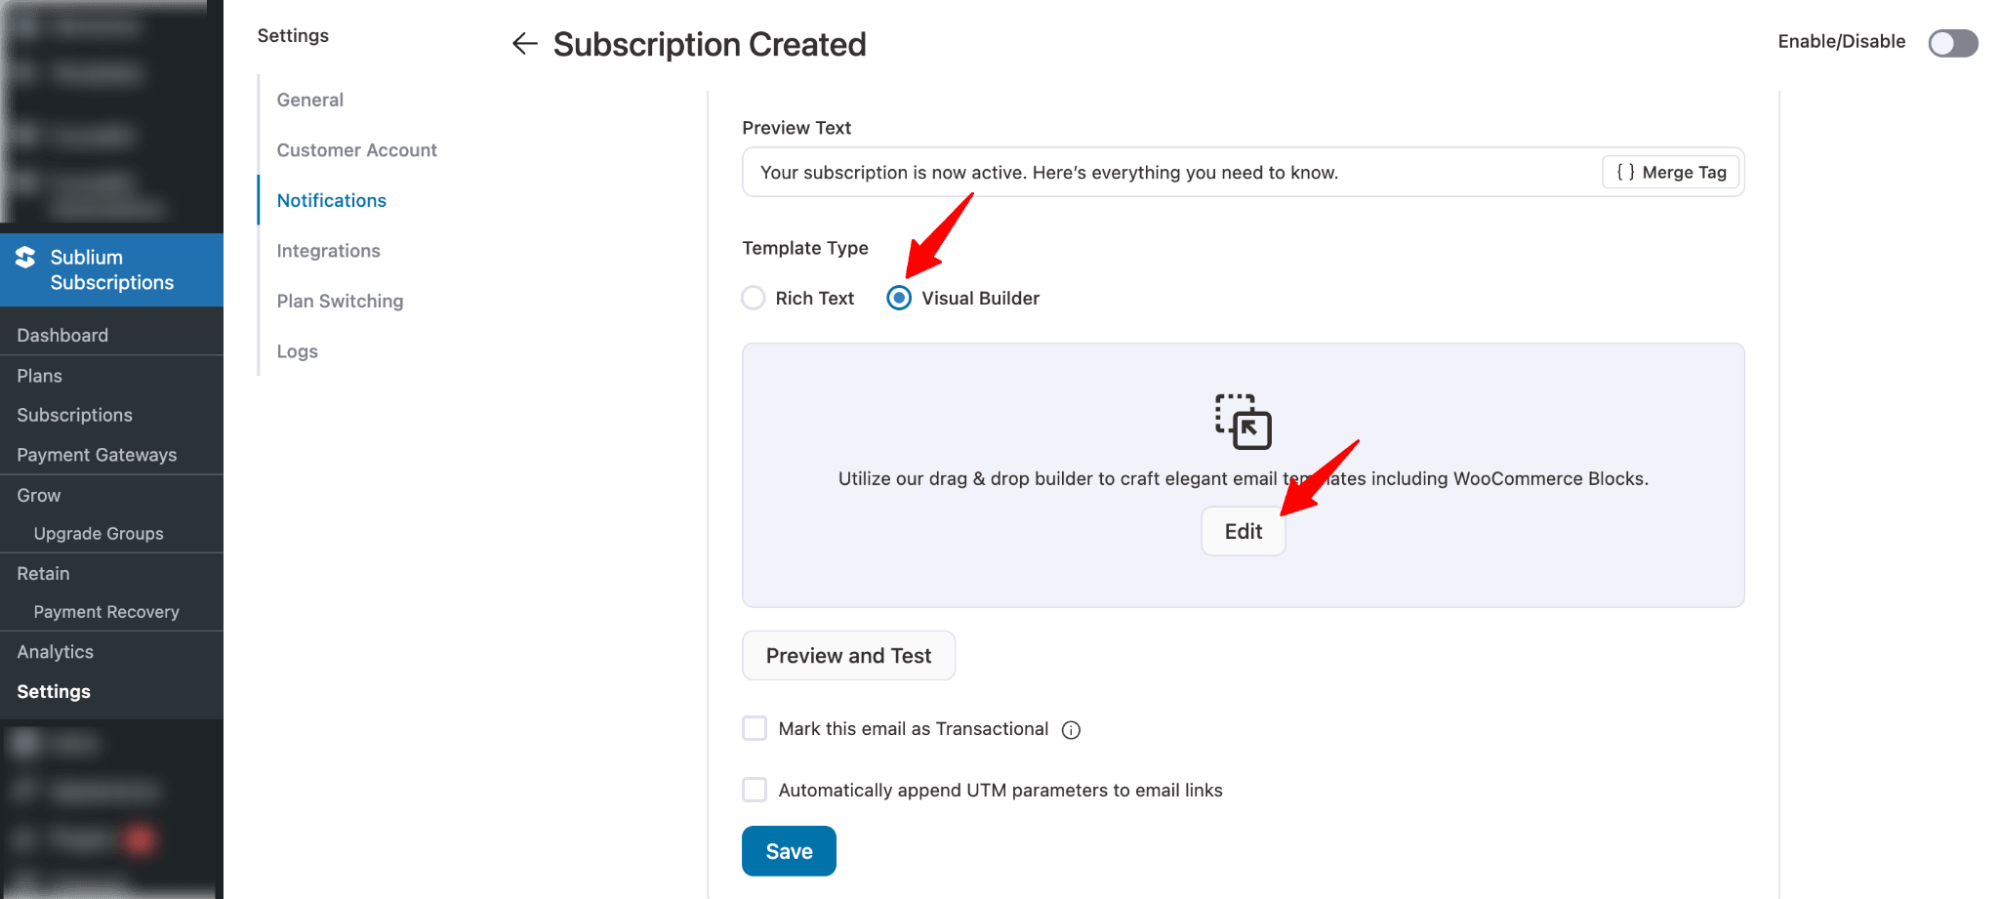
Step 5: Customize Email with the Visual Builder (Recommended option)
After selecting the Visual Builder option, click on the Edit button to start customizing your WooCommerce subscription email notifications with the drag-and-drop editor.
Global Style:
A Global Styles settings will pop up. In Global Styles Settings, you can configure the logo, colors, typography, buttons, layout, footer, and social links.
Make sure to save the global settings.
Next, you need to design the email with the visual email builder.
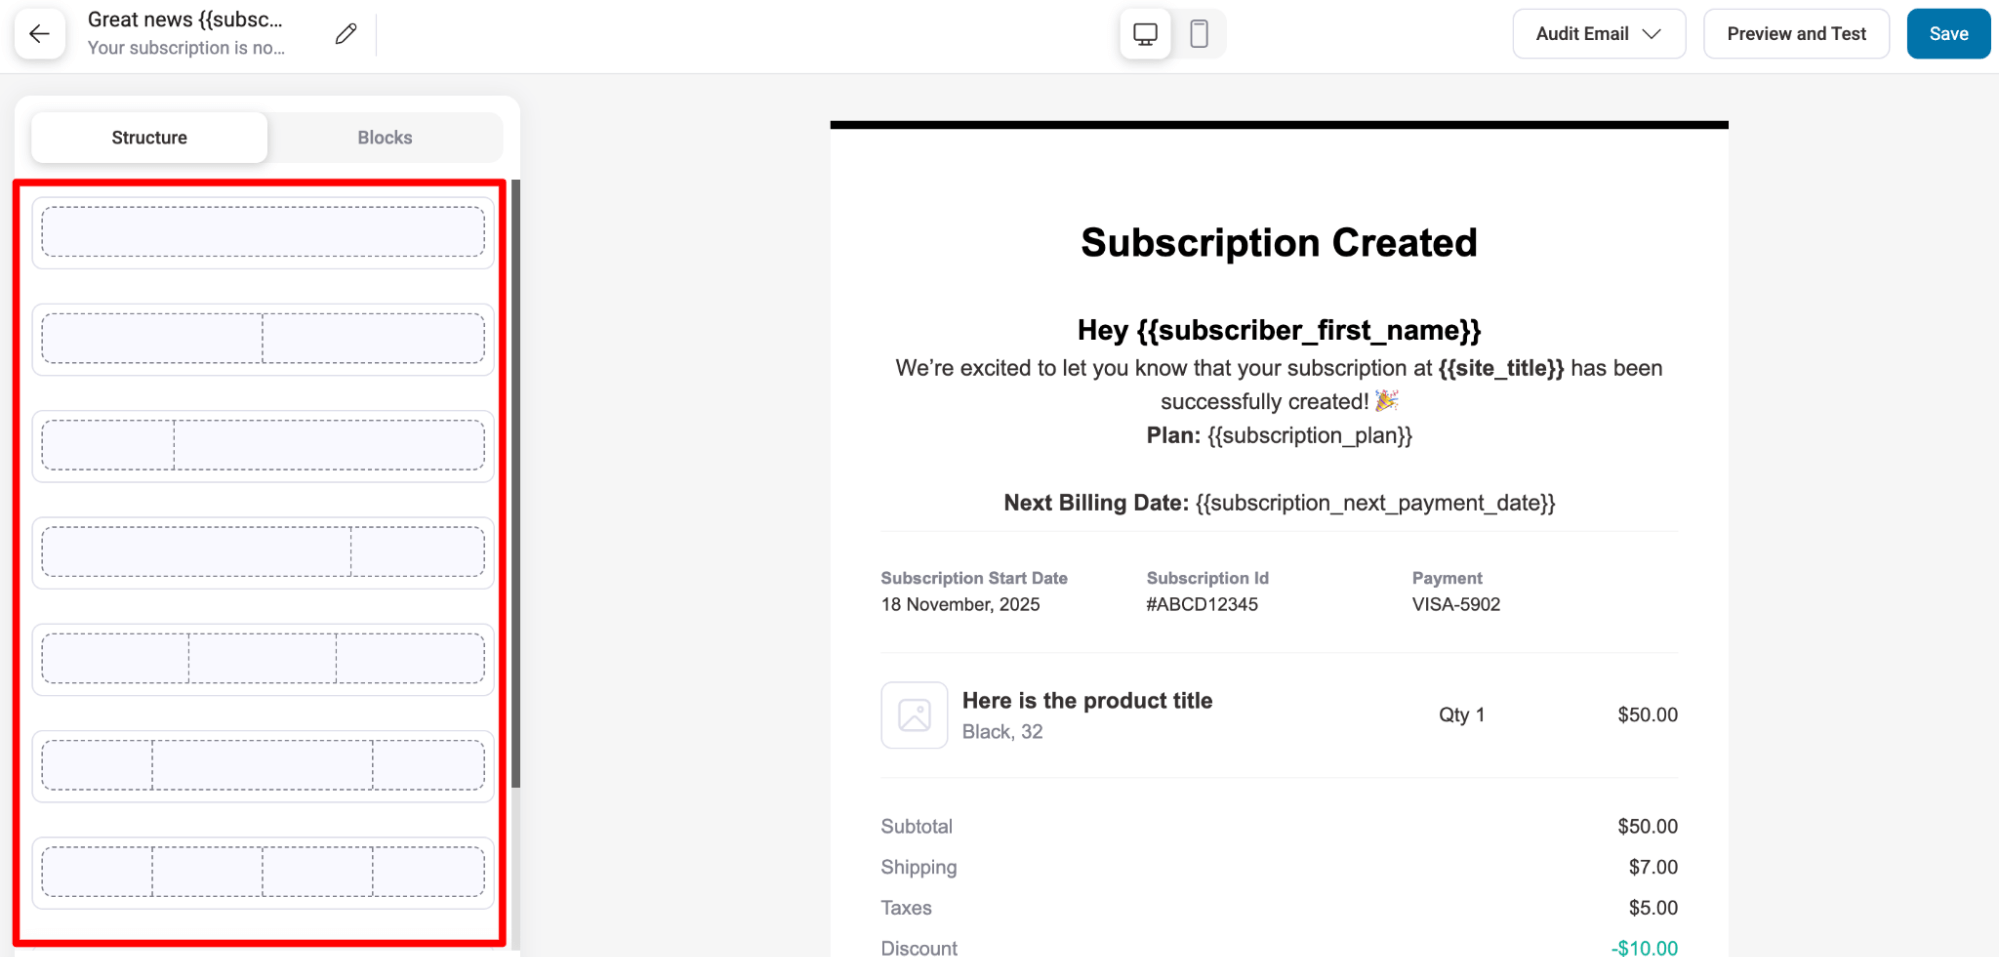
The editor layout consists of:
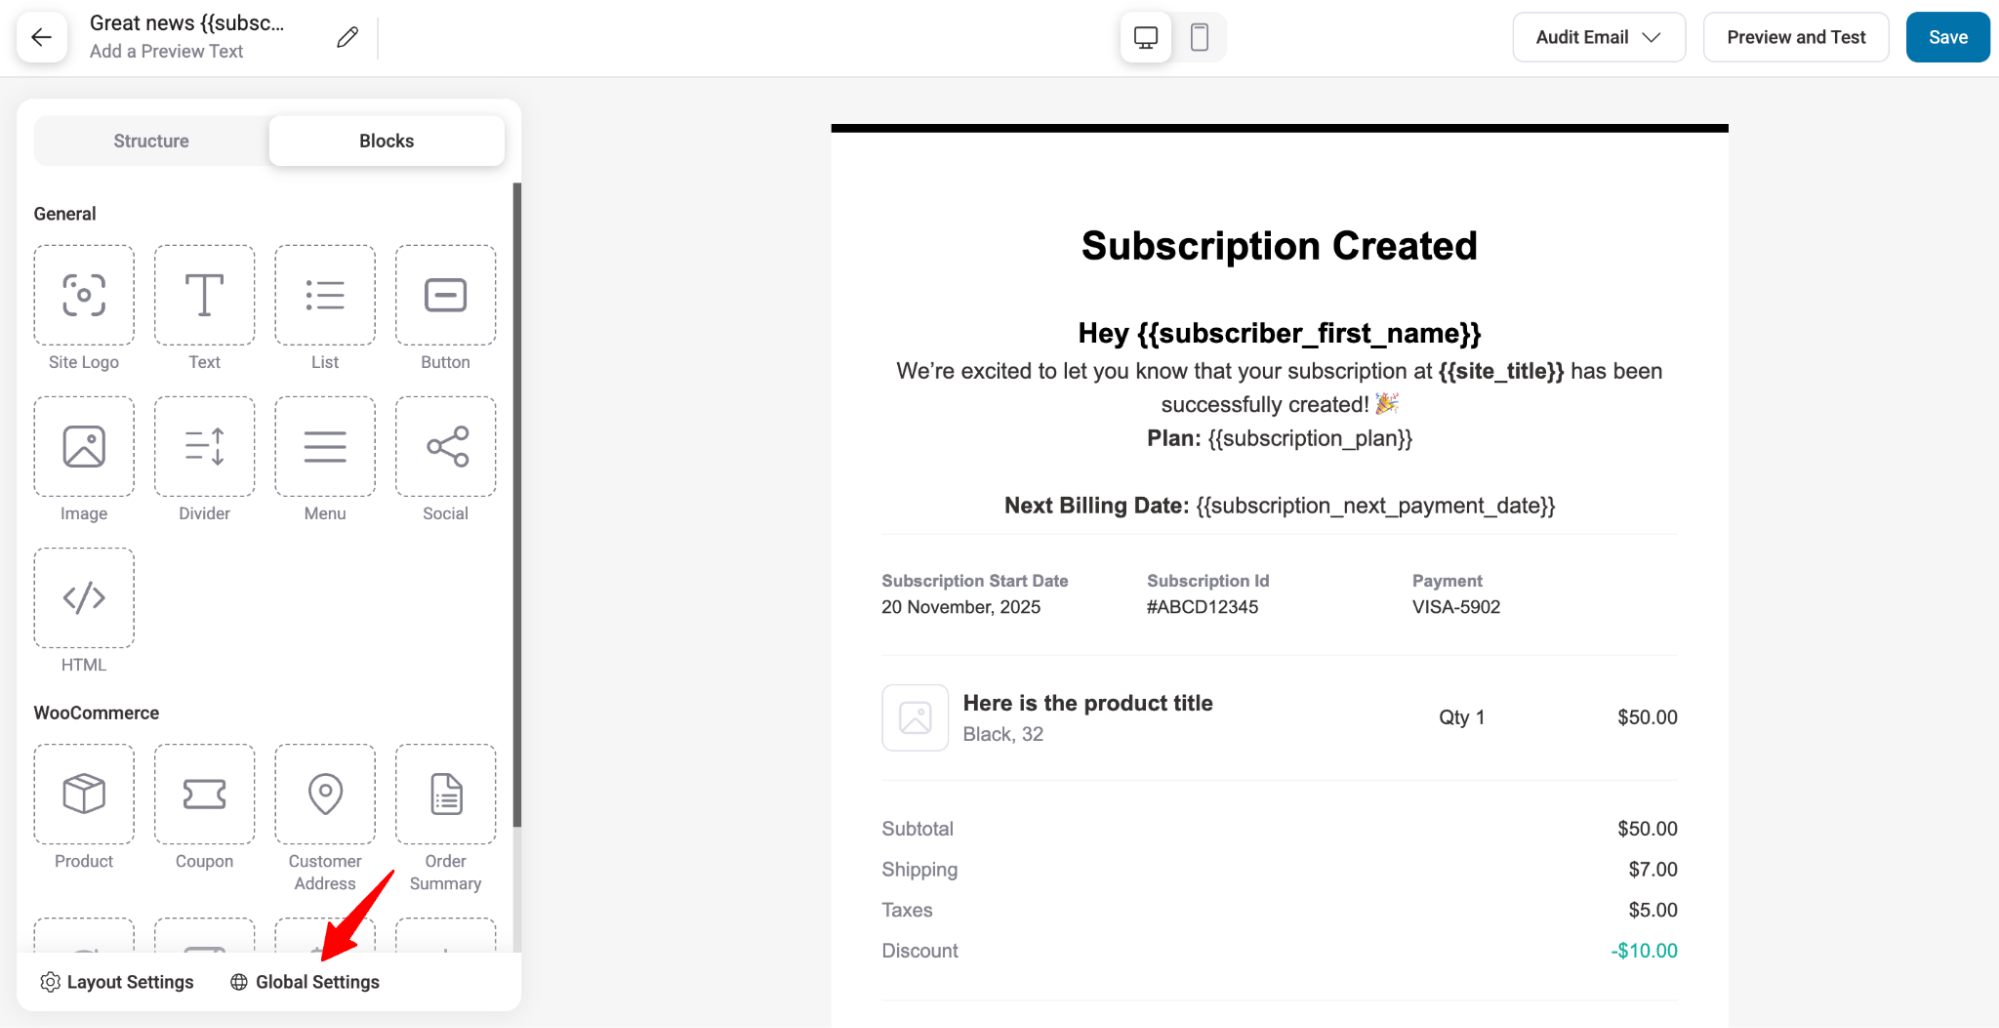
Structure and Blocks section: Here you will find the structure and blocks.
Structure:
- Drag and drop column structures to design your email layout.
- Each column can contain multiple content blocks for text, images, buttons, and more.
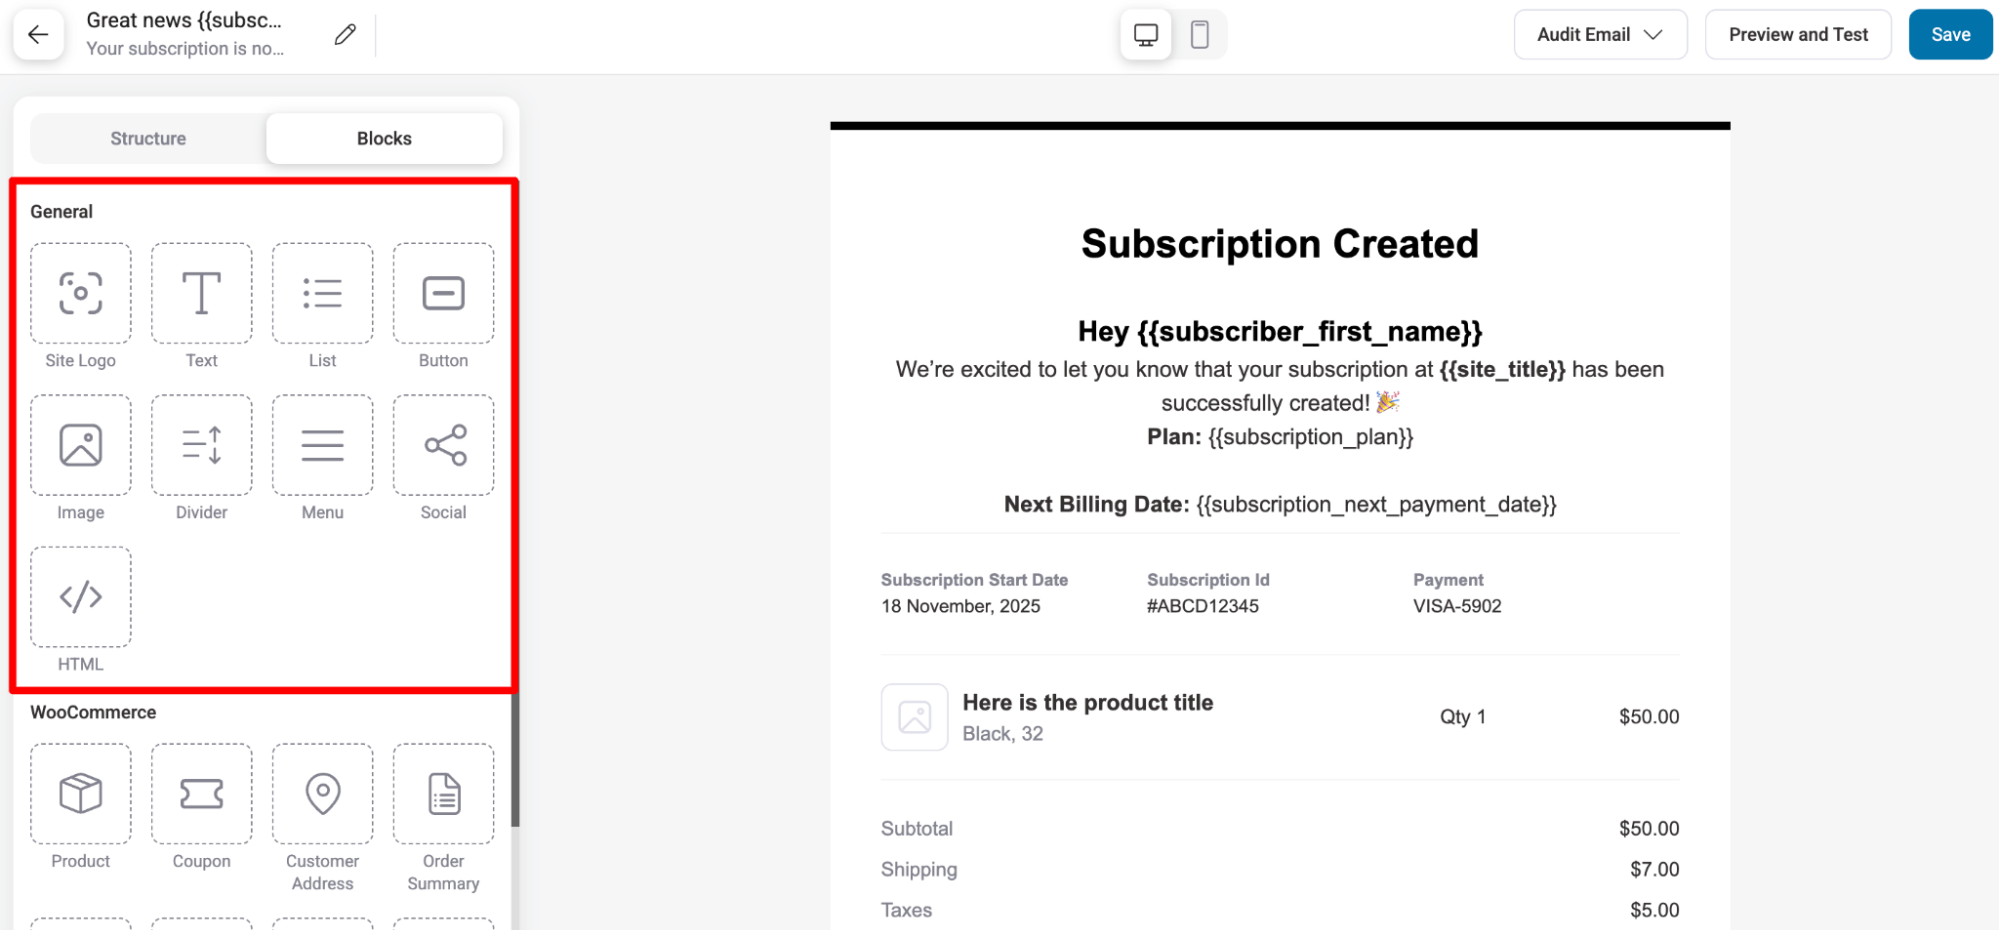
Content Blocks:
The visual builder offers content blocks below to customize your email.
Here are the General blocks:
- Site Logo: Displays the site’s logo in the email header or body.
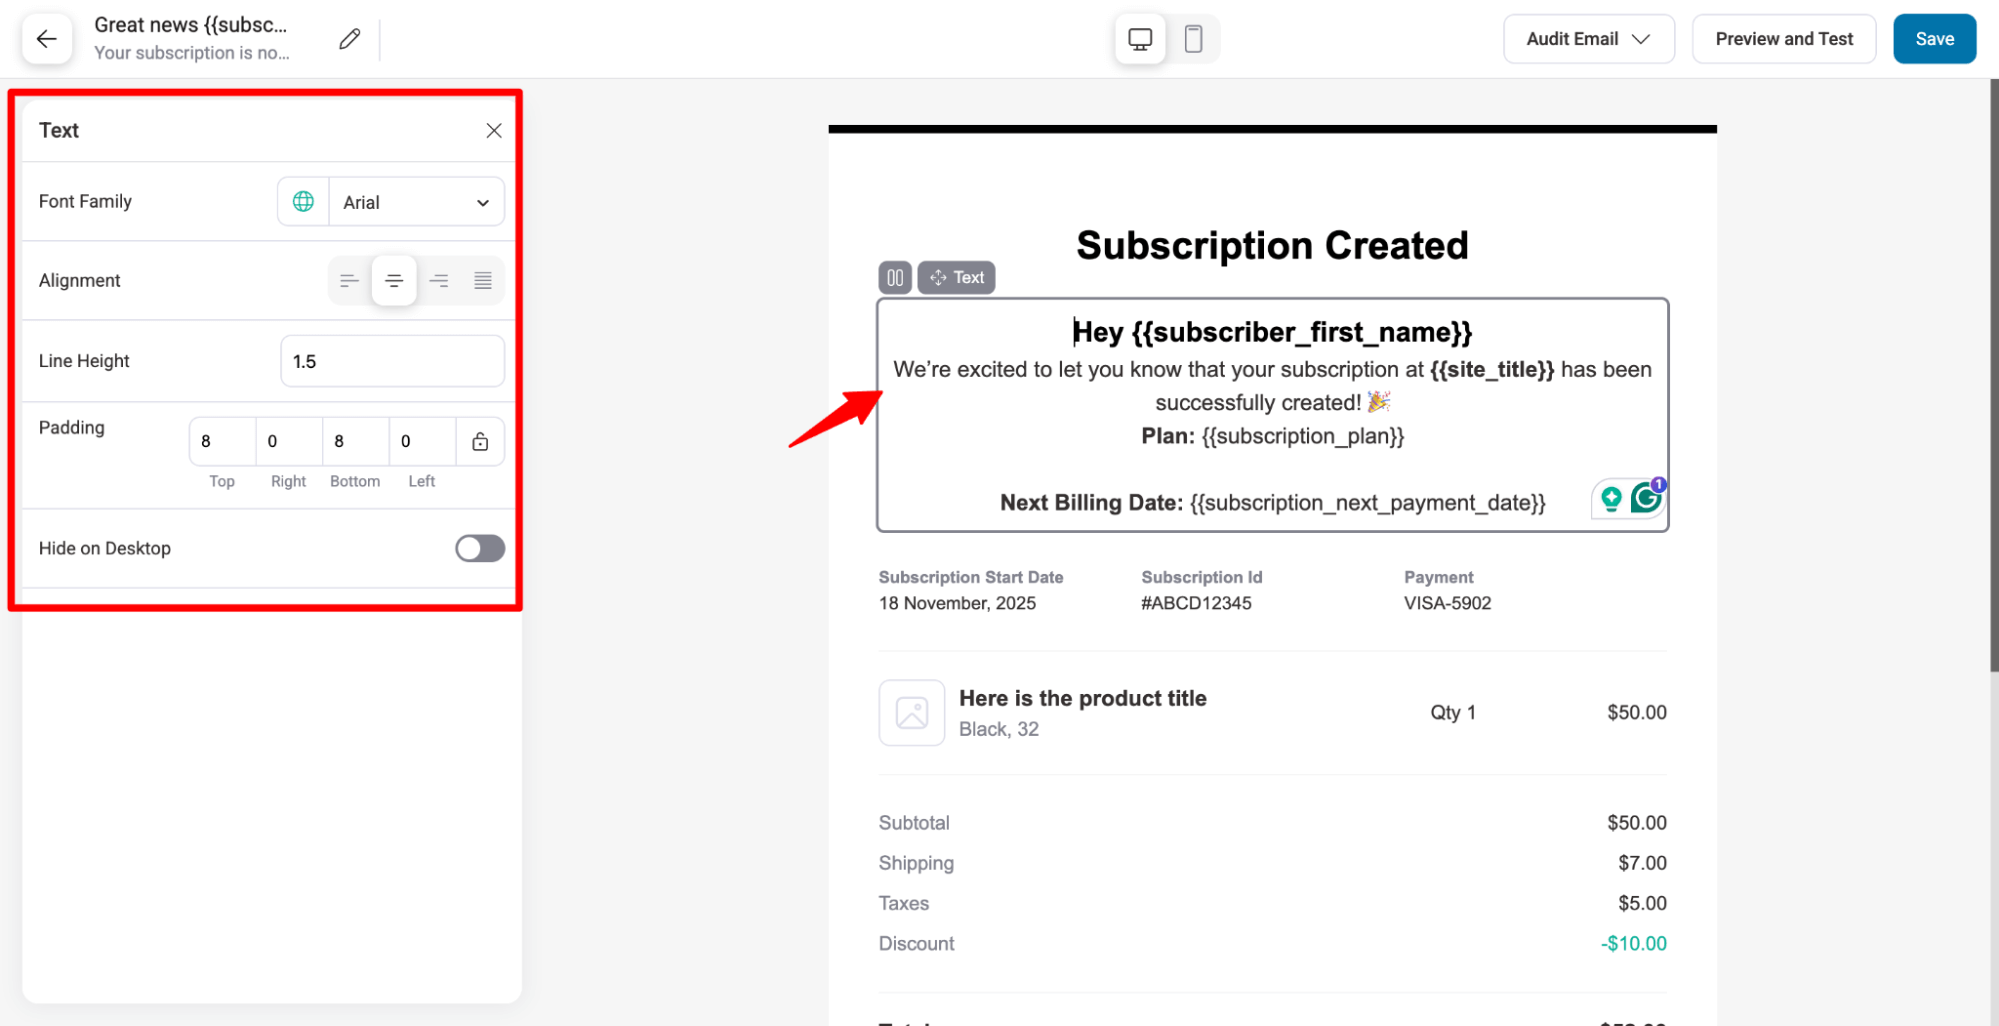
- Text: A block for adding customizable text content to your email.
- List: Lets you create ordered or unordered lists in your email for better readability.
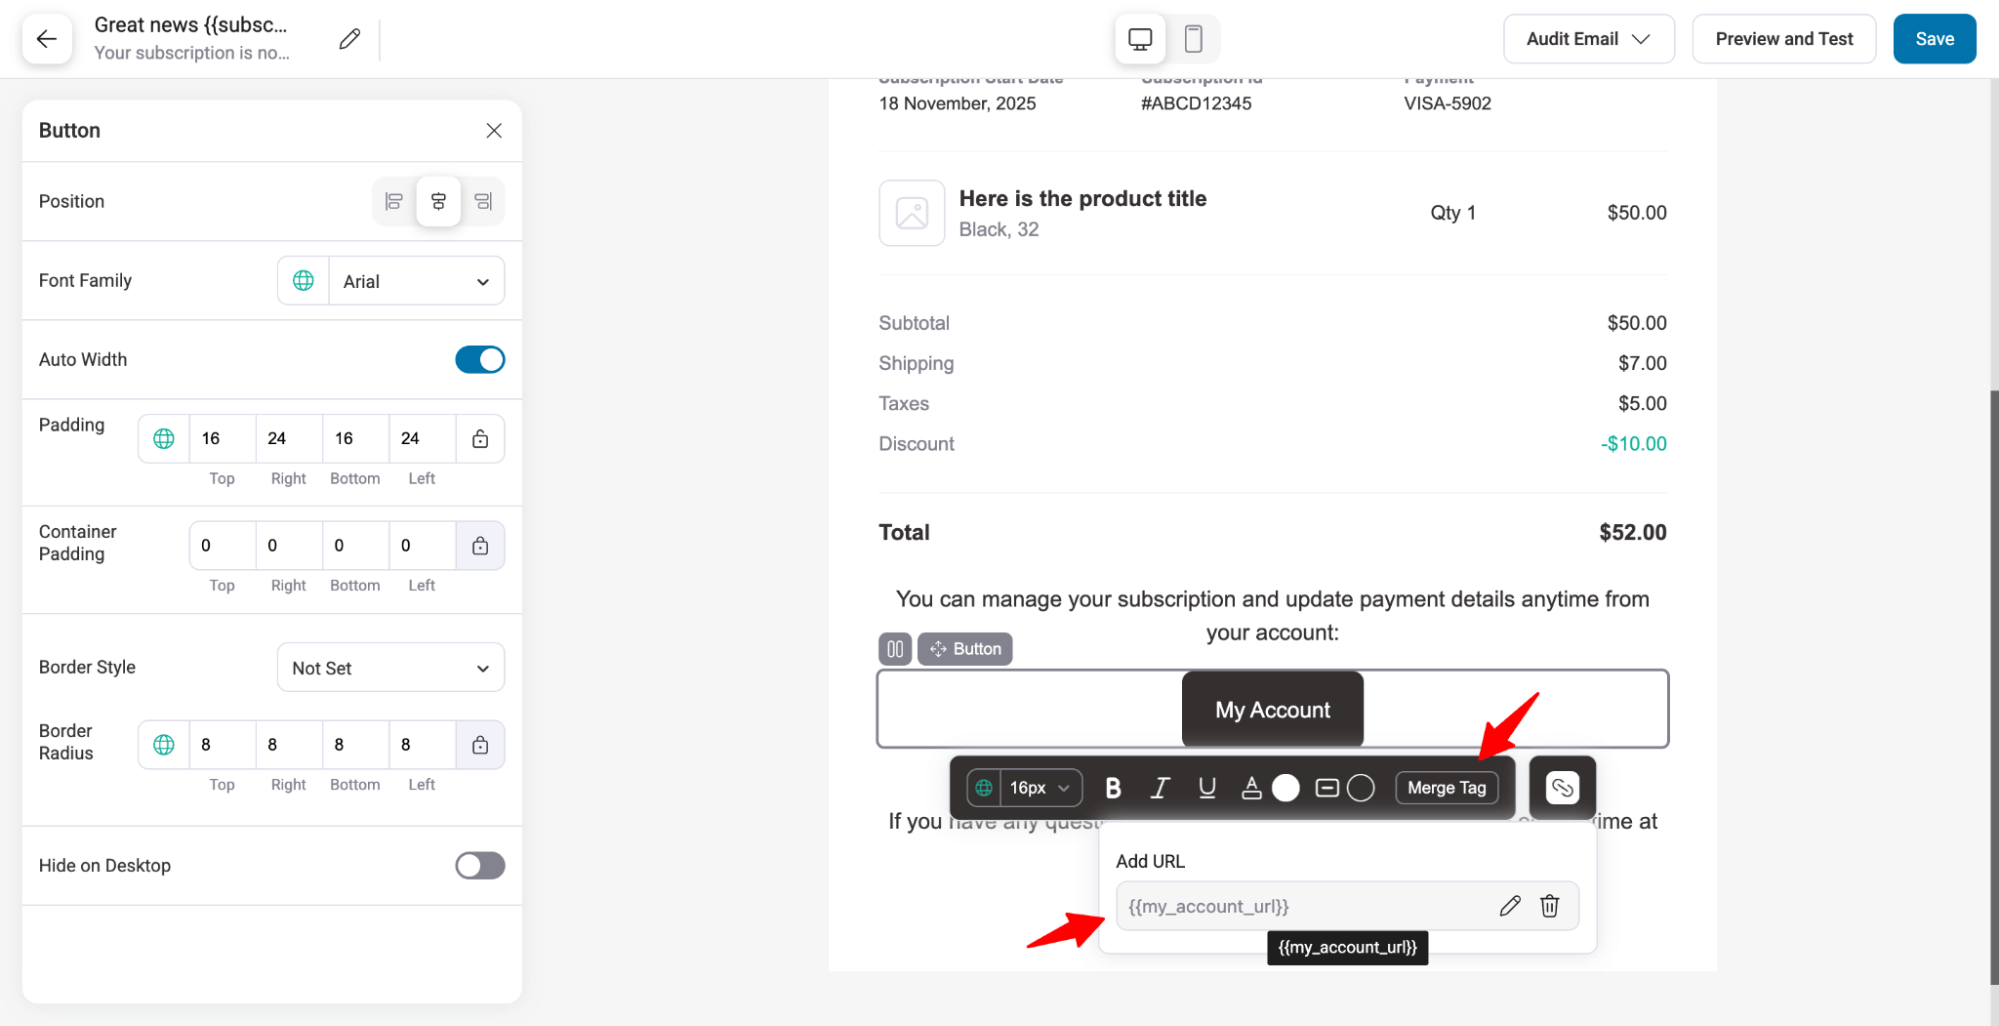
- Button: Adds a clickable button to your email, which can link to external pages or actions.
- Image: Allows you to insert images, such as logos or product photos, into your email.
- Divider: Inserts a horizontal line to visually separate content sections in your email.
- Menu: Adds a navigation menu to the email, useful for linking to different pages or sections.
- Social: Enables you to add social media icons with links to your profiles.
- HTML: Can add custom HTML to your email content.
Here are the WooCommerce blocks you get:
- Product: Displays a specific product from your WooCommerce store in the email.
- Coupon: Inserts a coupon code block for discounts in the email.
- Customer Address: Shows the customer’s shipping or billing address from WooCommerce.
- Order Summary: Displays a summary of the customer’s order in the email, including product details.
- Subscription Info: Displays details about the customer’s subscription, including plan and renewal dates.
- Subscription Items: Lists the items included in the customer’s subscription.
- Customer Notes: Adds any notes provided by the customer related to their order.
- Order Downloads: Provides downloadable links for purchased products or digital content in the email.

Email Body Section: Displays the live email content.
You can click on any element/section and customize relevant options.
Like rich text, add a merge tag for personalization and adding links.
Note: If you want to change your global and layout settings, you can do so from here as well by selecting the option at the bottom left.
After making to changes, make sure to hit Save to update.
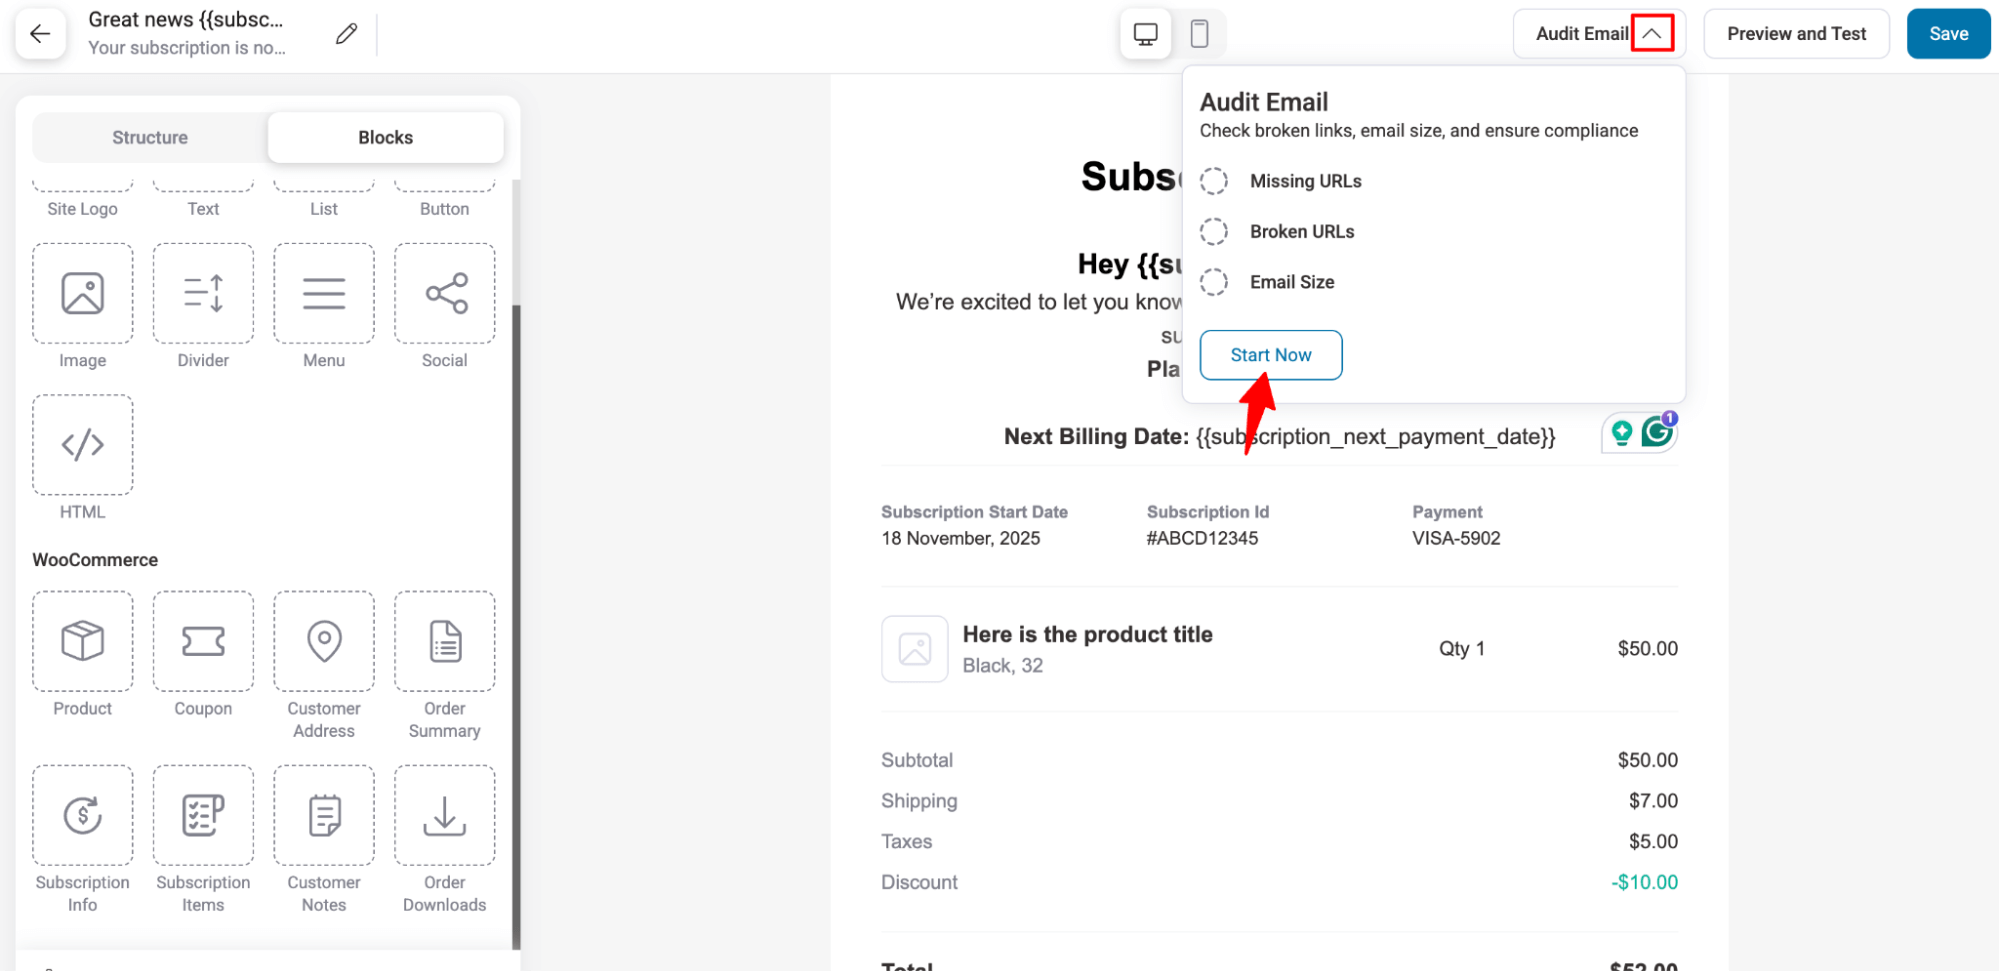
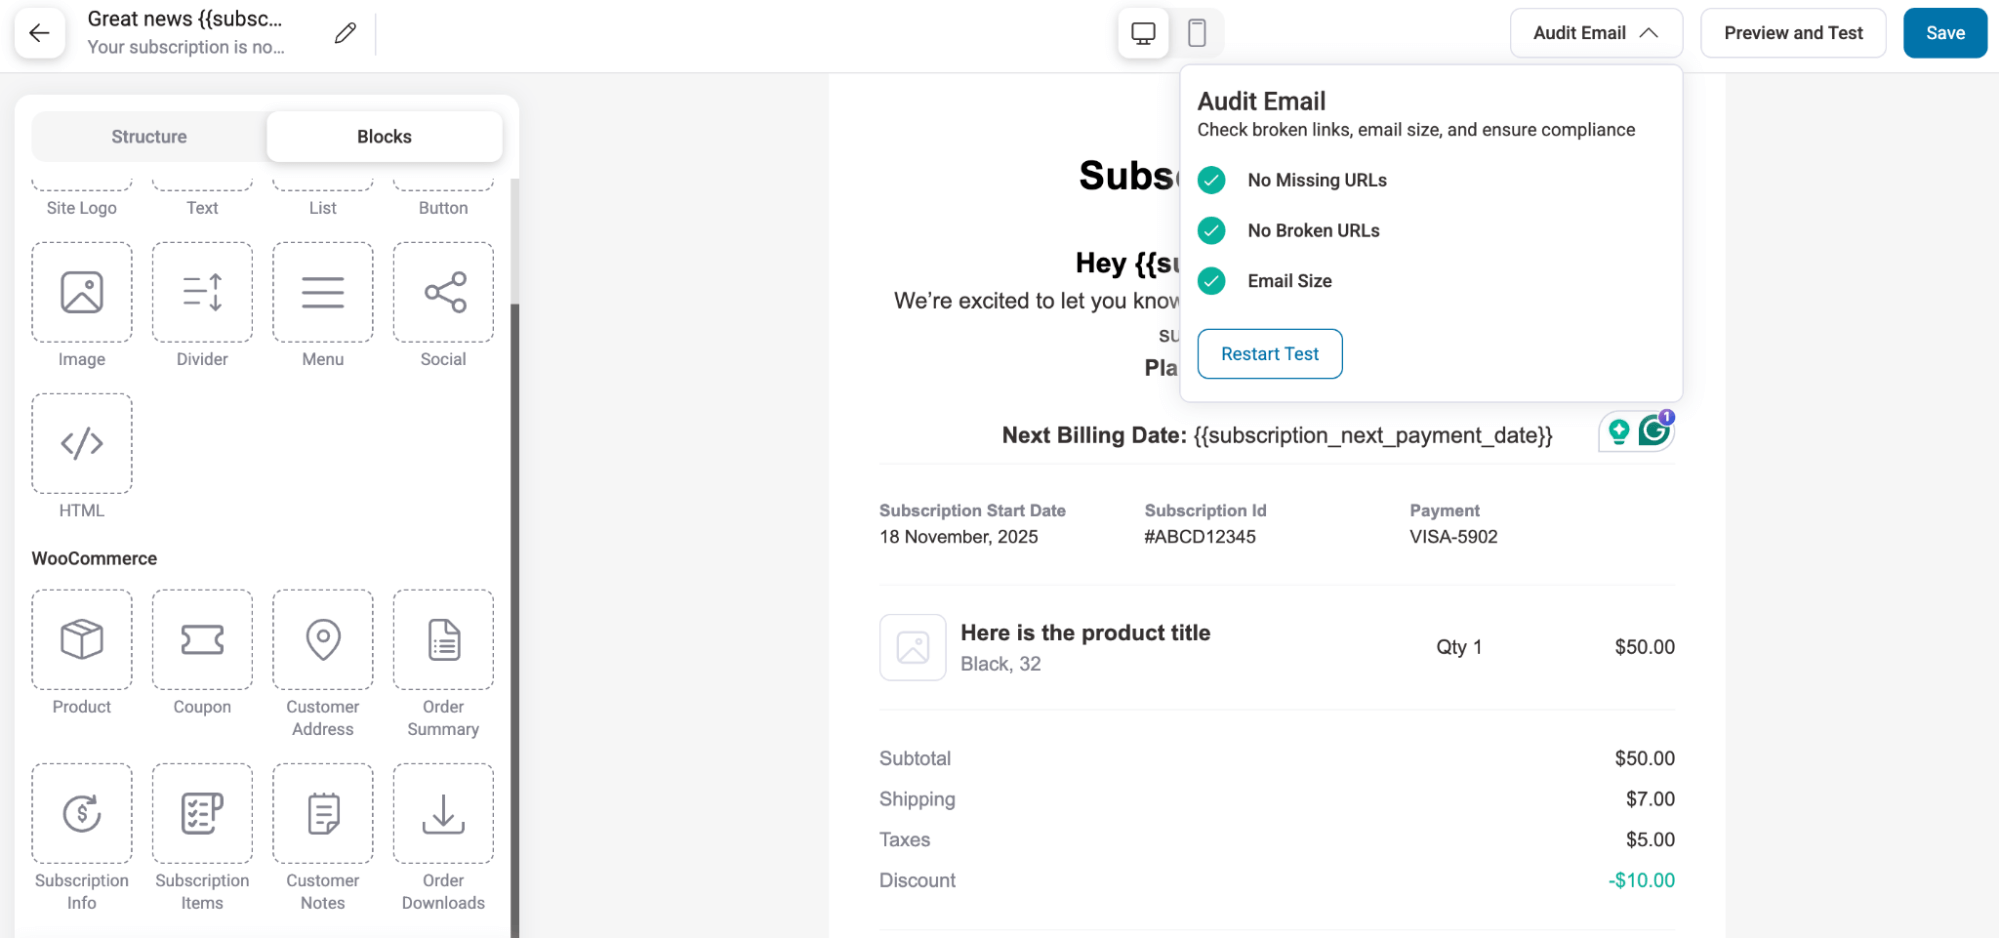
Audit Email Notifications
Use the Audit Email feature to check for
- Missing URLS
- Broken URLs
- Email Size
To audit, click “Audit Email” at the top to expand, then hit “Start Now”.
Review the findings and make necessary corrections. Then you can audit again by hitting the “Restart Test”.
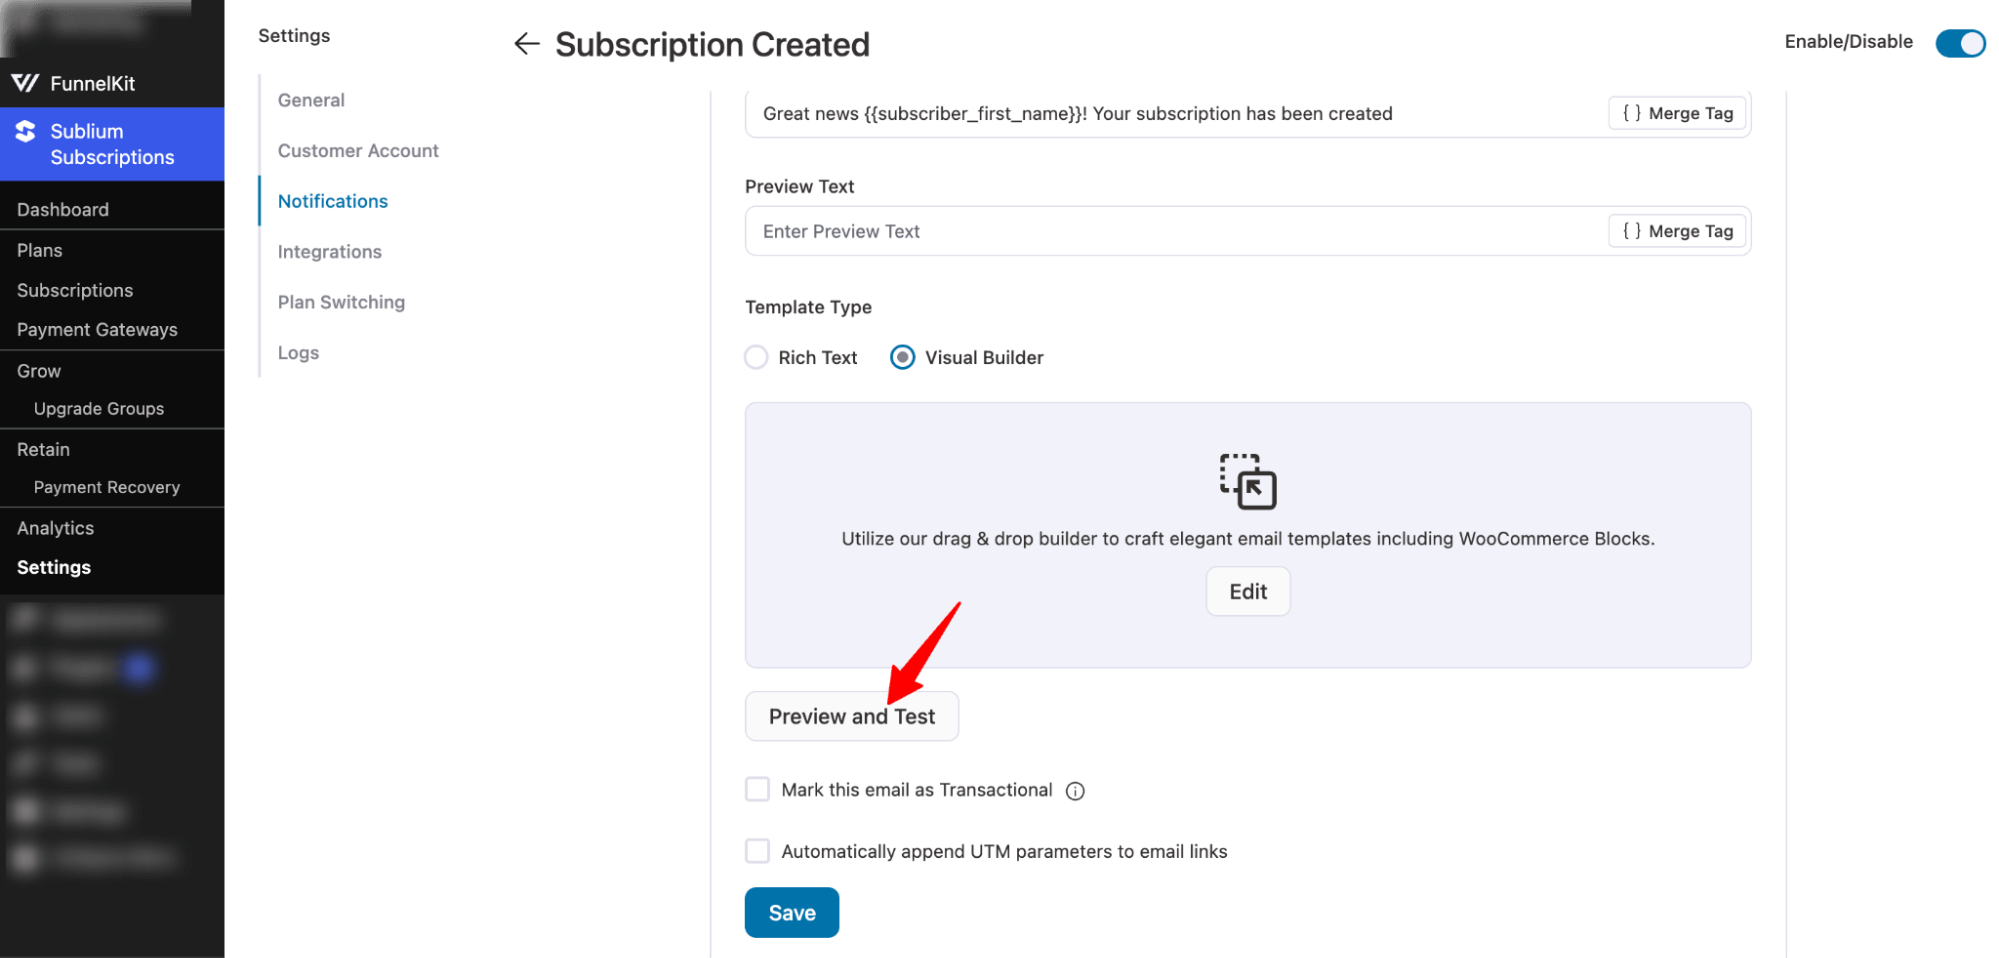
Preview & Test Email
Hit the “Preview and Test” button to see how the email will appear when sent in real time and to send test emails.
Now you can see the preview of your subscription email notification.

You can switch to the Mobile option to check the preview on a mobile device as well.
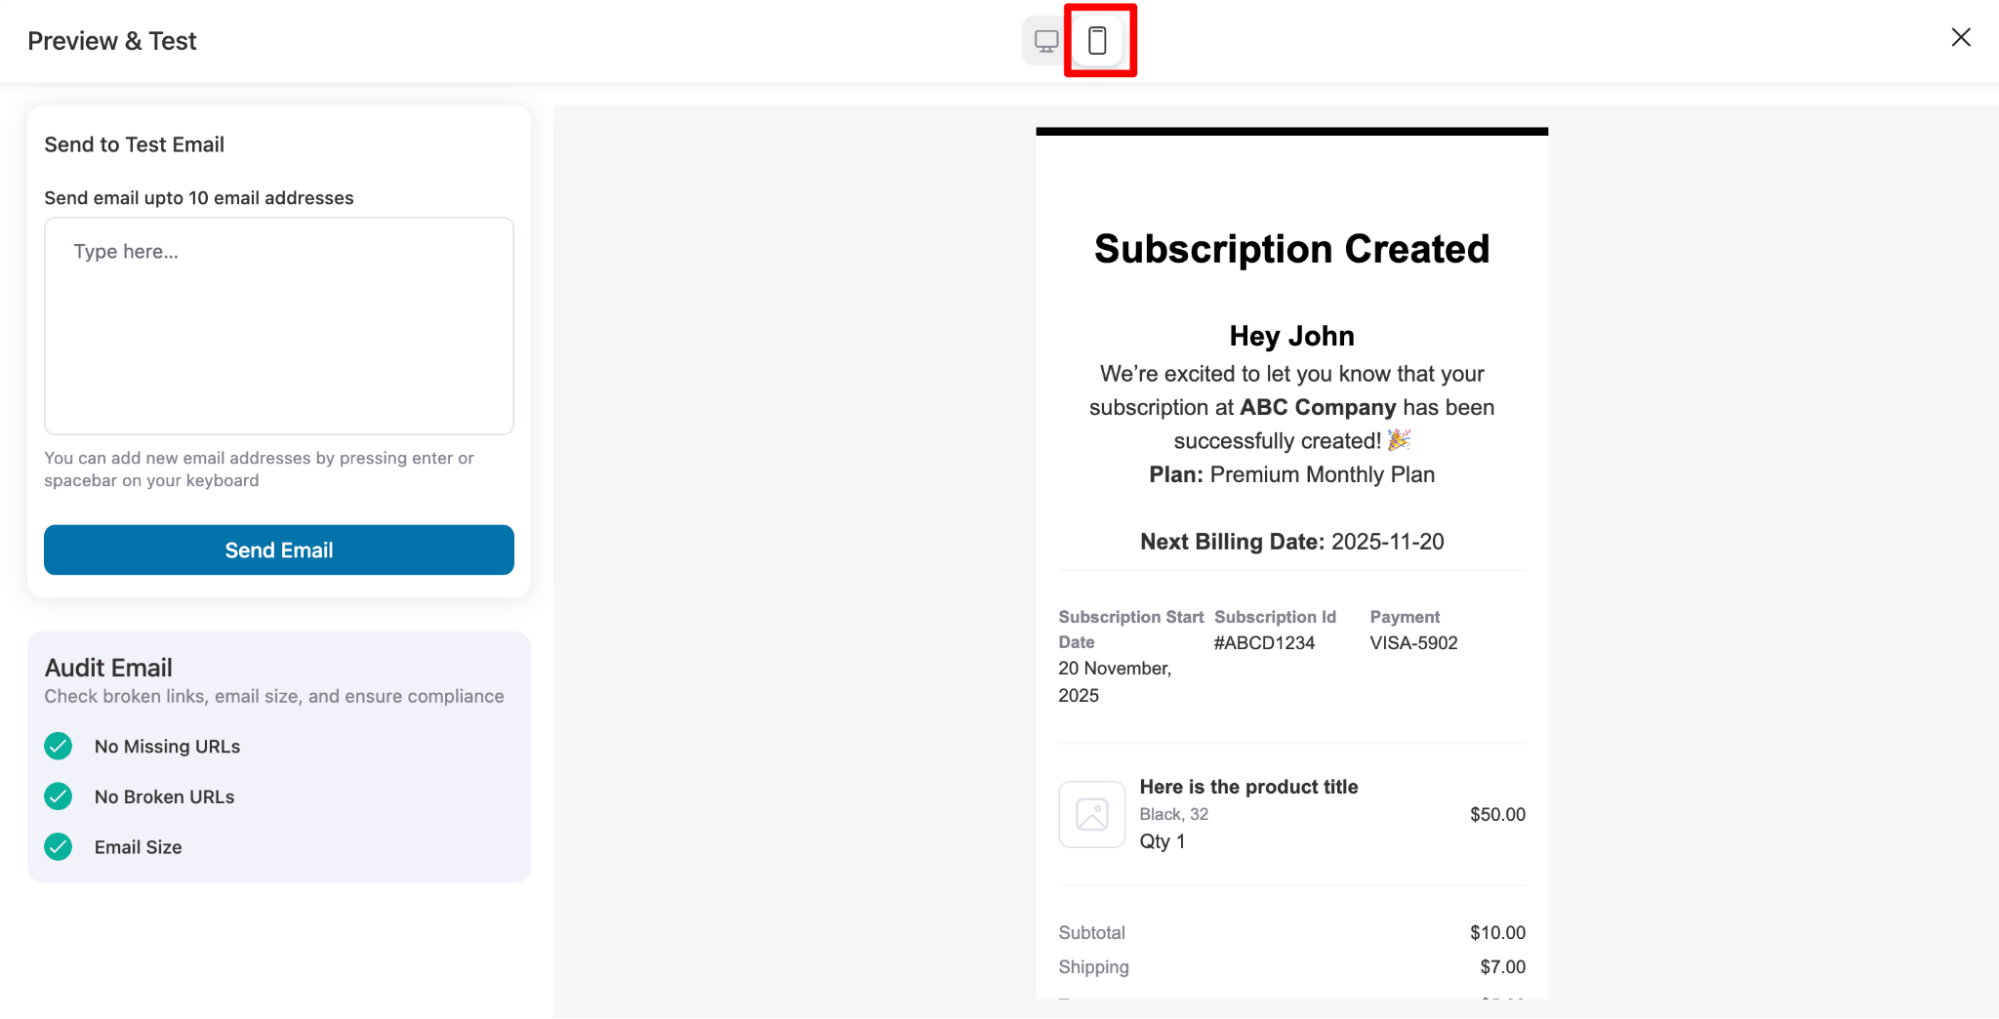
To ensure everything looks perfect, send a Test Email to yourself.
You can send test emails to many addresses at once. Simply add the emails and hit “Send Email”.
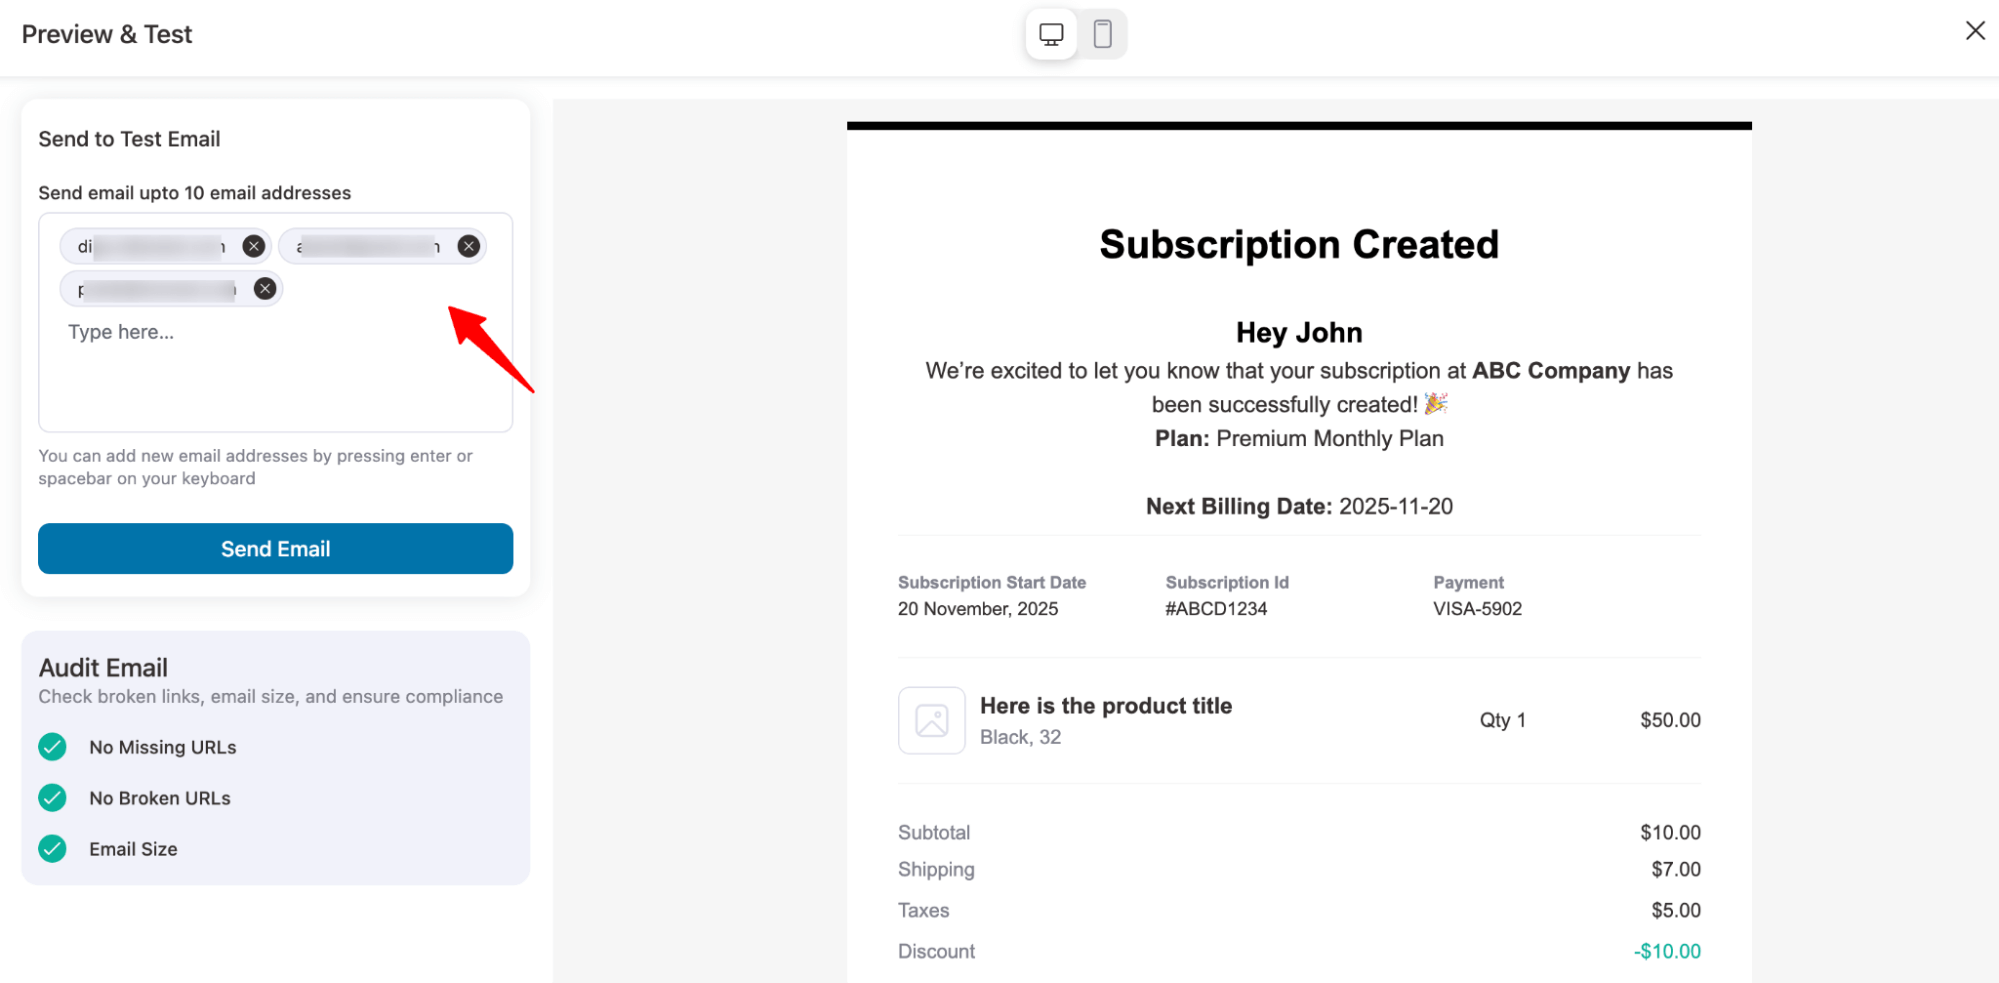
This lets you see exactly how the email will appear in an inbox.
This is how you can customize, audit, preview, and send test email notifications of Sublium.
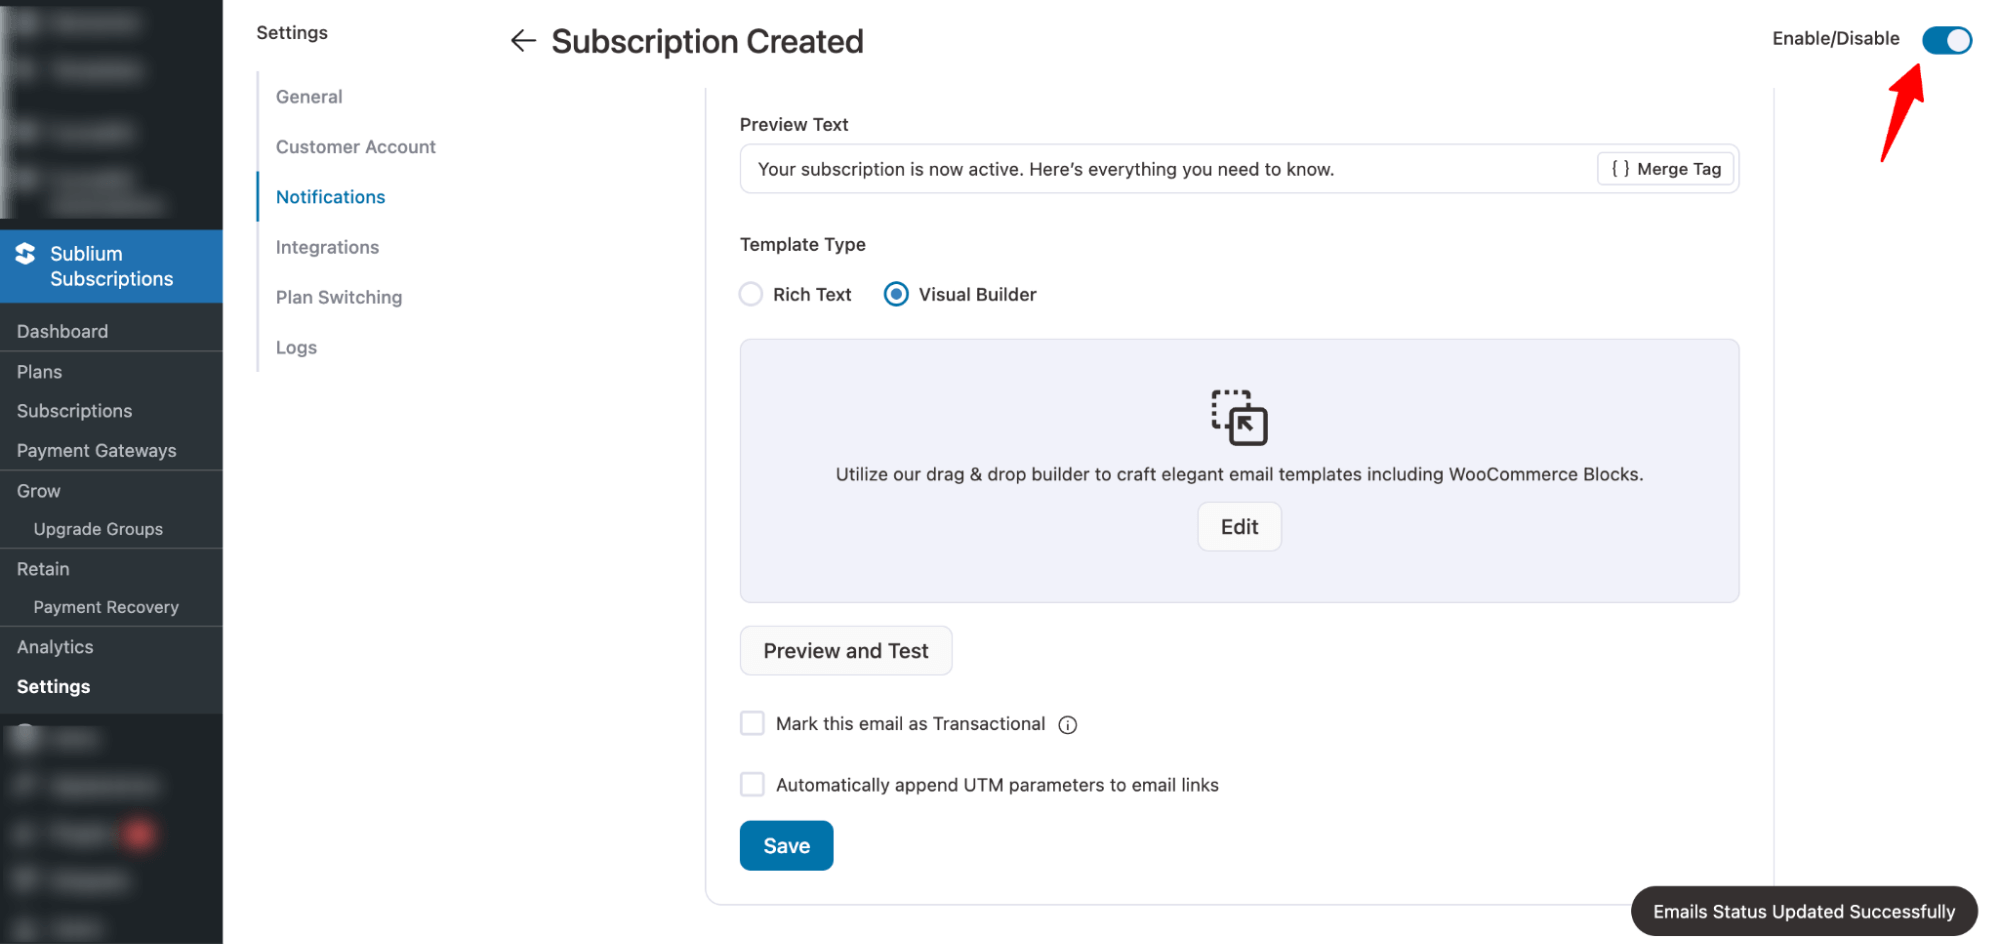
Activate Email Notification
Lastly, you must enable the email notifications. For this, turn on the Toggle button.
That’s it. Your customized email notification is ready.