This document contains all the information related to subscription creation, email notifications, email customization, and activation.
Overview
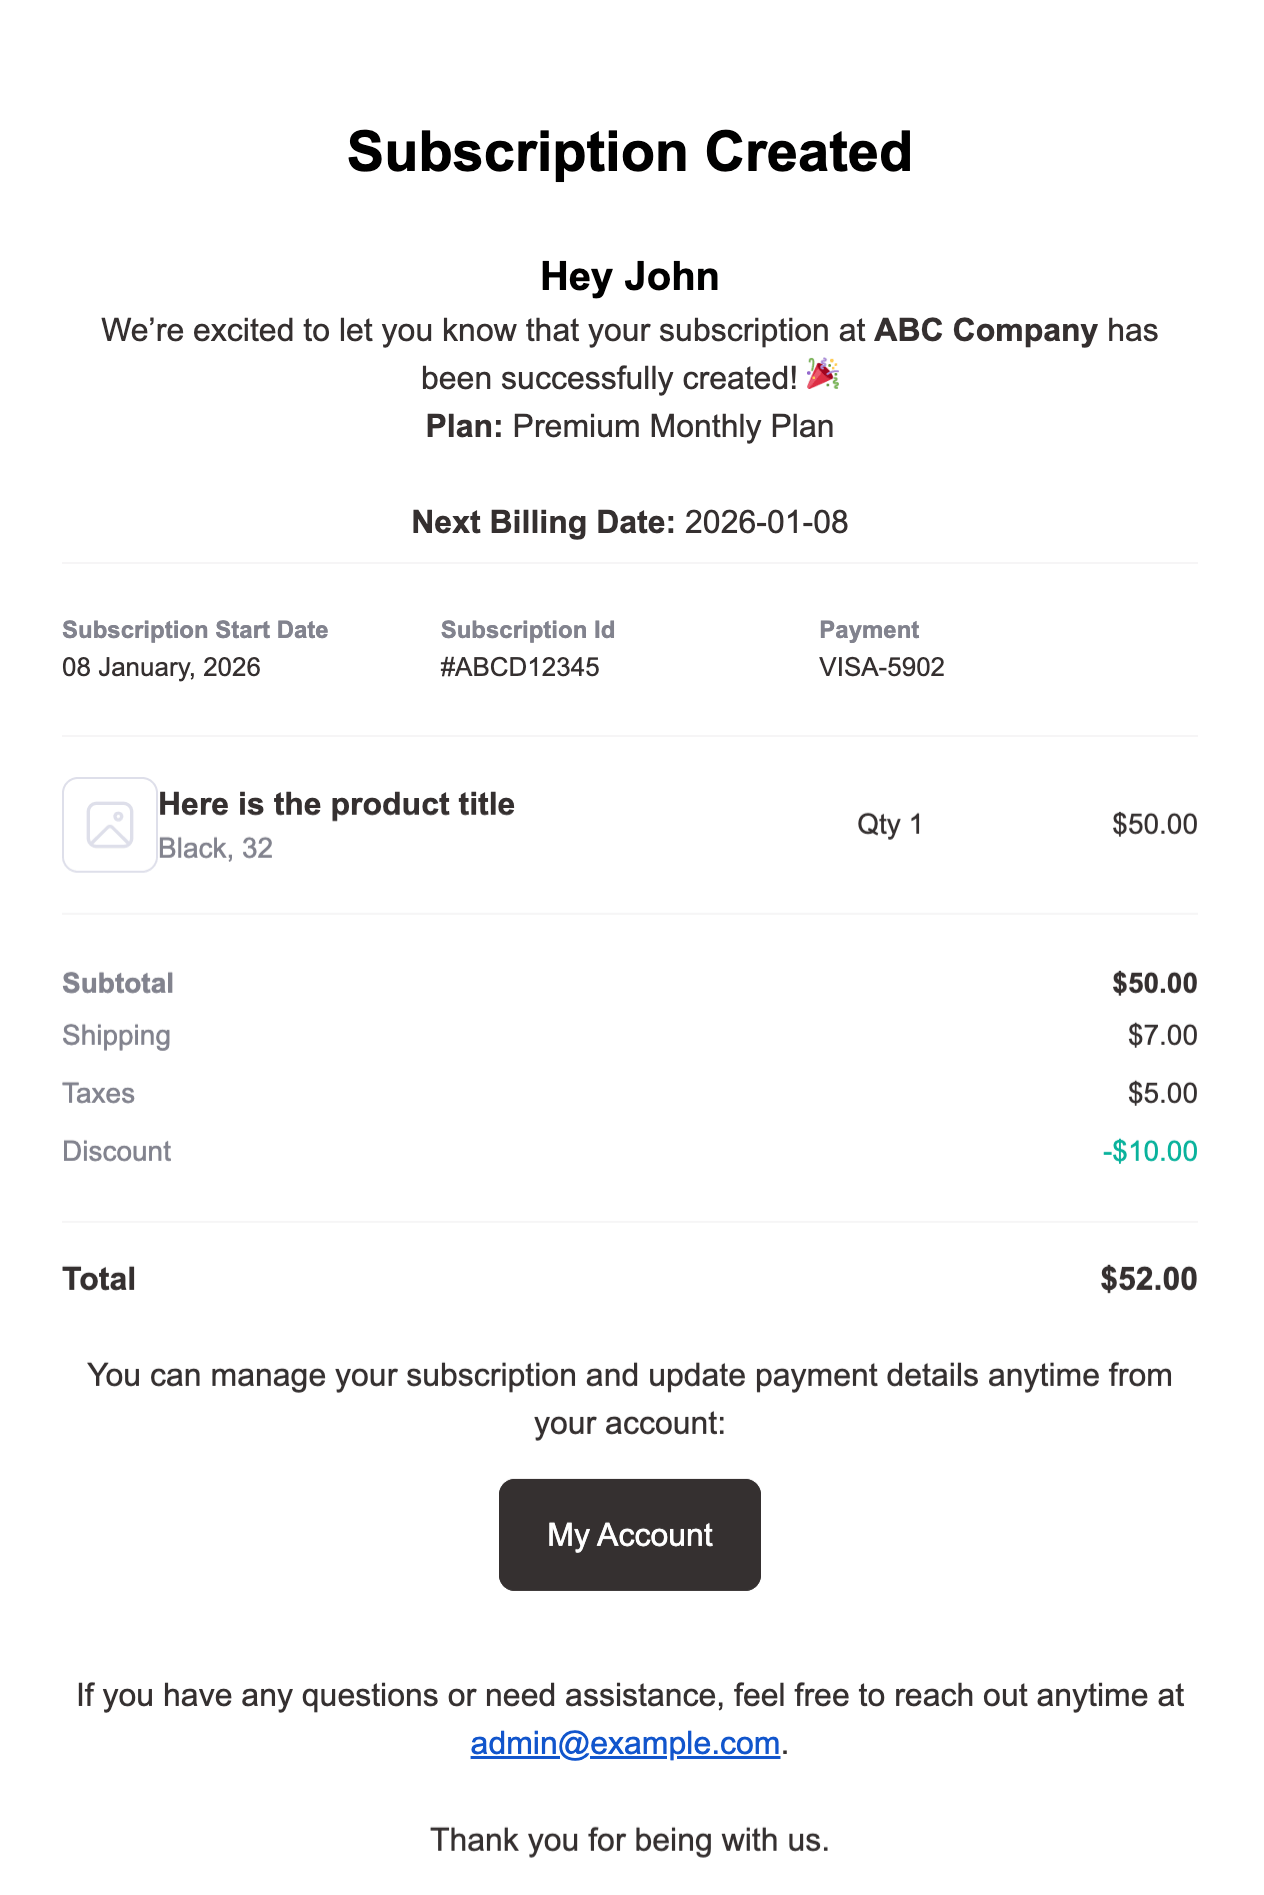
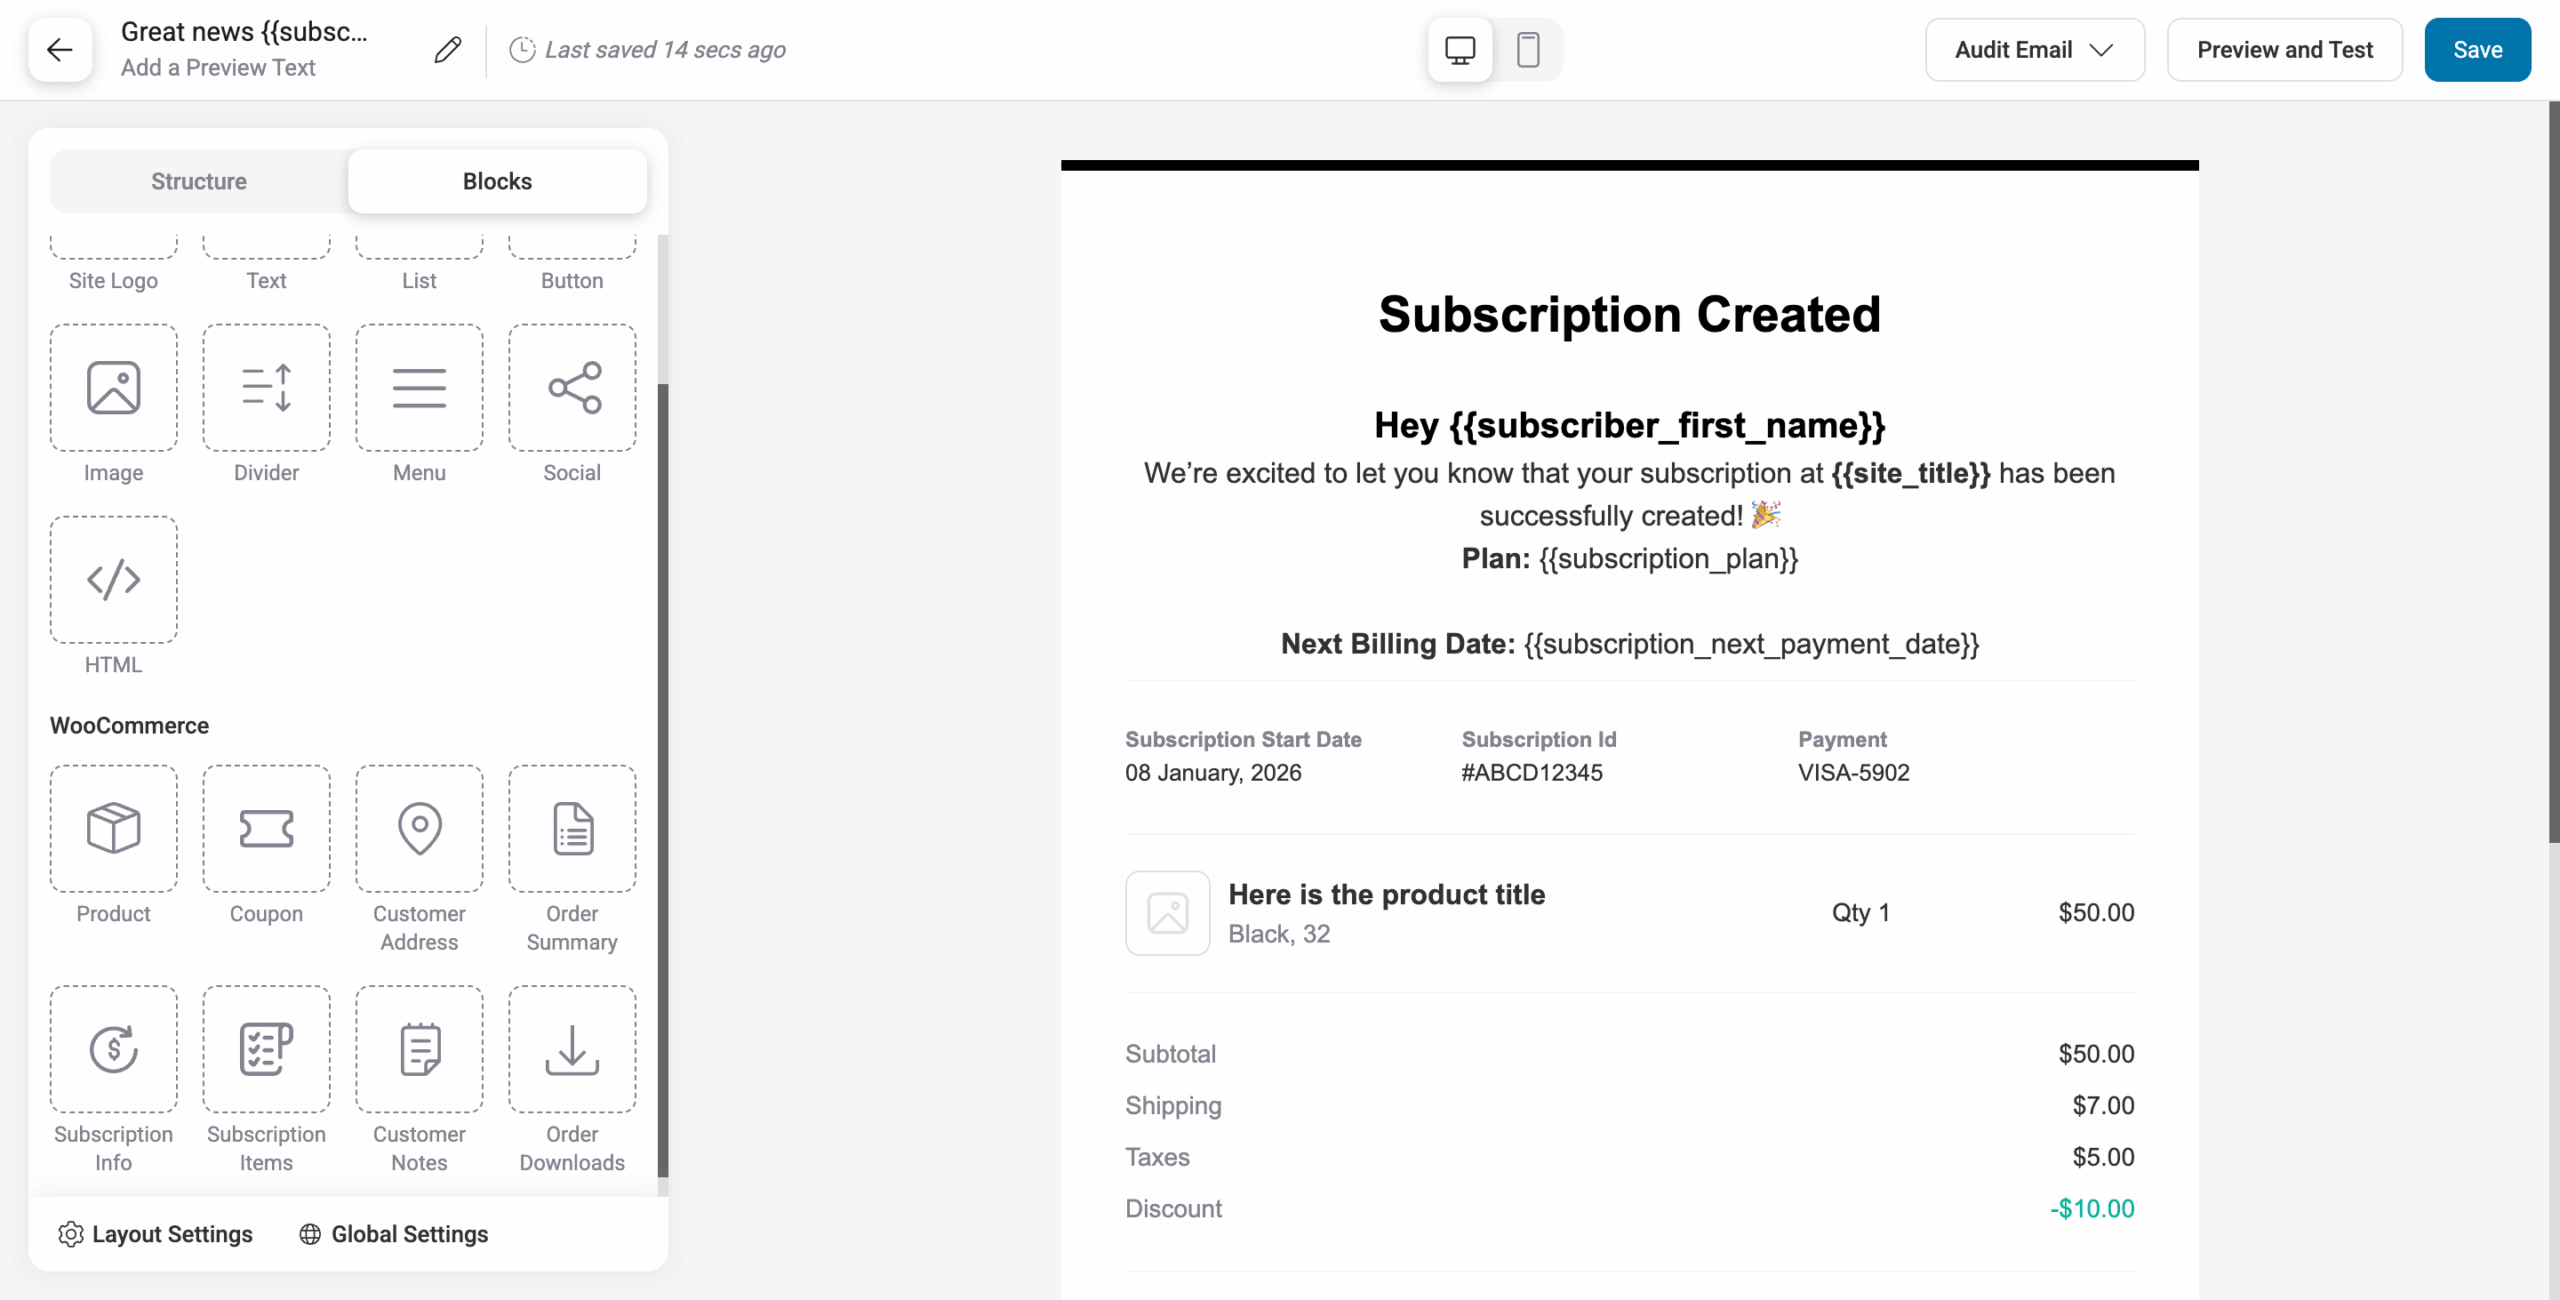
“Subscription Created” is the email notification sent to customers when a new subscription is successfully created.
It provides all the essential subscription details you need, including:
- Plan name
- Next billing date
- Subscription ID
- Subscription start date
- Payment details
- Billing address
- Shipping address
- Subtotal
- Shipping cost
- Taxes
- Discounts
- A link to continue to the next step, such as the My Account page
Here is a prebuilt template by Sublium Subscriptions:
When It is Sent
This email notification is sent when
- A user completes checkout for a subscription product
- A subscription is created manually by an admin
Recipient
By default, the email is sent to the customer.
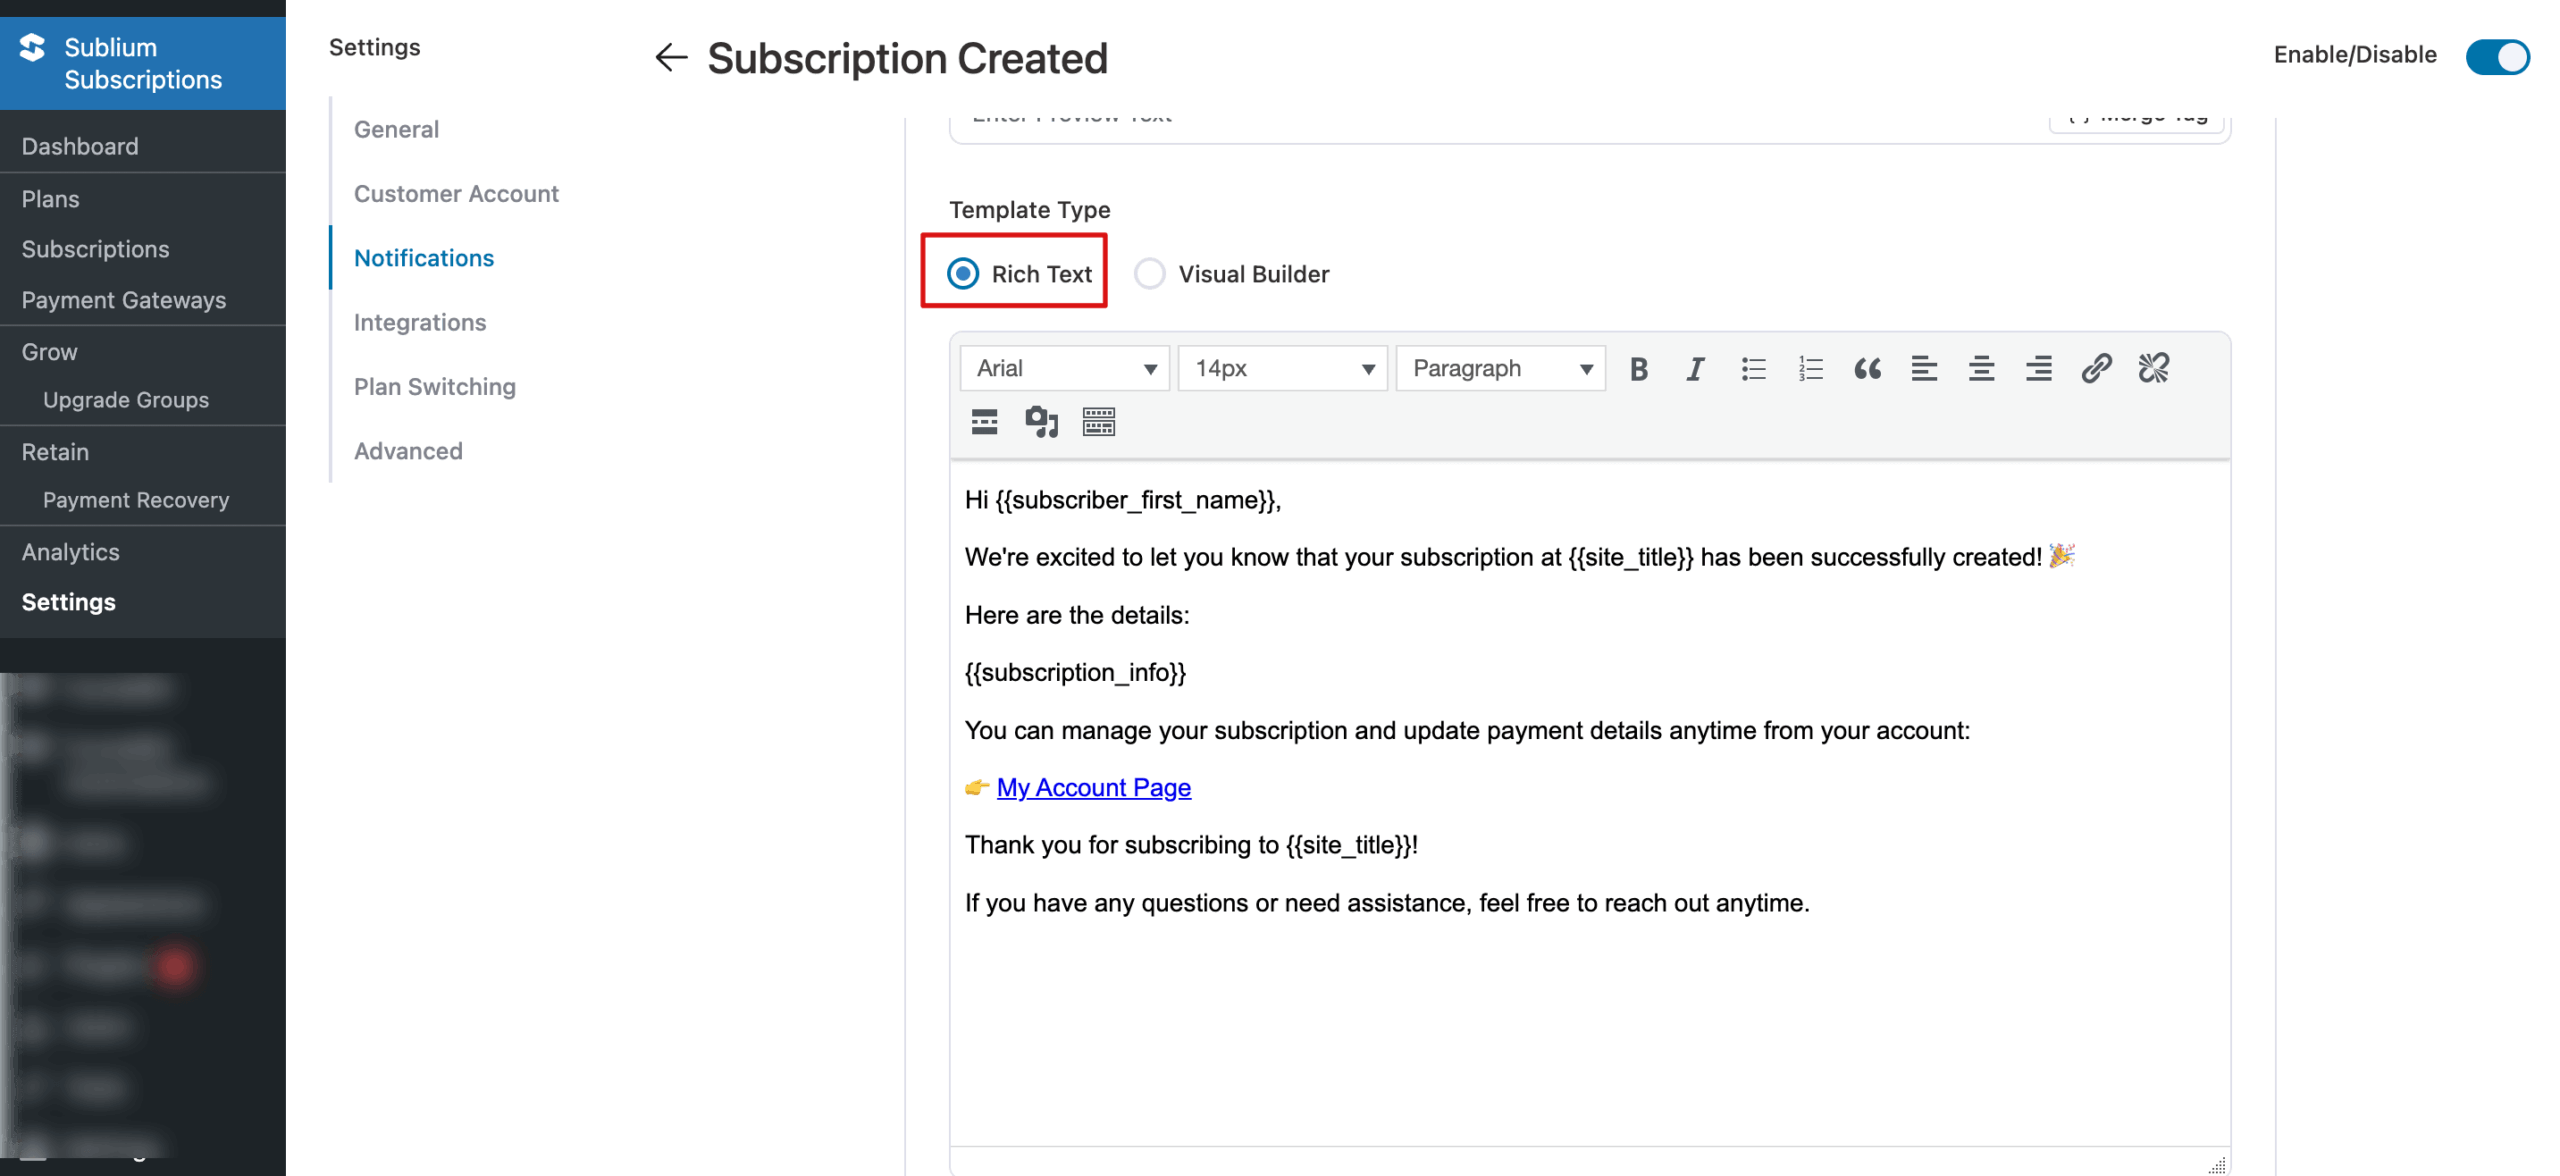
How To Activate “Subscription Created” Email Notification
Navigate to Sublium Subscriptions ⇒ Settings ⇒ Notifications. On the “Subscriptions” tab, you will find the “Subscription Created” email notification.
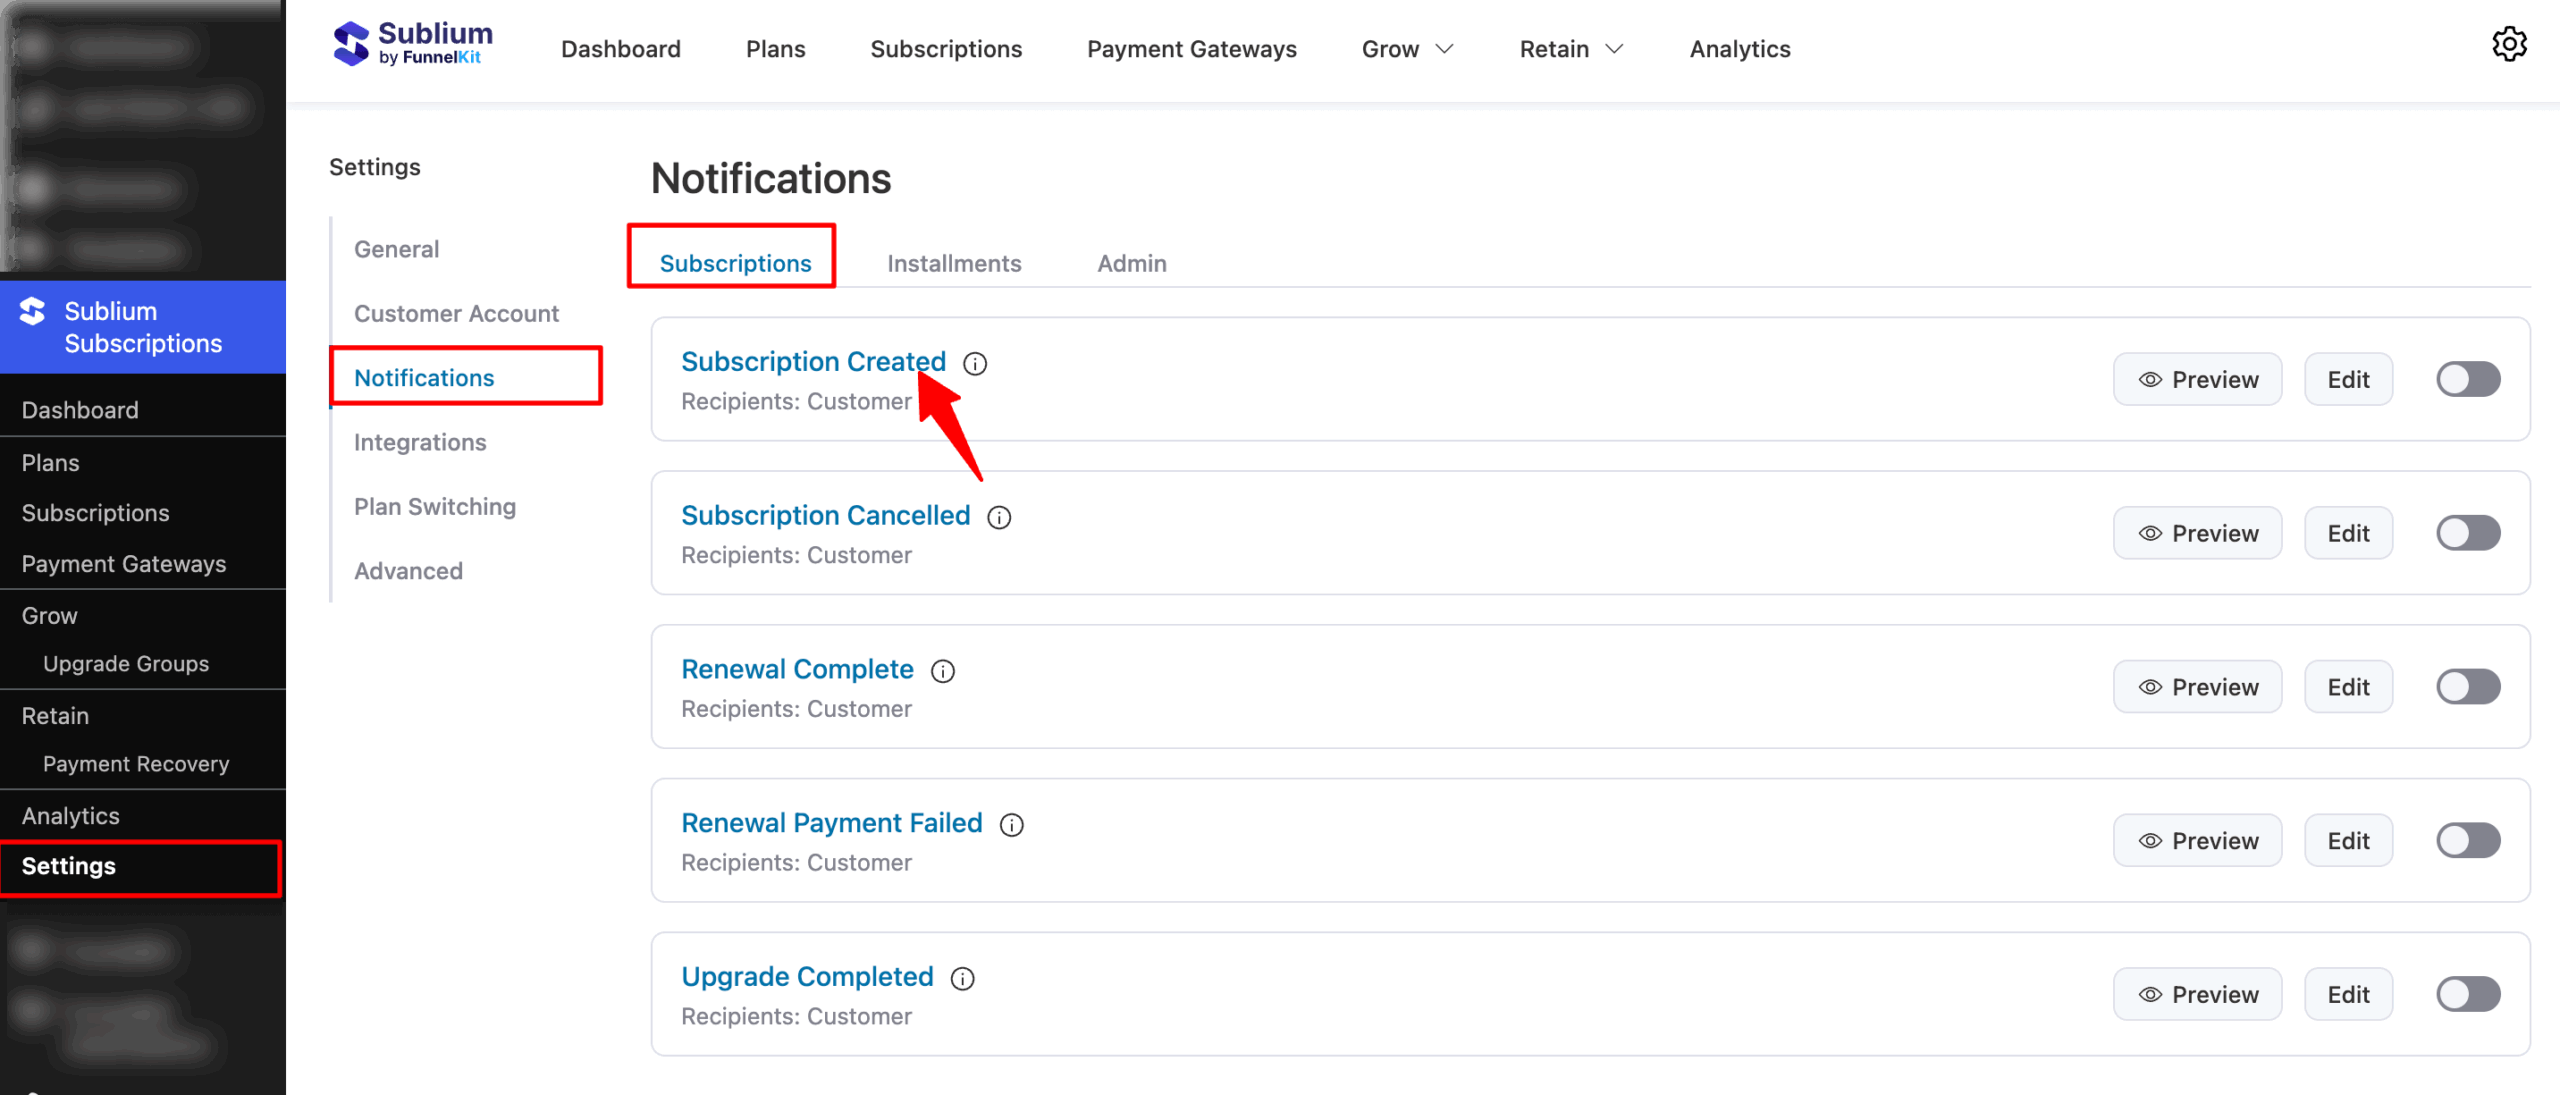
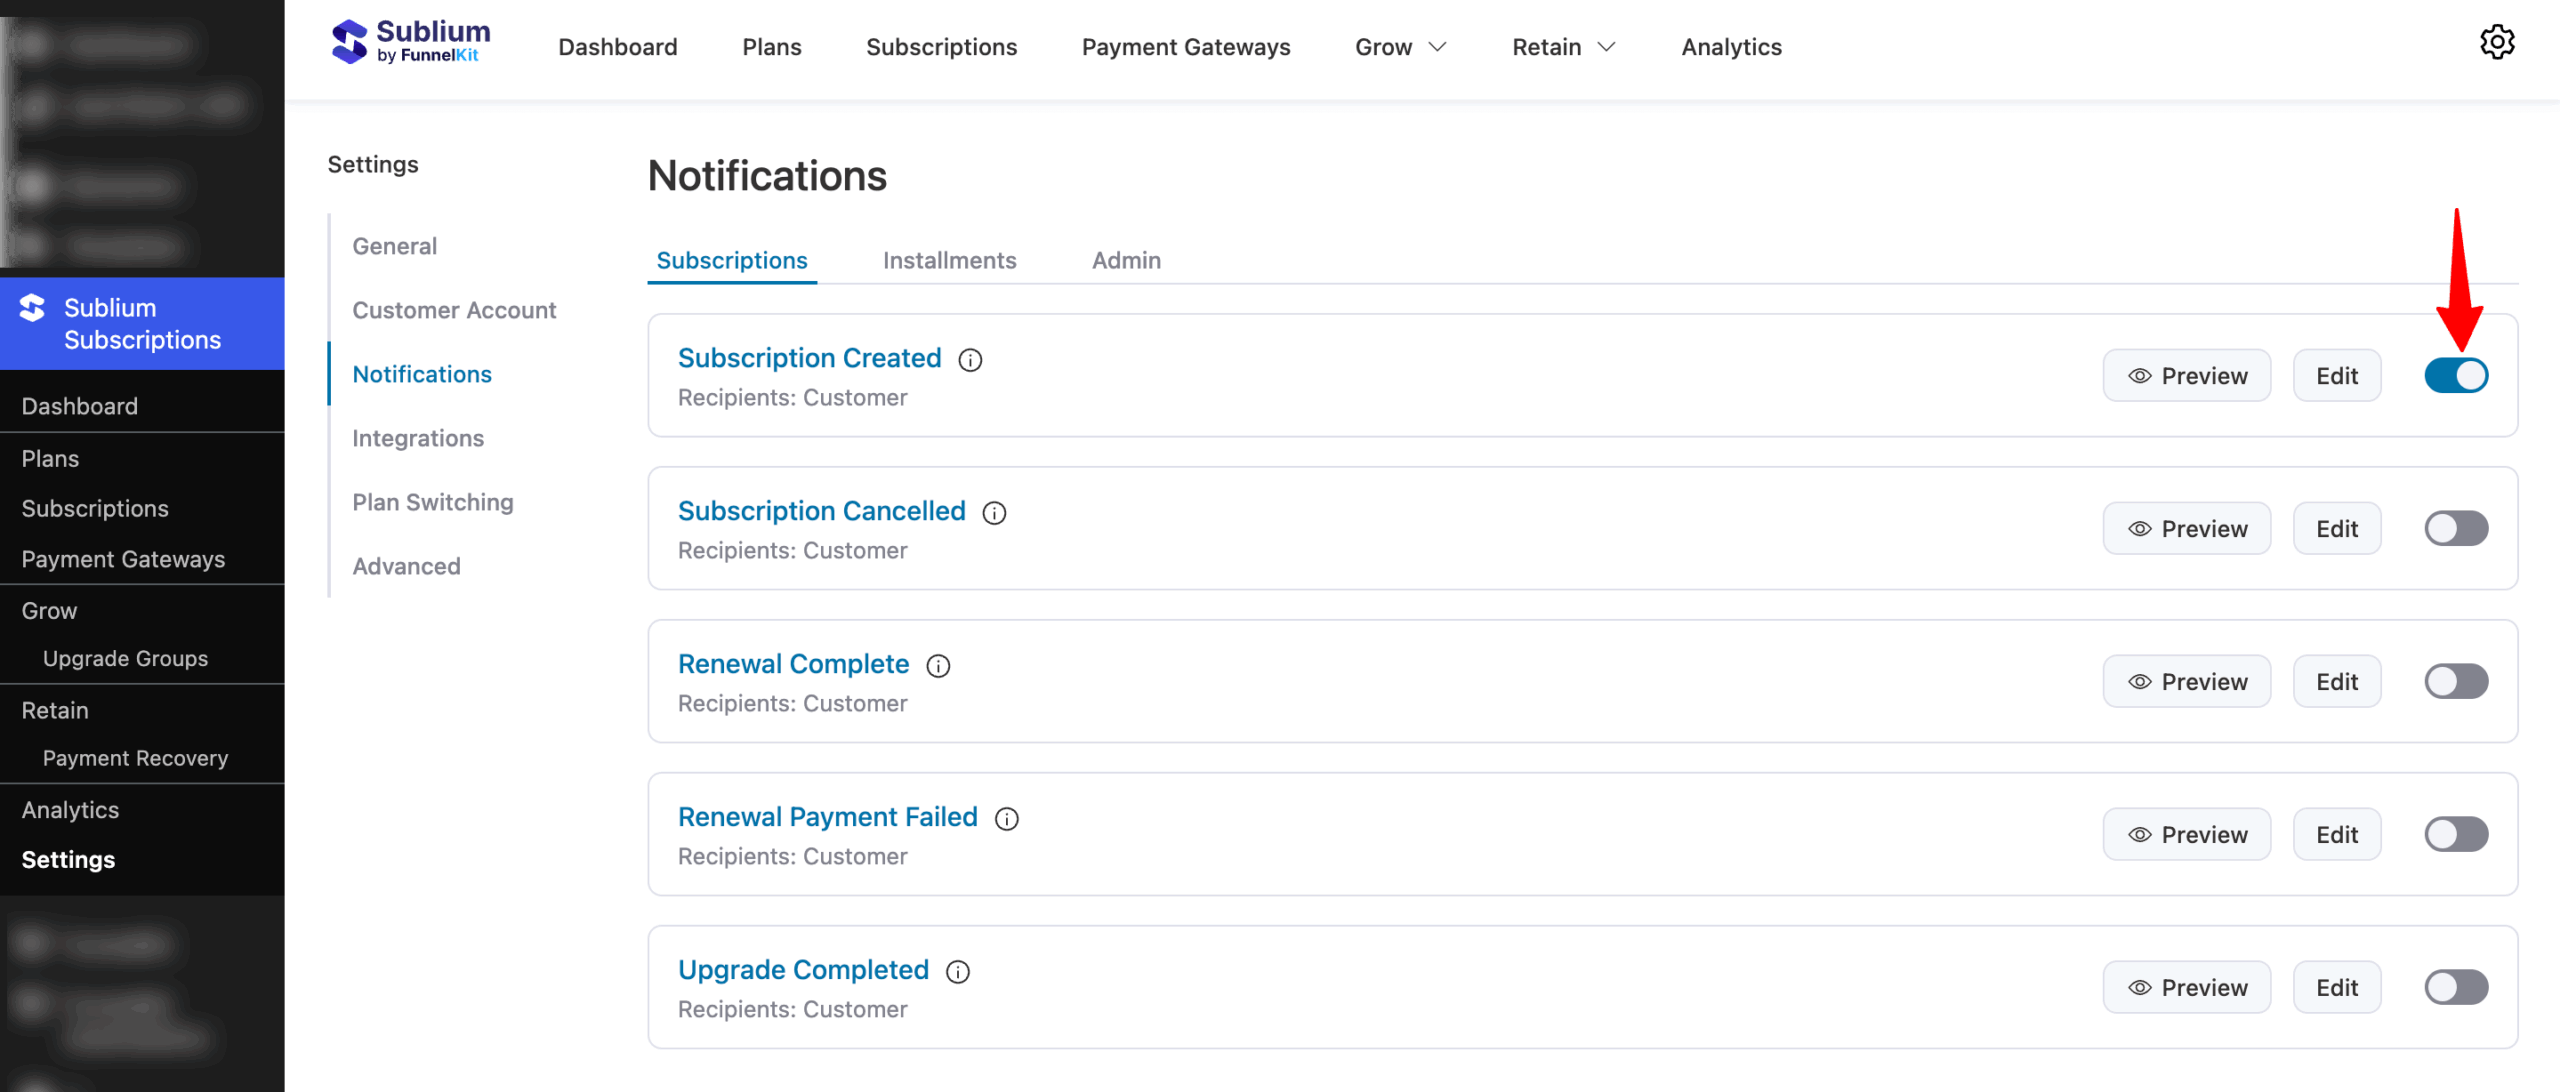
To activate the “Subscription Created” email, turn on the toggle next to the email notification.
Email Customization
You can customize this email notification with two different types of editors:
- Rich Text
- Visual Editor
Sublium Subscription comes with a prebuilt “Subscription Created” email template for both editors. You can easily customize or build from scratch if needed.
Here is how the Rich Text editor looks:
Here is the Visual Email Builder:
Personalization
To personalize the subject line, preview text, and email body, Sublium Subscriptions offers a variety of merge tags.
These tags let you dynamically insert customer information. Simply search for the tag, then copy and paste it in the desired place.
Here are the merge tags used in the prebuilt template:
- {{subscriber_first_name}} – Subscriber’s first name
- {{site_title}} – Name of your website/store
- {{subscription_next_payment_date}} – Next scheduled renewal date
- {{my_account_url}} – URL to the subscriber’s account page
- {{admin_email}} – Admin email address for support
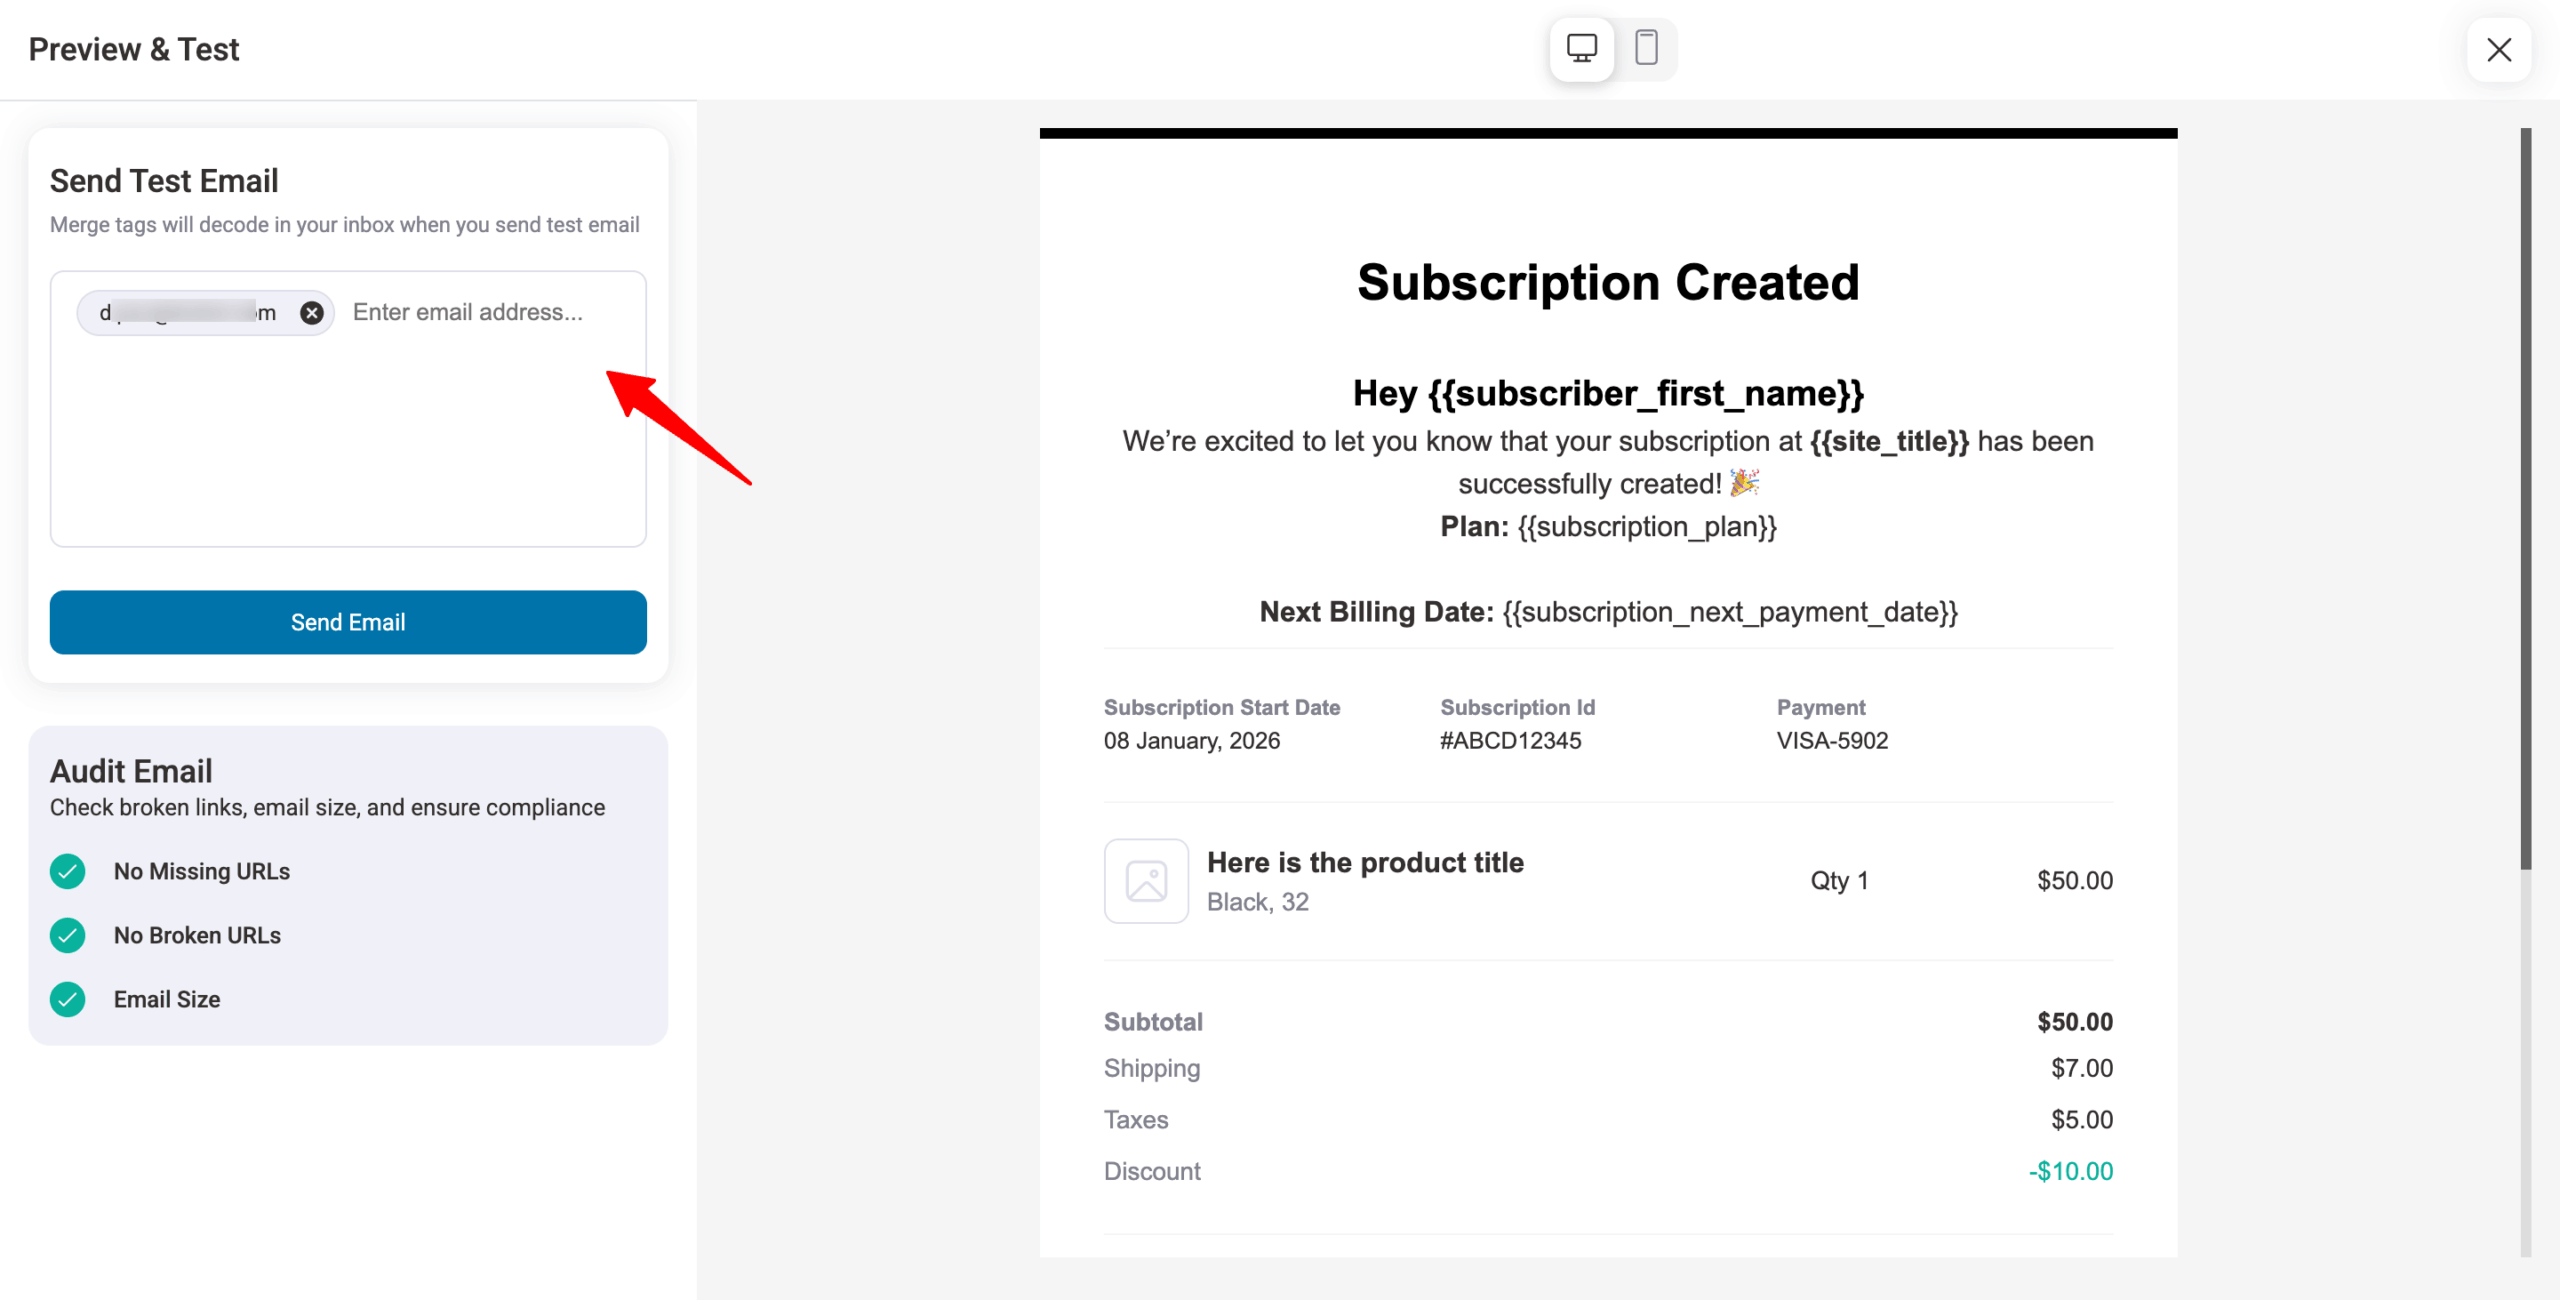
Testing The Email
To send a test email, click “Preview & Test”, enter the email address(es), and click Send Email.